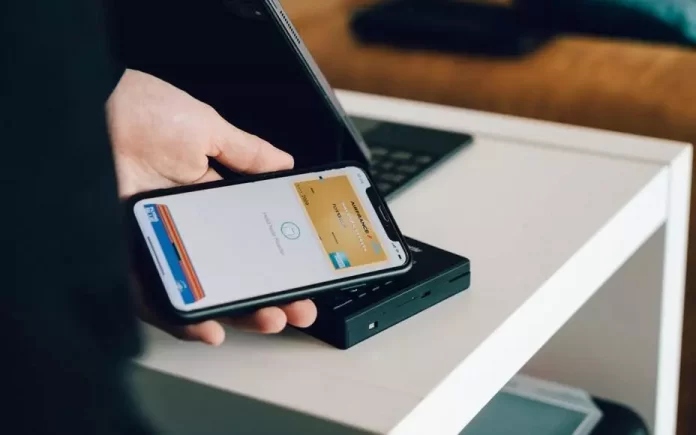
In today’s world, the ability to pay with Apple Pay has opened up more options for many people. In addition to this, it’s also a much safer payment option. All you need to do is add one or more cards to the Apple Wallet and hold your iPhone up to the terminal to make a payment.
If you pay online, you only need to confirm the transaction with a fingerprint scan, Face ID, or a password. So if you need to add a card or change in Apple Pay in order to simplify your life, there is an easy way to do it.
What to do to add or change a card in Apple Pay
Apple Pay is a payment system with which it’s possible to pay by putting an iPhone, Apple Watch to the terminal. To pay, you need to bring the gadget to the terminal, select the card in the app and put your finger to the Touch ID sensor.
On the Apple Watch, the payment is triggered by a double-tap on the power button and doesn’t require special authorization. Neither Apple Pay nor other payment services charge a fee.
This feature makes life very easy for all people, regardless of their way of life, as it’s very convenient. You can buy water during a run or just go to the other end of the country having only your phone with you. You don’t need to carry a wallet with cash or a physical card. It’s enough just to have an iPhone to make any payment operation.
What steps to change the default card in Apple Pay
After you double-tap the lock button, your iPhone will use the default card in your wallet set up to work with Apple Pay. If you have more than one card in your wallet or have cards that aren’t relevant to you, you can easily change the default card.
After you double-tap the lock button, your iPhone will use the default card in your wallet set up to work with Apple Pay. If you have more than one card in your wallet or have cards that aren’t relevant to you, you can easily change the default card. Follow these steps using the Settings app:
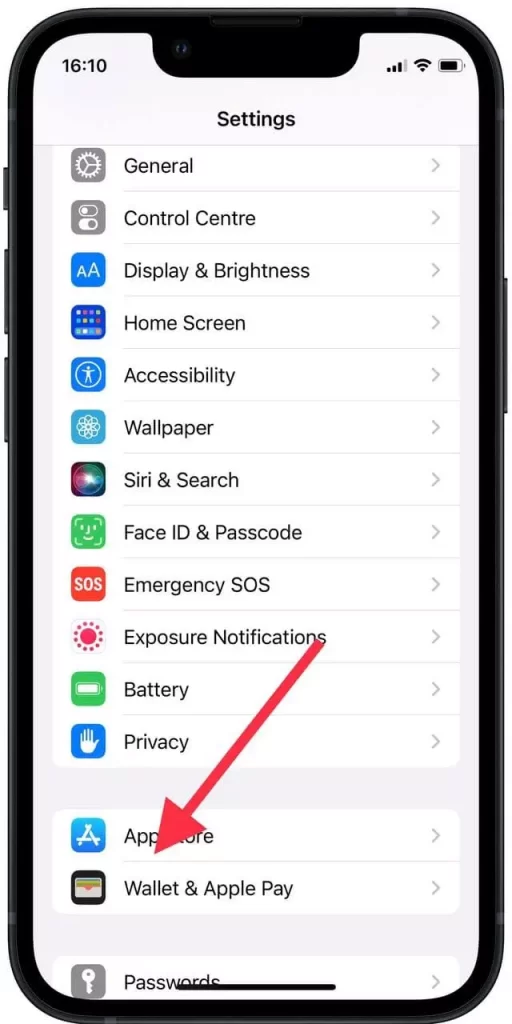
- First, you need to open ‘Settings’ on the home screen of your iPhone. Then you need to scroll to the ‘Wallet and Apple Pay’ section and open it.
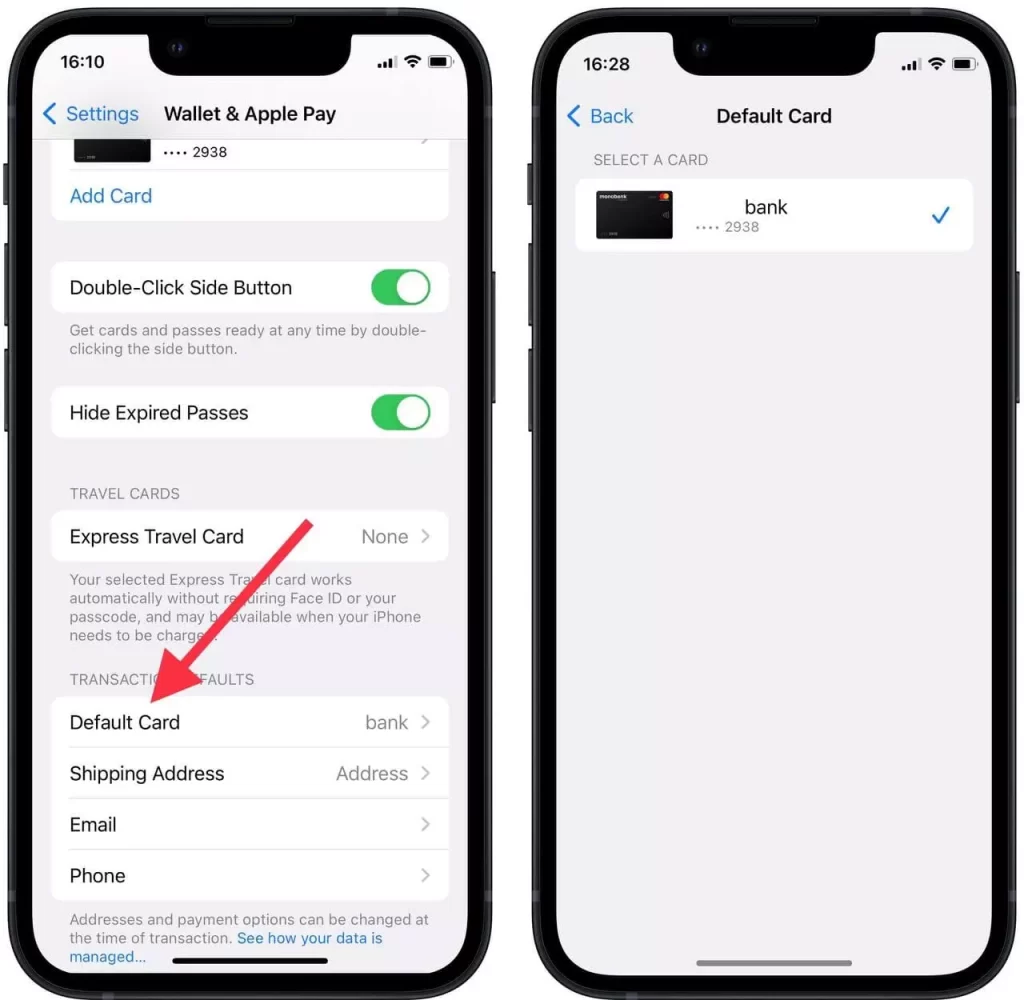
- Once you have opened the ‘Wallet and Apple Pay’ section, you need to click ‘Default card’. After this window opens, select the card you want to use for purchases.
There is also another way to change the default card in the Wallet app. This is even easier and requires a few elementary steps to do it:
- First you need to open the Wallet app.
- Next, you will see a window with all the cards that you have previously added to this app. Now you need to click and hold the card. Then drag it to the top of the list.
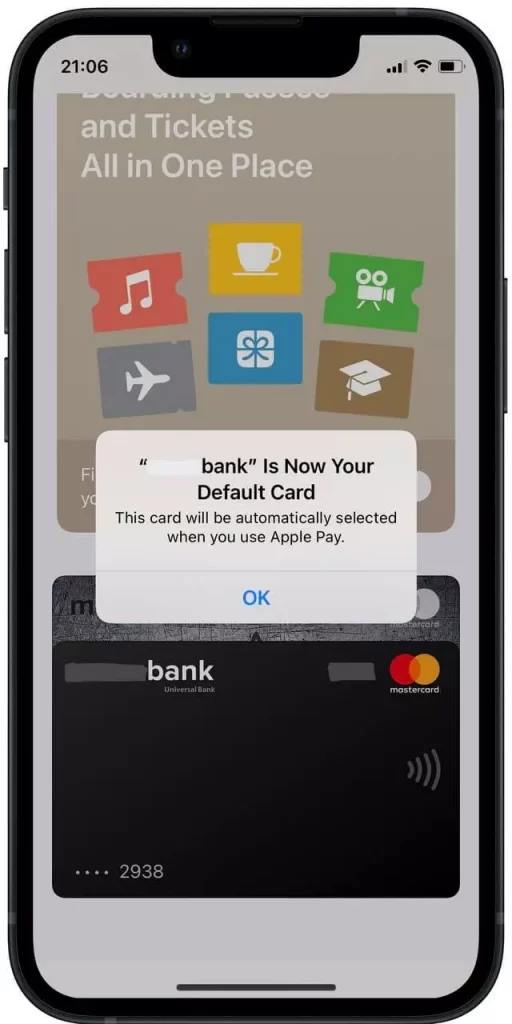
- Thus the card you have chosen will be displayed at the top of the list. You will also see a notification that you have changed the default card.
What steps to take to add a new card in Apple Pay
If you suddenly found yourself in a situation where you wanted to change the default card in Apple Pay and realized that the right one isn’t on the list. You need to add a new one, it’s easy to do, just a few steps:
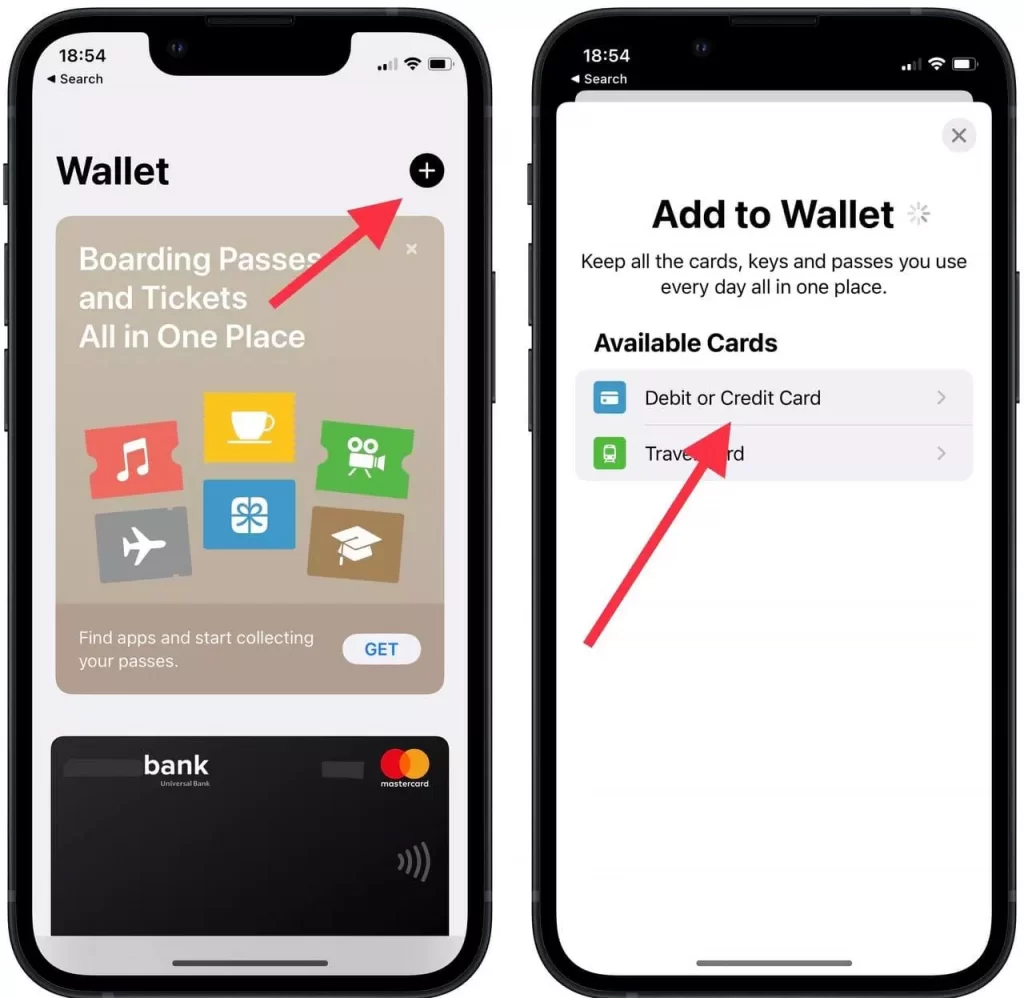
- The first step in adding a new card is to open the Wallet app.
- Then in the upper right corner you will see a ‘+’ icon, you need to click on it.
- Now when the ‘Add to Wallet’ window has opened in front of you, click on the ‘Debit or Credit Card’ icon.
- Then you need to accept the terms and click on ‘Continue’.
- Enter your card information such as name,card number,expiry date and security code.
- After that you need to confirm your actions, enter the code in the bank’s app or go through another check.
- Then you will see the added card in the Wallet app.
So if you have a lot of cards and regularly pay with different, you can change the card from which the payment will be made already at the terminal. The algorithm is the same as in the Wallet app.
After you have clicked twice on the lock button and the window with cards and the notification ‘Bring the device to the terminal’ will open in front of you. You need to press the desired card and move it to the top of the list.


