
Have you ever wondered about the best laptop for working? If yes, I believe that you heard about the MacBook. Apple produces a high-quality device with plenty of useful features that may simplify your life and save time due to the simple interface. That’s why more and more people every day prefer purchasing Mac to other laptops.
Did you have a situation when you emergency need a screenshot of some important information on your Mac, and you transferred it to your phone to take a screenshot? If yes, we can help you to make fewer efforts on doing that, as you can make a screenshot directly using your Mac. Moreover, it’s possible to edit the screenshot on your Mac also.
Why Mac is the best choice to work with
Have you ever experienced tiredness from work? This may be because you feel uncomfortable with your device. That’s why many people choose the laptop depending on their feeling of comfort and mental health. So why the choice comes to Mac?
First of all, Macs are easier to manage than a PC. Despite the fact Mac provides great accessibility options, it’s also user-friendly. This leads to growing productivity. That’s why there’s no need for employers to worry that users wouldn’t get used to Macs quickly.
The second reason is that Macs are compatible with all platforms. Especially good collaboration is with Microsoft, including MS Office Apps such as Microsoft Word, Excel, PowerPoint, and Outlook. Also, Macs are compatible with Microsoft365 Environment (OneDrive, SharePoint, Mail, Contacts, Calendars) Microsoft’s Active Directory, and more.
So, sometimes there’s also a need for screenshots for different kinds of work and due to being user-friendly, you’ll be able to take it and even edit using your Mac.
How to make a screenshot on Mac
As was mentioned before, Mac developers have tried their best to let the users be satisfied with the device. All the Accessibility options, keyboard shortcuts, etc, have been done in the way to maximum simplify your work. Even a simple screenshot can be done in several different ways. So, to know more about that, you should read the section below:
The first method is to press and hold the Command+Shift+3 button. In this way, the entire screen would be captured. The preview of the screenshot would be displayed in the bottom-right corner.
For the second method, you should press and hold Command+Shift+4. In this way, you’ll get your cursor turned into the crosshair which can be pulled to select the area of your screen.
The third method’s based on the keyboard shortcut Command+Shift+5. This would give you an opportunity to open the toolbar and select the area. You can also screen record using it.
How to crop screenshots on Mac
Screenshots can be very useful for the work. They can help you to explain to your employees the task more efficiently, you can also make your reviews or articles more interesting for reading with screenshots. However, sometimes, you need to edit your image in order to make it more attractive or remove unnecessary information. So, to crop the screenshot on Mac, you should follow the steps which would be mentioned in the section below:
- First of all, you should use one of the 3 methods that have been mentioned in the previous paragraph to capture your screen.
- After that, you should see the preview of the screenshot in the bottom-right corner. You should click on it.
- Then, there would be a new window displayed with tools.
- You should tap on the “Crop” icon and choose the section that you want to leave.
- After that, you should tap on the “Crop” option.
- To complete the process, you should tap on the “Done” option.
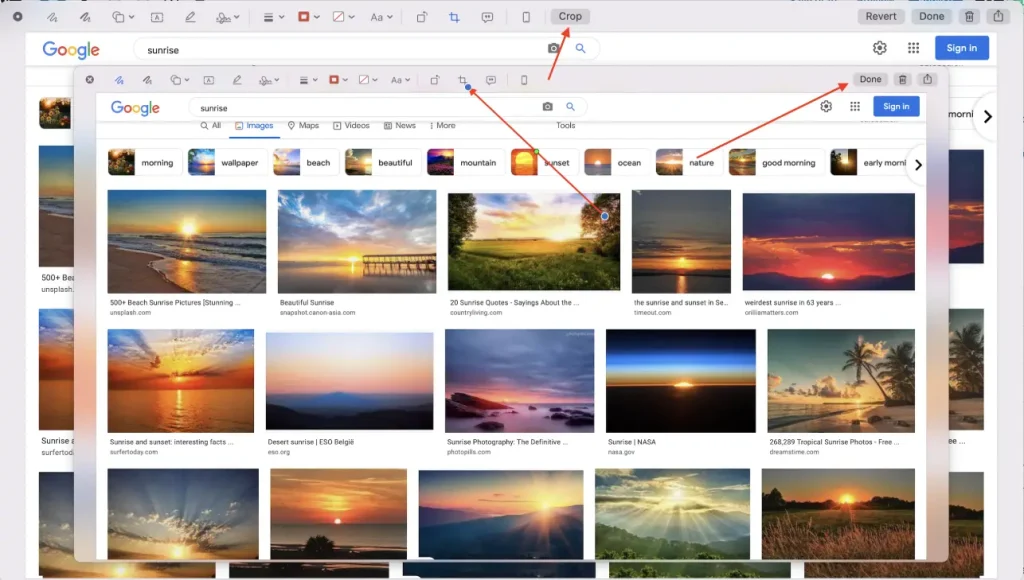
Since then, the screenshot would be cropped and all unnecessary info would be removed from it. Moreover, you can see in the tool window a great range of tools. You can add some arrows, draw on the screenshot, write some text, etc.
How to crop the screenshot using the Photos app
Sometimes, there may be situations when you’ve saved the screenshot to your Photos app, or you’ve transferred it through your iPhone to the Photos app. If this’s your case, you shouldn’t worry, there’s no need to do the screen capture once more, as it’s still available to crop it using the Photos app. To do that, you should follow the steps which would be mentioned in the section below:
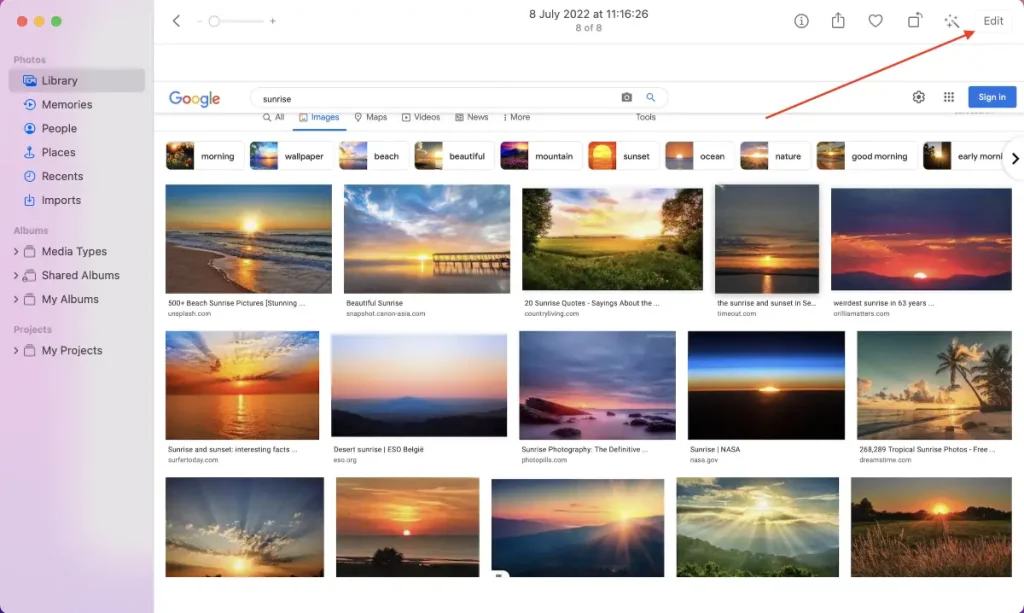
- First of all, you should open your Photos app on Mac.
- After that, you should find the screenshot.
- Then, you should click on the “Edit” option in the upper-right corner.
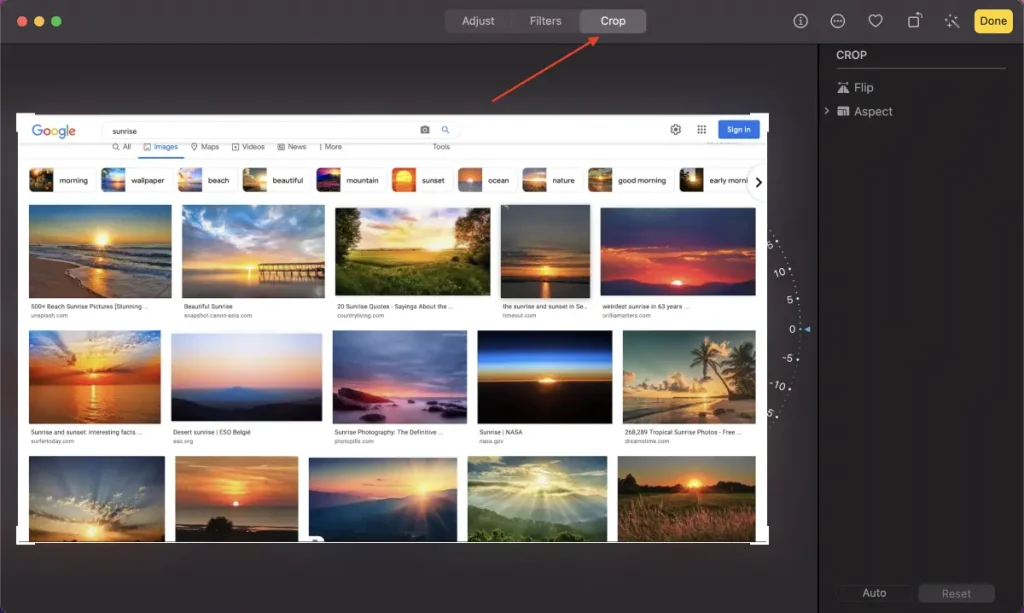
- Next, you should tap on the “Crop” section at the top of the screen.
- To complete the process, crop your screenshot and tap on the “Done” option.
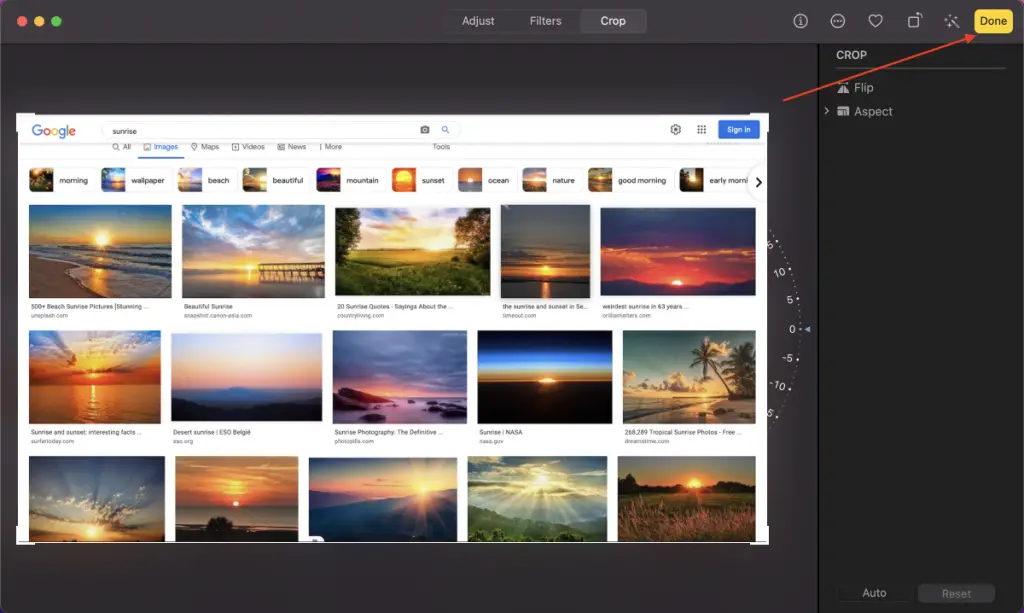
Since then, the screenshot would be cropped. As you can see, mac developers have cared a lot about the convenience and different issues that their users may face. That’s why there are several solutions to one issue that may help you in the most convenient way for you.
