One of Snapchat’s features is the ability to set the amount of time that a photo you send and another user opens will be available. The default setting is 3 seconds, so in most cases, you can set nothing at all. However, if you want to shorten or lengthen the snap’s lifetime, you’ll have to use a timer.
In addition, you can set the timer in Snapchat when you create a photo during the shooting. So the timer in Snapchat has these two main functions. However, how do you set and interact with it?
What is a timer in Snapchat?
The timer in Snapchat is the amount of time given to the recipient of the photo or video file to view it. With this feature, the memory on your mobile device isn’t clogged with received and sent graphic images.
You can safely launch funny pictures and videos into the network and not worry that the amount of graphic content on the device will be overflowing. All incoming and outgoing Snaps are subject to automatic deletion.
The time allotted for viewing data is from 1 second to 10 seconds. The program initially laid down a 3-second segment. Sometimes this is enough.
Read also:
- How to get someone off your best friends list on Snapchat
- What about fixing the Snapchat camera zoomed issue
- What does Quick Add mean in Snapchat and how you can use it
How to use the timer correctly on Snapchat
If you want to reduce or increase the time available for viewing data, follow these steps:
- Open the Snapchat app on your device.
- Click the camera section and create a snap.
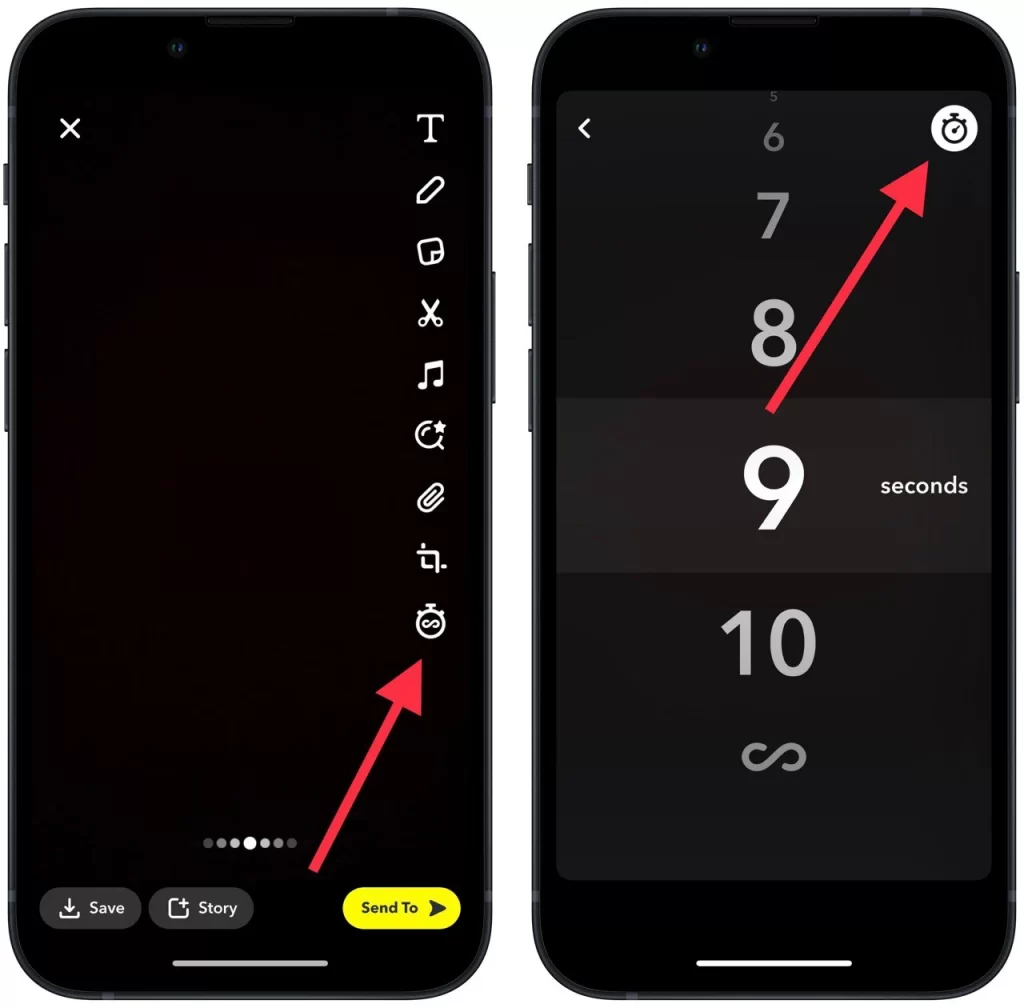
- Then a window will appear on the screen with a set of functions for editing. Select the last icon ‘Timer’.
- After clicking on the display, another window will open with options for setting the time interval. Here you should select the number of seconds you want your friend to have available to view the file you’re sending.

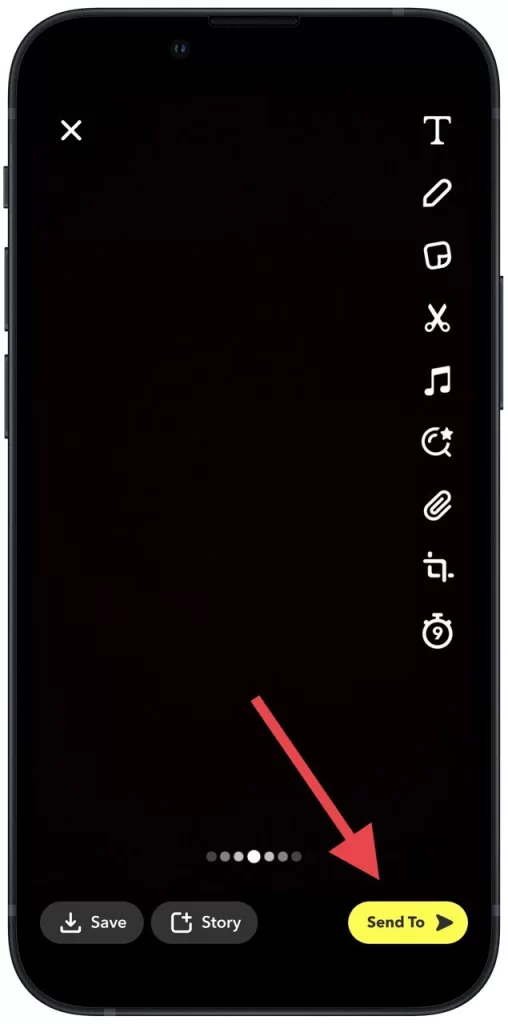
- Then press ‘Send to’.

After these steps, you can post your Snap. Although the messages will delete themselves after the period you specify, the recipient can take a screenshot and the file will be saved on their device.
What to do to put a timer on your Snapchat photo?
You can also set a timer to take a photo of yourself. If you want to have time to change your pose, get ready for the picture, and move in front of the camera. So to put a timer on your Snapchat photo follow these steps:
- Open the Snapchat app on your device.
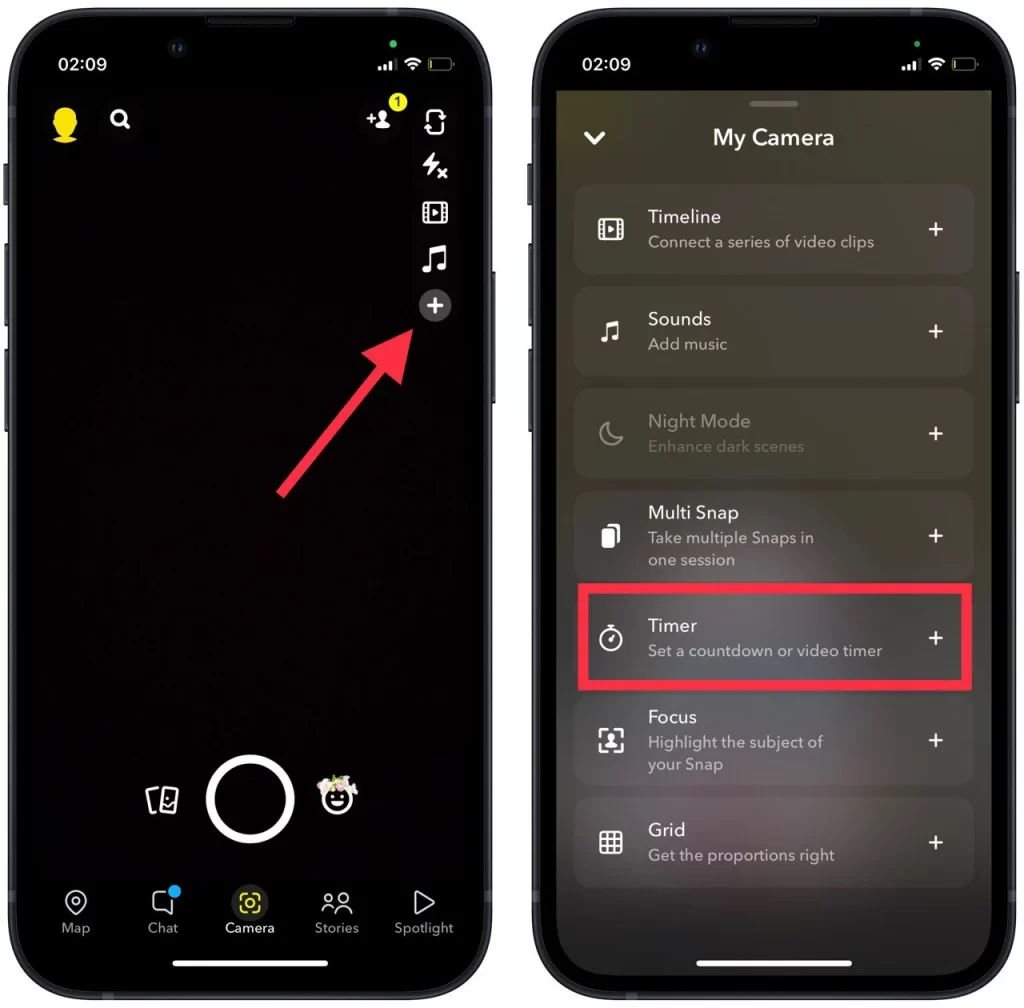
- In the Snapchat creation window, locate the panel on the right side of the screen.
- Click the plus sign pointing down to open an additional menu.
- Select the timer icon.

- Click on the big round button to take the picture.
- You will see that a three-second timer is running.
- Large numbers will pop up on the screen – after one appears, the picture will be taken automatically.
After performing these actions, you will see that a button in the form of a timer displays the number of the timer time you have selected.
Is it possible to put a timer on your Snapchat video?
Many people are wondering if they can also set a timer on Snapchat videos. As such a feature in use on photos can help and facilitate the experience of taking photos. Sometimes it’s necessary to set a timer before creating a video, for example, to take a video with a tripod.
This is a feature that Snapchat doesn’t have, unfortunately. You won’t be able to set a timer to take a video. In this case, you can shoot a video with the timer on your device and then load it on Snapchat. In this way, you can even edit the video and apply the necessary filters.
Snapchat offers a ring function instead. However, in my opinion, this feature isn’t at all comparable to the timer. It’s a completely different format and your video will just be repeating in circles. Instead of a few seconds to prepare for the beginning of the video.


