Today’s computers are very dependent on the Internet. The point is that you need the intranet for updates and for downloading third-party applications. For this reason, the network adapter is one of the most important components of your PC. Modern operating systems, such as Windows 11, have all the necessary tools to work correctly and be compatible with most network adapters you can buy for the money. However, Windows 11 PC users sometimes experience problems with their network adapters.
The fact is that Windows 11 is a very complex operating system that has dozens, if not hundreds, of processes running simultaneously to give users a wide range of functionality and good performance. However, sometimes these items conflict and bugs like broken network adapters can happen. Most often, the problems are caused by outdated drivers or a physical breakdown of your adapter. In most cases, you should not immediately run to the store and buy a new adapter. There are universal fixes that can fix most problems with your network adapter in Windows 11.
Why does the network adapter keep disconnecting on Windows 11?
Let’s start by looking at why your network adapter might not work or keeps disconnecting. If you are more interested in how you can solve this problem on your own, then you can skip straight to the next section of this article. There you will find step-by-step instructions to solve this bug.
I would divide problems with your network adapter into three main categories: problems with your network adapter drivers and software, physical failure of your network adapter or connection port on your PC, and a system error that disconnects the network adapter from your computer.
If your adapter is not physically broken, then you should not run out and buy a new one right away. Most likely, this problem you can solve yourself. Since almost all software problems are resolved by updating or restarting the system in charge of the process, I recommend you try to fix the problem yourself. If you have any problems with your network adapter, check the fixes I will recommend in the next section of this article.
How to fix the network adapter that keeps disconnecting on Windows 11
Now I propose to talk about what fixes you can apply to fix the network adapter that constantly disconnects from your Windows 11 computer. I recommend you try all these fixes one by one until you find the one that fits your situation. To do this, you will need the following:
Restart your computer
Often the problem with stemma adapters can be caused by system errors within your system. In this case, you should restart your computer to reset all processes running on your PC and start it from scratch. This helps to solve most system fixes.
Check the port where your adapter is plugged in
After that, if you have a removable adapter, you should try taking it out and plugging it into another port or even into another computer and see if the problem persists. If the problem persists, then most likely, one of the ports on your computer is simply defective. If the problem persists even on another computer, it means that the problem is with your network adapter.
Update your adapter drivers
The next step is to update the drivers for your adapter. They are necessary for your adapter to be compatible with other computer hardware. As you update your Windows 11 system, some items in the drivers may become outdated, so you should keep them up to date. To do this, you will need to:
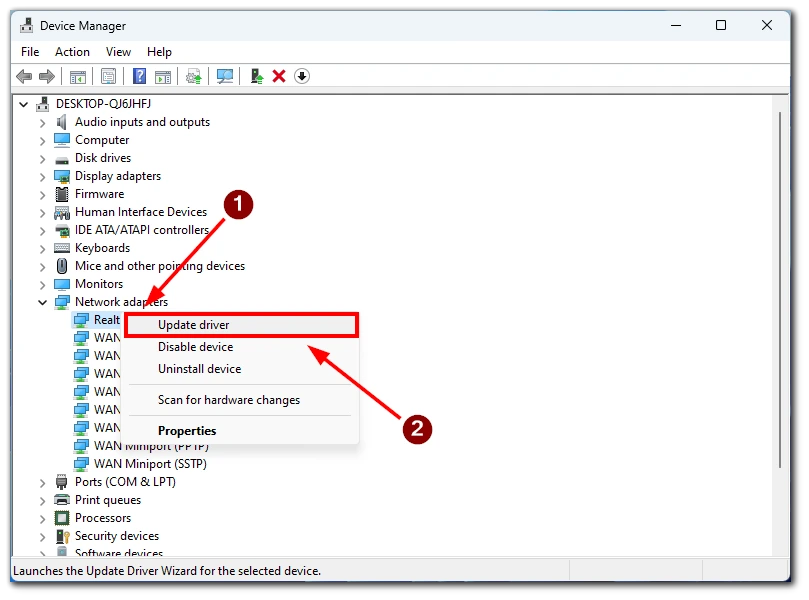
- Open the Start menu and type Device Manager. Open the appropriate application.
- In Device Manager, select Network Adapters.
- Here you should find the problem adapter and right-click on it. In the drop-down list, click on Update Driver.
- You can select Auto Update or Manual Update in the window.
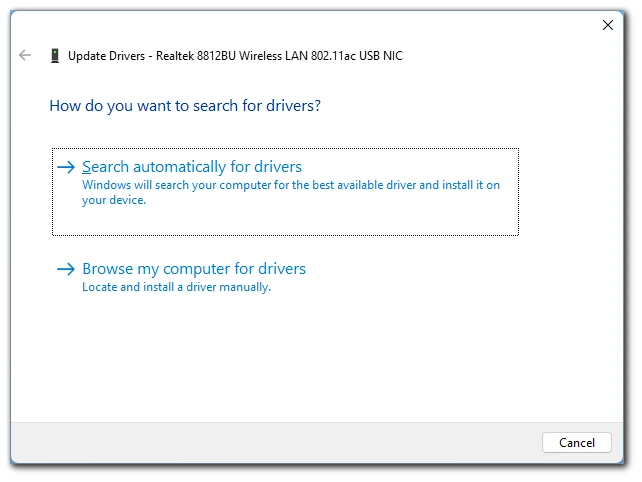
Note that not all of the newest drivers can be found by Windows. Sometimes you may want to check the website of your network adapter manufacturer for the latest driver. Then you can download it and install it manually using the instructions above.
Reset the network
Another feature that can fix your computer’s connectivity problems is resetting the networking functions of your PC. However, you should remember that it will reset all network settings, including access point passwords. To do this, you will need to:
- Press Win+I to go to Settings.
- Select the Network and Internet tab.
- Here, click on Advanced network settings.
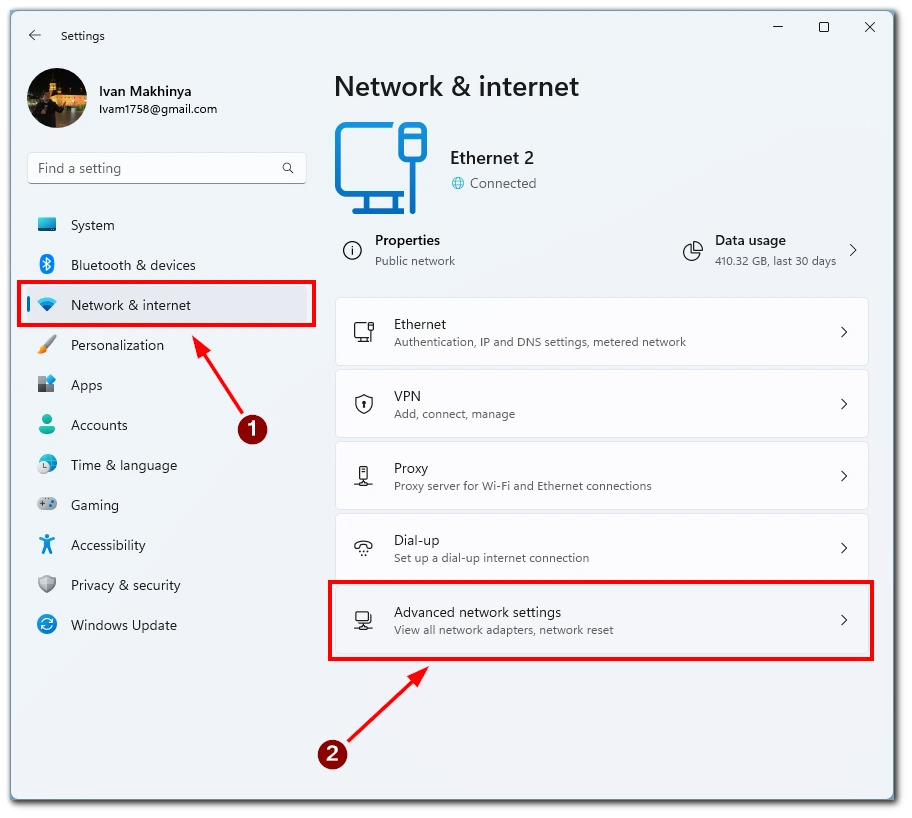
- Then select Network Reset.
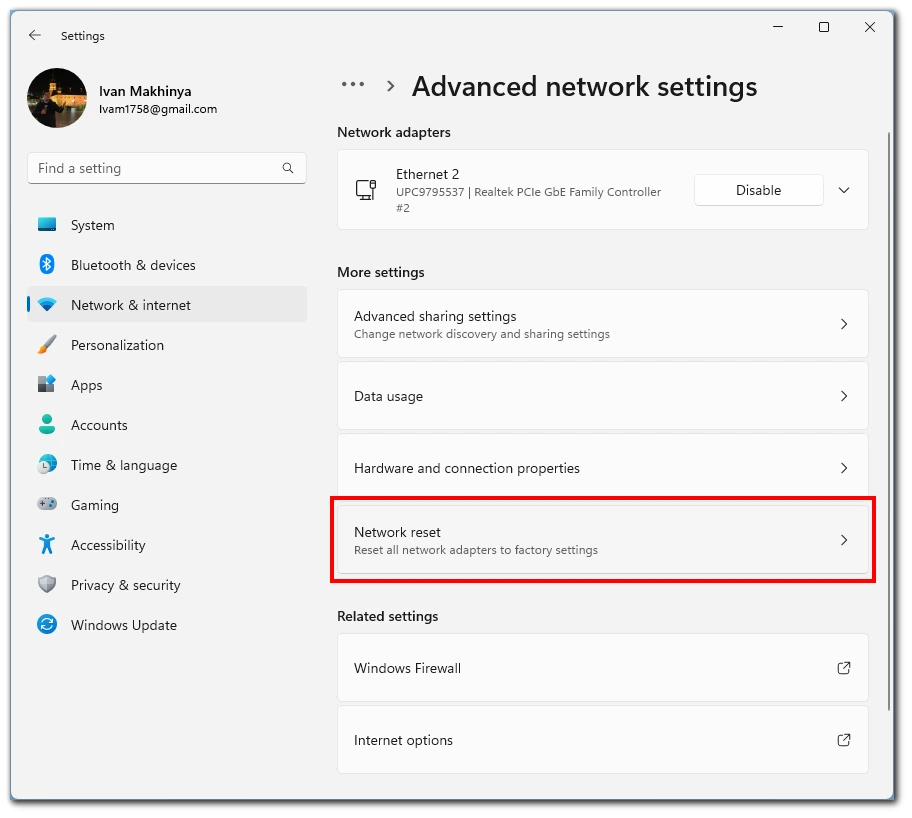
- In this menu, simply click Reset Now and follow the on-screen instructions.
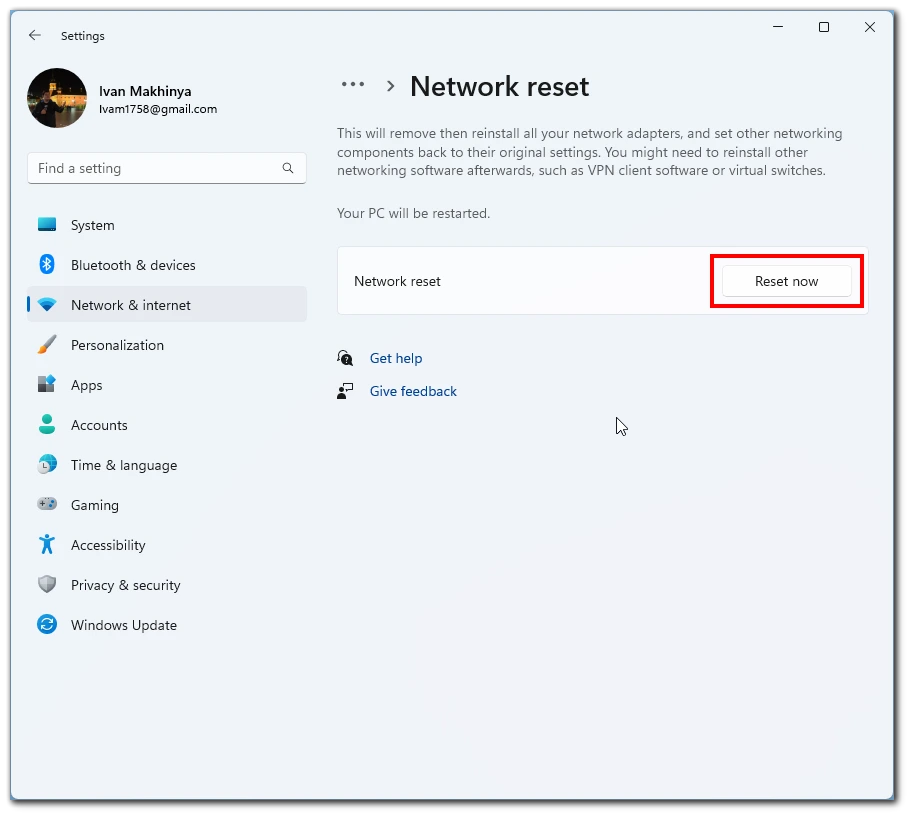
After that, I recommend you restart your computer so that all processes connected to the network also restart so that you do not run into another critical bug.


