Usually, the emails that people send are of a business nature. Of course, there’re exceptions, but more often they are. So when a user sends an email to confirm some information or to add more facts, it’s necessary to attach a file or a photo. Some people may have difficulty with this because the button isn’t in a conspicuous place. However, it’s pretty easy to figure it out.
What to do to attach a photo or other file to an email on iPhone
Even with all the simplicity of the iOS operating system, newcomers may have problems with some aspects. One of these weaknesses is file management, or to be more precise, sending files with the built-in email client. Since iOS is a closed file system, even the location of certain types of files can raise questions.
The thing is that a document, photo, or video can be located in completely different places. For example, photos and videos in the Photos app, documents or other files in iCloud Drive, or some third-party cloud storage like Dropbox. So when sending different types of files, the approach will be slightly different.
Many iOS device owners have probably noticed that when creating a new email in the Mail app on their iPhone, iPad, or iPod touch, there’s no button that allows you to attach an attachment. It’s actually quite simple. There’re three easy but maybe not obvious ways to attach a photo to an email.
What steps to take to attach photos to an email in the Mail app on the iPhone
In fact, there may be many situations where you need to attach any file or photo to the letter. Starting with work issues, ending with the solution of your problem with the online store. So to attach photos to an email in the Mail app on the iPhone you need:
- The first step to attaching photos to an email in the Mail app on your iPhone is to launch the Mail app on your iPhone.
- Once the app has opened, you need to click on the icon in the lower right corner. This icon will be displayed regardless of whether you have a menu of all mailboxes or a specific mailbox in front of you.
- After you’ve clicked on the icon in the lower right corner, the ‘New Message’ window will open.
- In this window ‘New Message’ specify to whom you’ll send the letter and the subject if necessary. Next, to attach the file, tap the screen to display a menu of all possible actions.
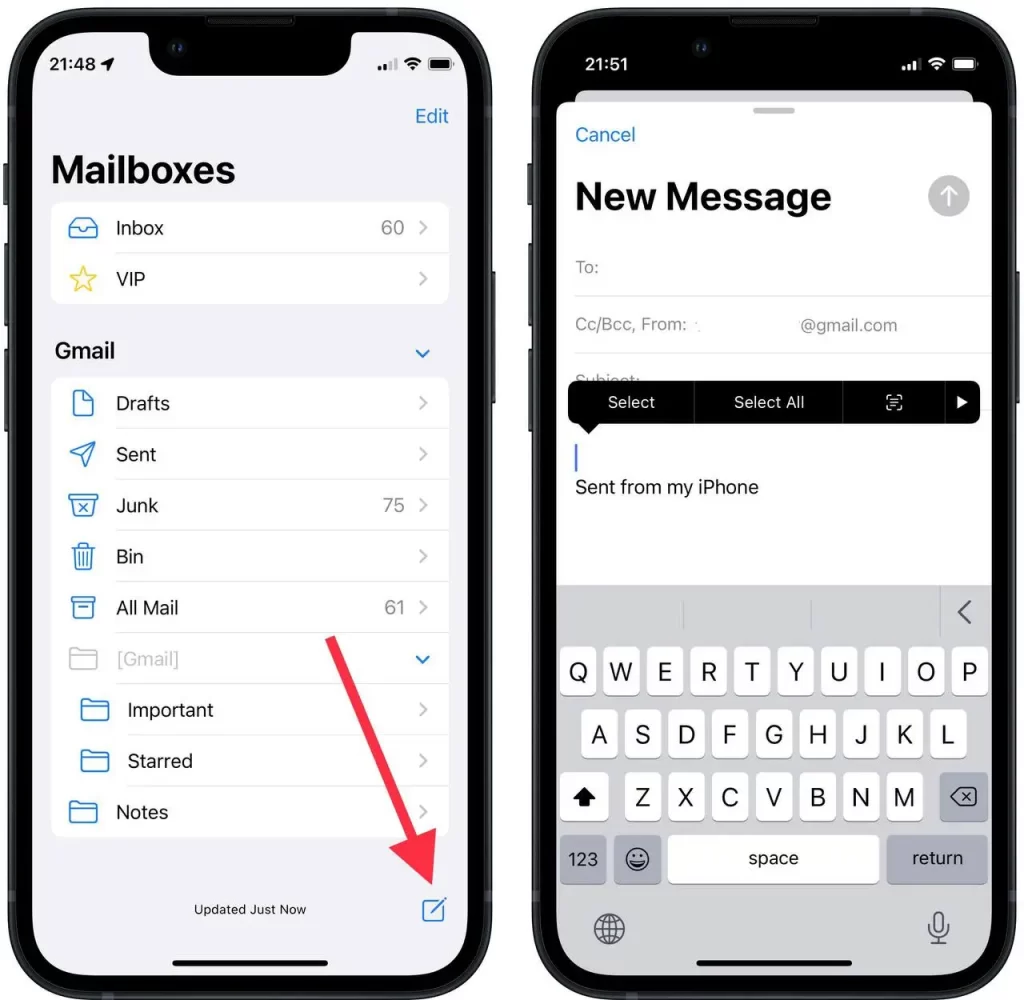
- The next step is for you to click on the right arrow icon in the new panel, which is displayed in a black shade.
- Then click on the last item ‘Insert photo or video’.
- After that, you’ll open a new window in which you’ll need to select the necessary photos that you want to add to the email.
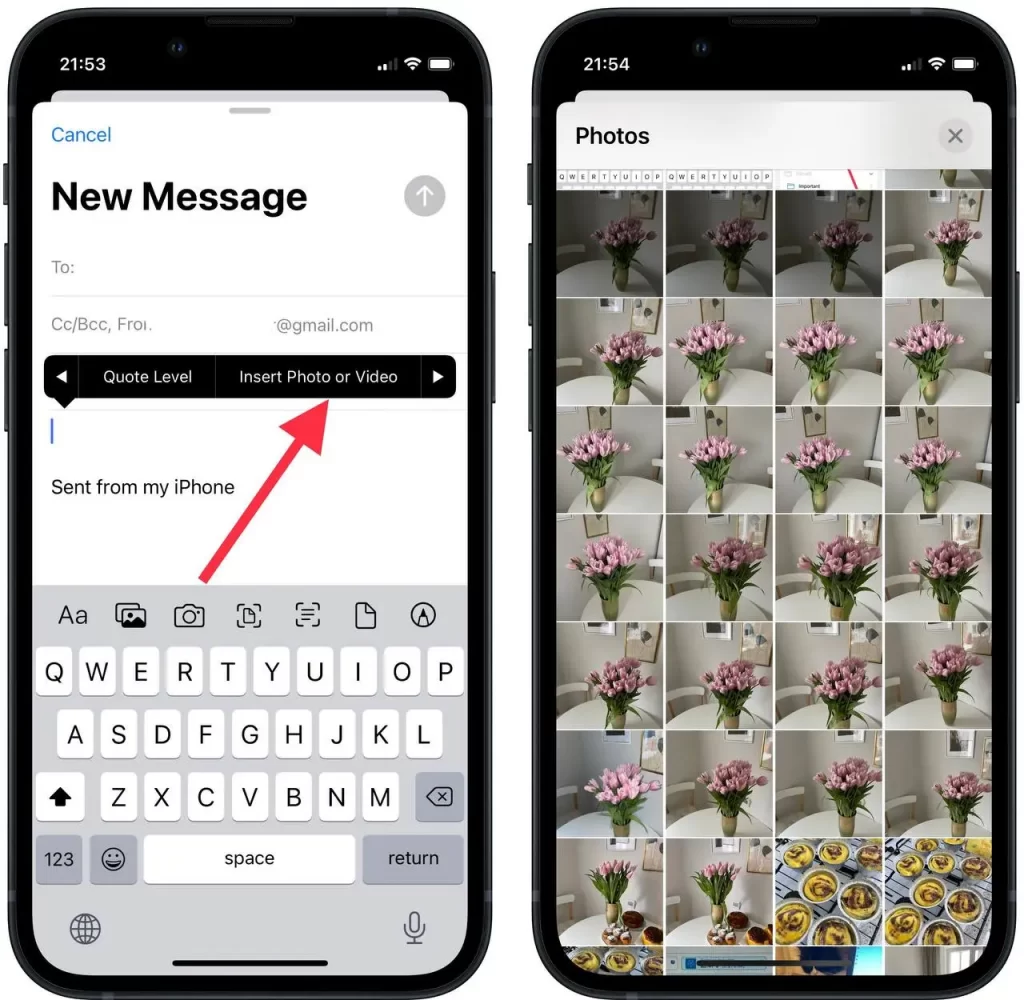
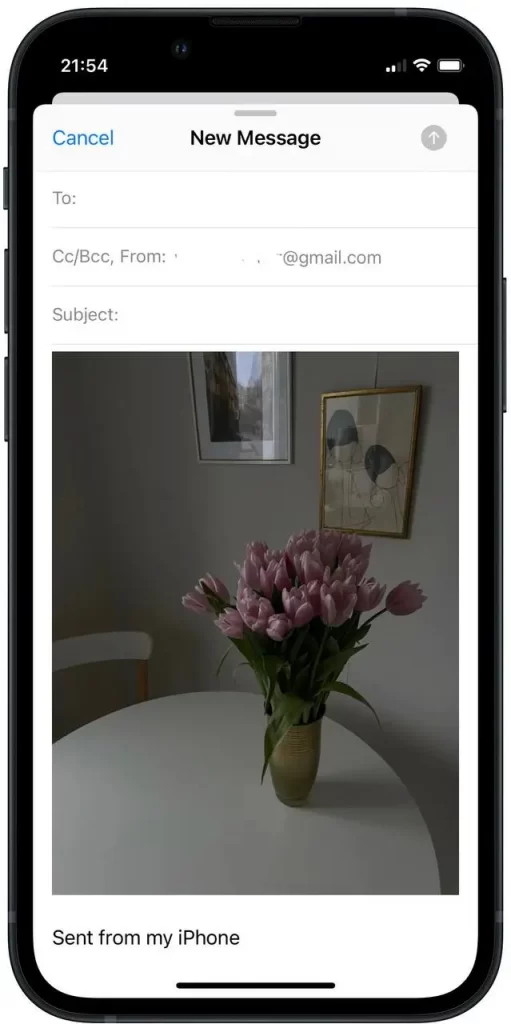
- After you have selected a photo you need to click on the cross icon to close this window and your email will be displayed.
- Immediately after that, you’ll see your email, which displays the selected photo.
What steps to take to attach files to an email in the Mail app on the iPhone
In fact, attaching files to an email in the Mail app on the iPhone is even easier than photos. In order to do so, follow these steps:
- Open the Files app on your iPhone. You can search for it yourself or you can swipe to the right to open the search menu.
- Once you’ve launched the files app, select the file you want to send by email.
- You need to tap that file with your finger to display the menu.
- After the menu with all the actions is open, you need to click on the penultimate item ‘Share’.
- Then you’ll be shown ways to share the file, you’ve to click on the email icon.
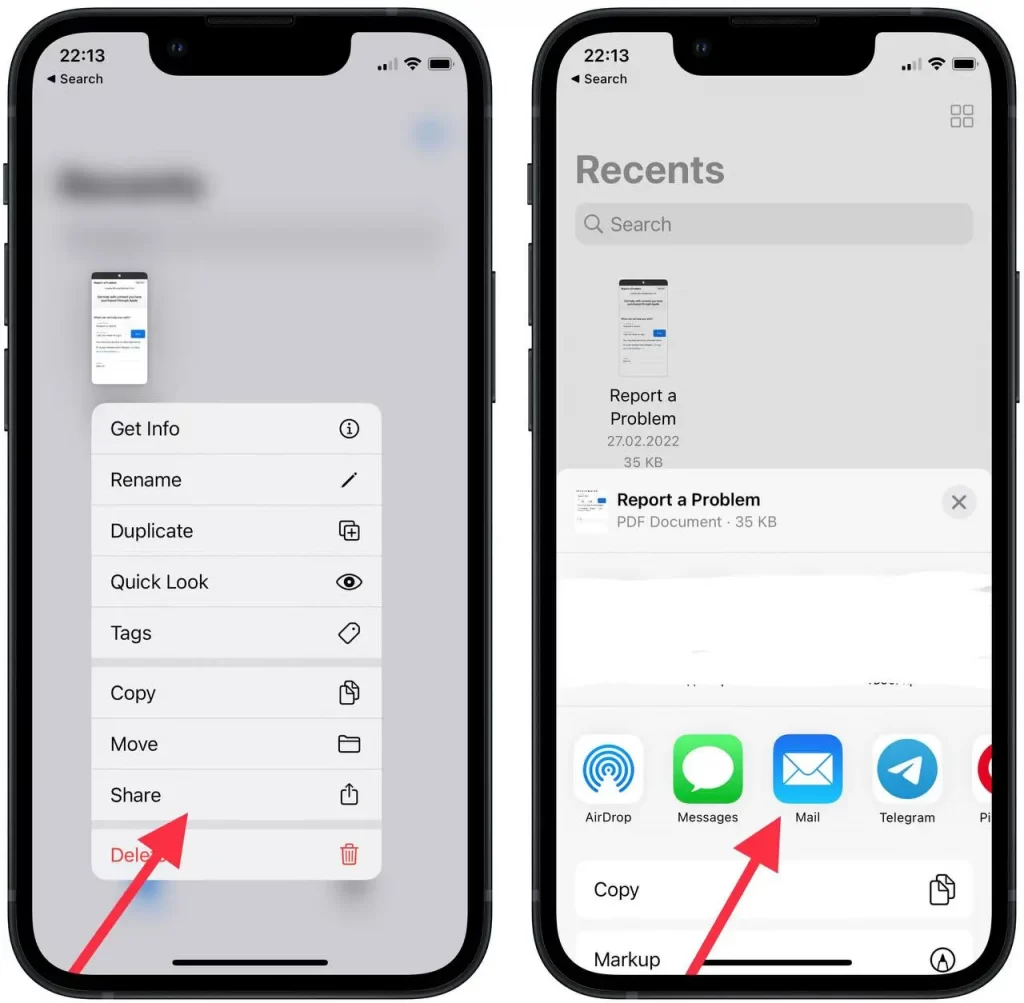
- After that, you’ll automatically get the Mail app and the window with this email, you need to add the recipient and the text if required.
In the same way as sending a file, you can send a single photo or a large number of photos. To do this, you only need to select all the photos in the Photos app, and also in the lower-left corner select the ‘Share’ icon. Therefore, the last method is more universal because using it you can send any number of photos and video material, as well as files.


