
Your personal computer is quite a complex device. It can handle many processes, a lot of information, and various third-party devices. In addition to being a device for work, it is also a tiny multimedia center that you can use for video games, music, or watching movies. Of course, in this case, you need to buy an audio device. Many Windows 11 users may have problems because not everyone understands how to change the audio output device on their Windows 11 PC.
There is nothing particularly complicated here, but it may not be very obvious to users who have not encountered Windows 11 or have not worked with the Windows operating system. You can use the taskbar or your PC’s settings to change the device’s audio output on Windows 11. To do this, you will need a few clicks. Let’s see how it works and what you need to do it.
How to change audio output in Windows 11
Let’s get right into how you can change the device’s audio output on your Windows 11. As I mentioned earlier, you can do it in two ways. The first one requires you to use the taskbar and the corresponding button on it, and the second is for those who want to change the device’s audio output using the settings of their PC. Let’s look at each of them in turn:
Change the audio device using the taskbar.
The easiest way is to use the speaker button in the taskbar. If you’ve used Windows before, you’ll quickly find it. By default, it’s on the bottom right corner of the screen. After you click on it, you need to:
- Click on the button with the Internet connection icon and the speaker in the taskbar.
- After that, you need to click on the speaker button near the volume control.
- A list of all available and active audio devices will open before you. Just choose the one that suits you best.
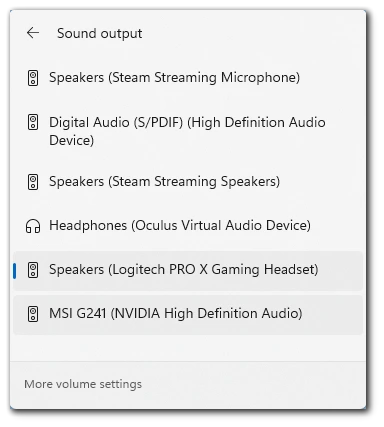
Note that you can use this method anytime and switch between devices directly in applications or games using the Win button to access the taskbar.
Change the audio device using the settings
You can also, of course, change the audio output devices in your PC’s settings. To do this, you will need the following:
- Go to Settings with the Start menu or the keyboard combination Win + E.
- Then select the System tab.
- This is where you will find the Sound button.

- A list of available devices will appear in front of you. Here you need to select the one you want.
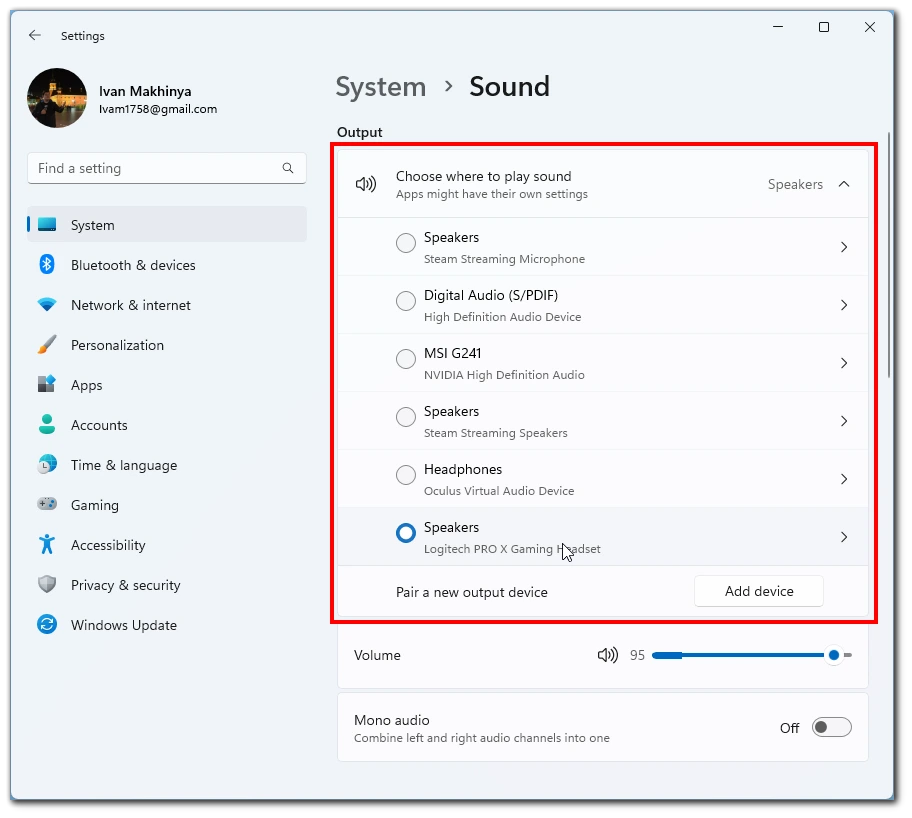
Note that the device should switch instantly and without delay; you do not need to reboot the computer or close Settings.
How to change audio input in Windows 11
Let’s also look at how you can change the audio input on your Windows 11. The point is that when you attach audio devices, they often have both input and output. So you may have quite a few devices that the system has identified as microphones and may even enable them by default. Changing this is relatively easy. To do this, you need to:
- Go to Settings with the Start menu or the Win+I key combination.
- Then select the System tab.
- Next, you will need to click on Sound.

- Here you need to scroll down a little bit to the Input section.
- You will see a list of all available audio input devices. Select the device you want.
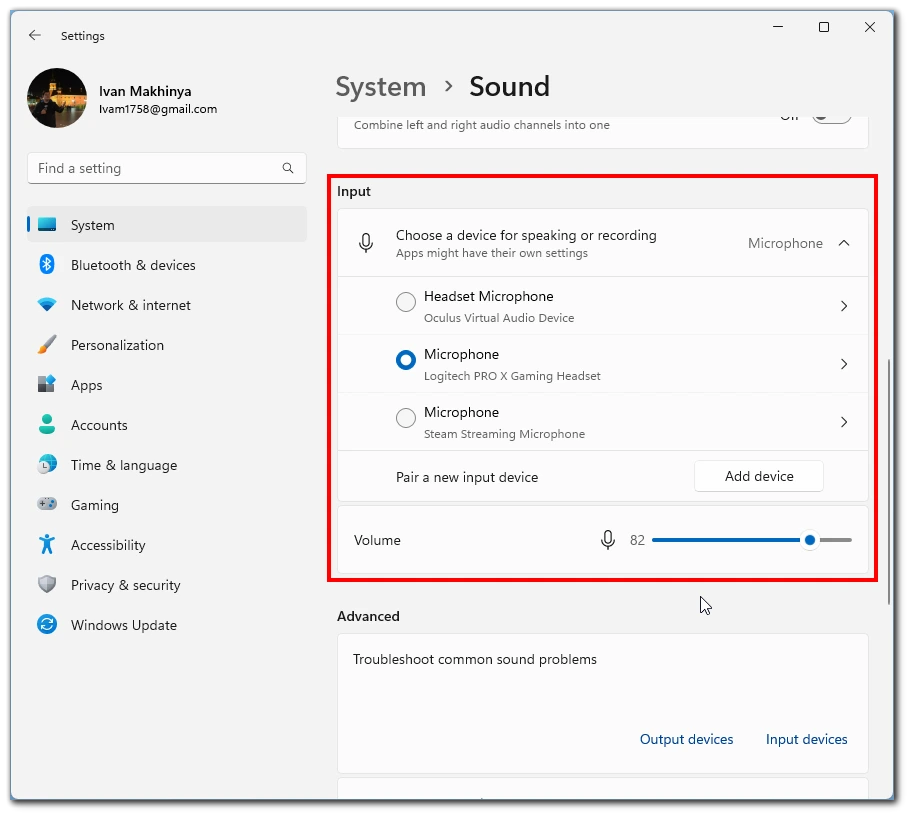
Note that right here, you can also test your device. To do this, you need to start talking into the microphone and look at the volume slider. You will see a bar with the volume of your speech there. The further to the right the bar goes, the better the system can hear you. You can also use the volume slider to lower the volume to make the microphone quieter. Also, if you have the right microphone enabled but don’t see your volume bar, look for the Mute button on the microphone; this might be a common problem.
How to open volume mixer in Windows 11
One of the most valuable features in Windows 11 related to Sound is enabling the volume mixer. This feature allows you to adjust the volume of specific applications and even set the device to which the Sound from that application will be output. To open the volume mixer, you will need the following:
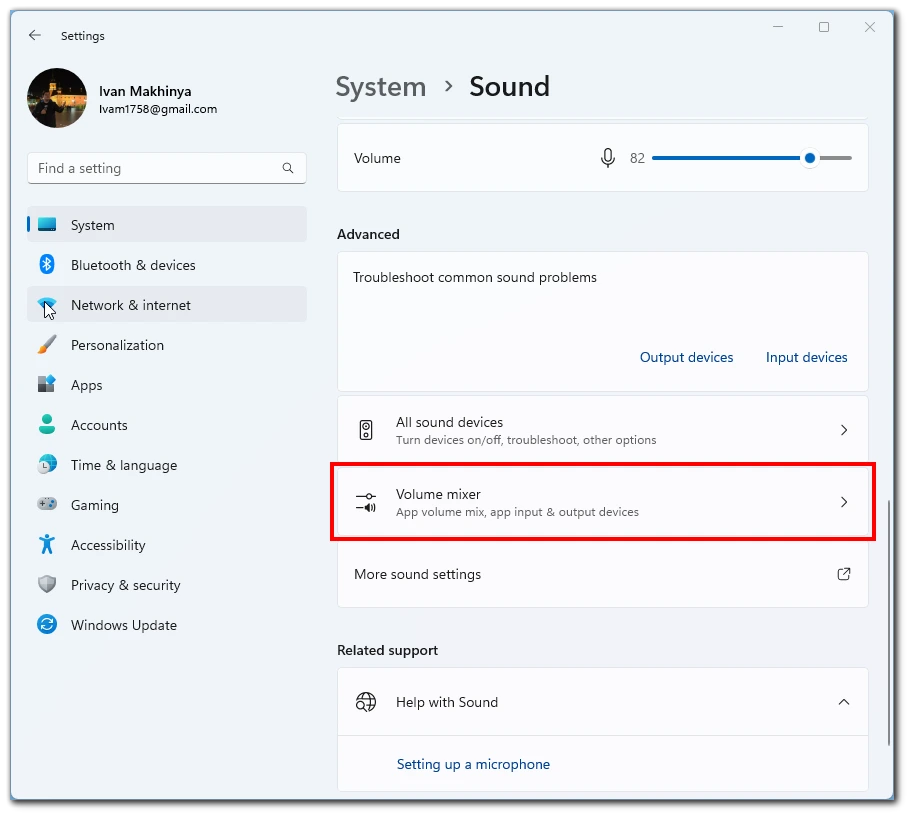
- Go to Settings using the Start Menu or the Win + I combination.
- Then you need to go to the System tab.
- After that, click on Sound.

- This is where you need to scroll down and find Volume mixer.
- You will see a list of apps and their volume. By default, it will be the same as your PC volume. You can change this for each app individually. And if you click on an app, you can choose an alternative input or output device from the dropdown menu.
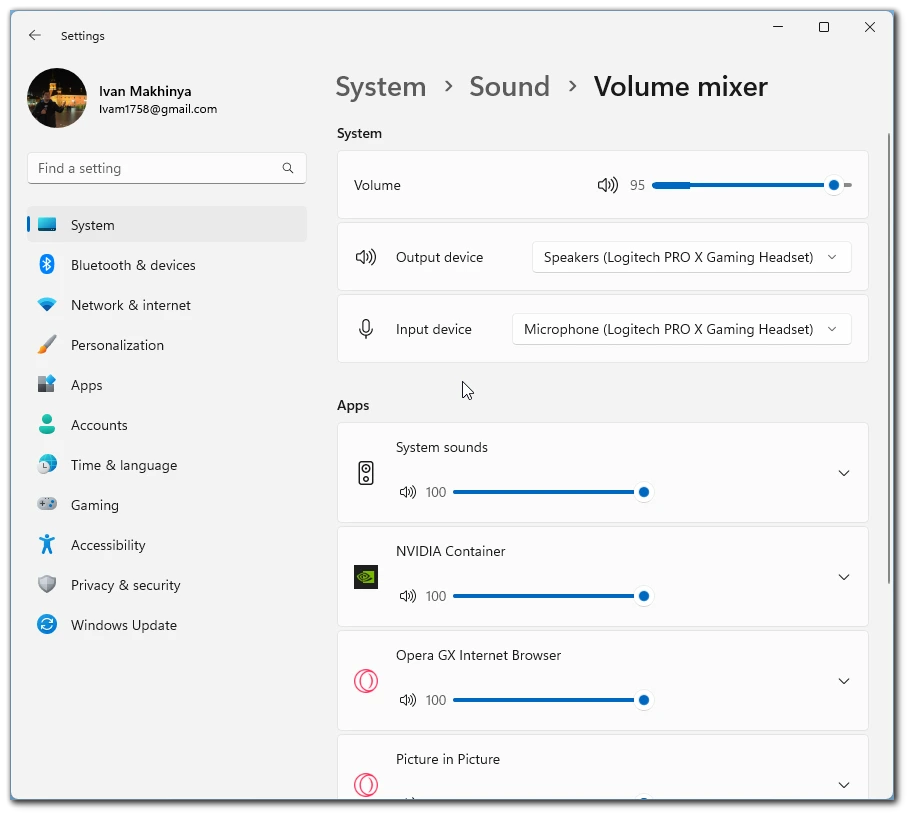
This tool is handy if you have multiple microphones or sound sources and want to work with them in parallel. For example, you can have music in the background on your speakers and a helpful podcast on your headphones.


