
Every smartphone owner watches at least one video a day. All people use YouTube for personal purposes. After all, having such a smart device means you can watch YouTube anywhere using Wi-Fi or mobile internet.
You may need to change the quality of YouTube videos. There can be several reasons for this, the most common being to save traffic and download videos faster. Fortunately, changing the YouTube video quality settings on your iPhone and iPad is easy enough.
What to do to change YouTube video quality settings on iPhone and iPad
YouTube is a video hosting service that provides users with video storage, delivery, and display. It has become quite popular and is used all over the world. Anyone, regardless of their occupation, uses this service.
Some people use YouTube for work, to develop and learn new aspects. Some are subscribed to a fitness trainer and have daily access to training sessions. Some people watch their favorite lifestyle blogger before going to bed.
Due to the fact that watching videos on YouTube is an entertaining pastime, users want to have the best possible viewing experience. YouTube usually adjusts the quality of the video you watch depending on the speed of your Internet connection. It does this automatically, it can seem intrusive to the user. You may find that you change the video quality for better viewing or to save data.
What steps to take to change YouTube video quality settings on iPhone and iPad
The YouTube app has received some updates to the user interface and now offers a wider selection of video resolutions. Previously, when you went into the video quality settings, you could quickly select one of several available resolutions. Now that has changed, as YouTube has added some basic video quality settings and moved the resolutions to a separate section.
So to understand and change YouTube video quality settings on iPhone and iPad, update the YouTube app to the latest version. The algorithm is identical whether you’re using an iPhone or an iPad. In order to change YouTube video quality settings you need:
- The first step to change YouTube video quality settings is to open the YouTube app.
- After that, start watching the video in the YouTube app, click once on the video to open the settings menu.
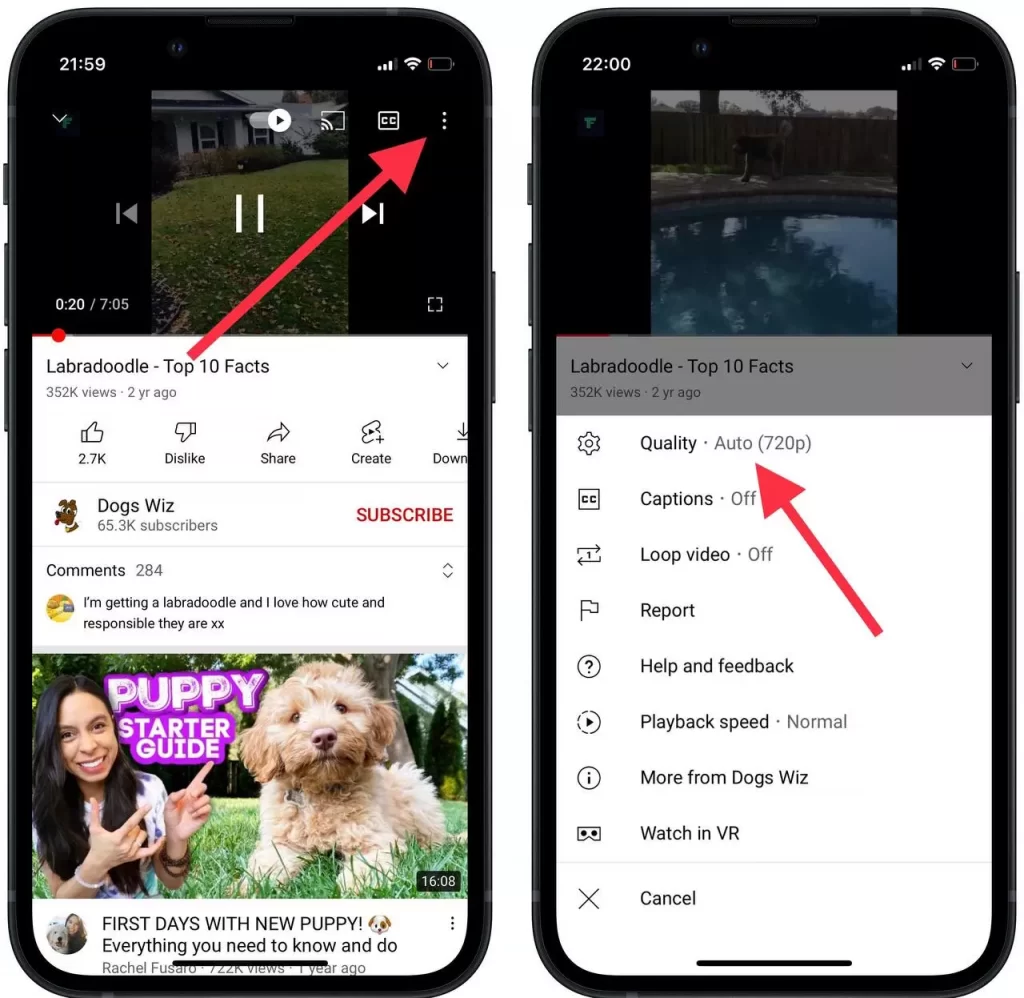
- Then in the upper right corner you will see an icon with three dots, click on it and more options will open.
- The next step is to click on ‘Quality‘ which is the first option in the menu. The current resolution will be shown in brackets.
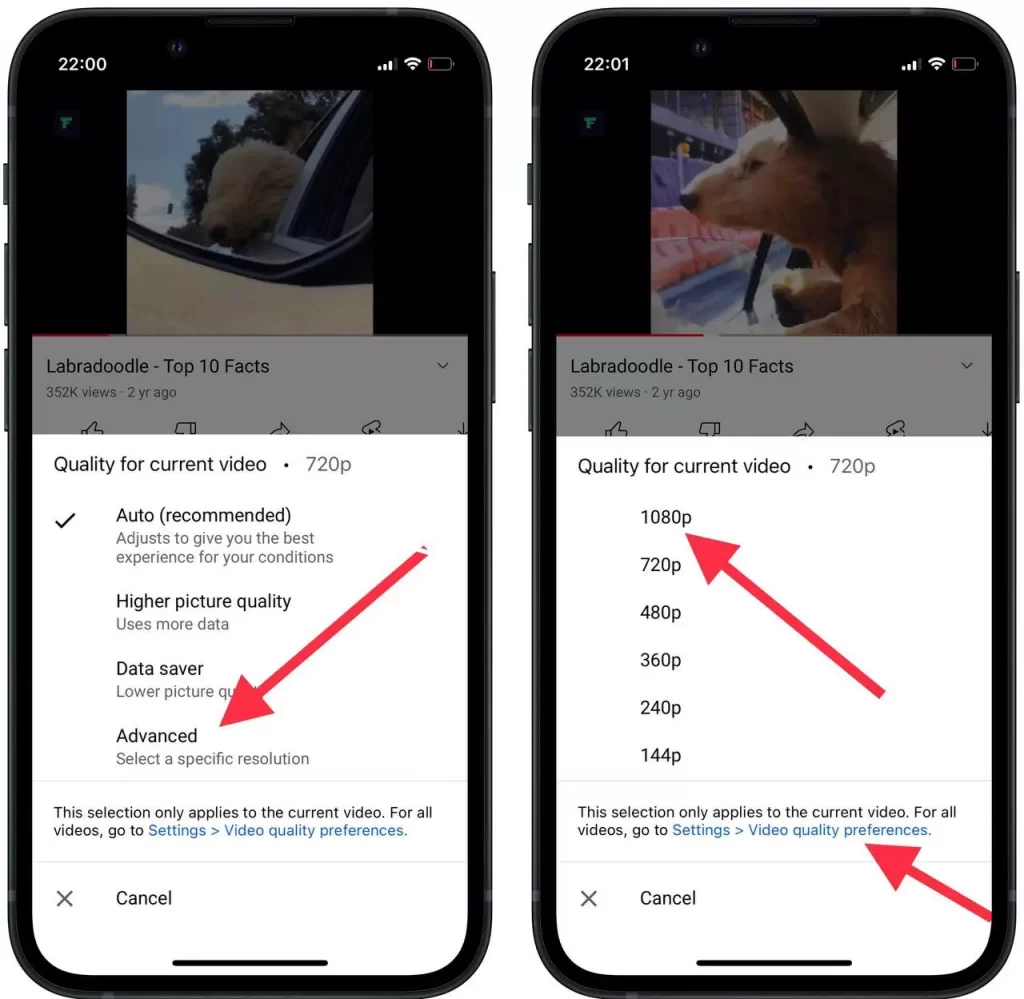
- Here, you’ll find the new video quality options called ‘Higher picture quality’ and ‘Data saver’. The ‘Higher picture quality’ is more suitable for Wi-Fi connections, while the ‘Data saver’ is mainly designed for cellular users.
- However, in this situation you need to click on ‘Advanced’.
- After that, a possible list of all available resolutions will open in front of you. To adjust the settings for all videos, click the ‘Settings > Video quality preferences’ button right below. Here you will be able to select the desired video quality settings for both Wi-Fi and cellular.
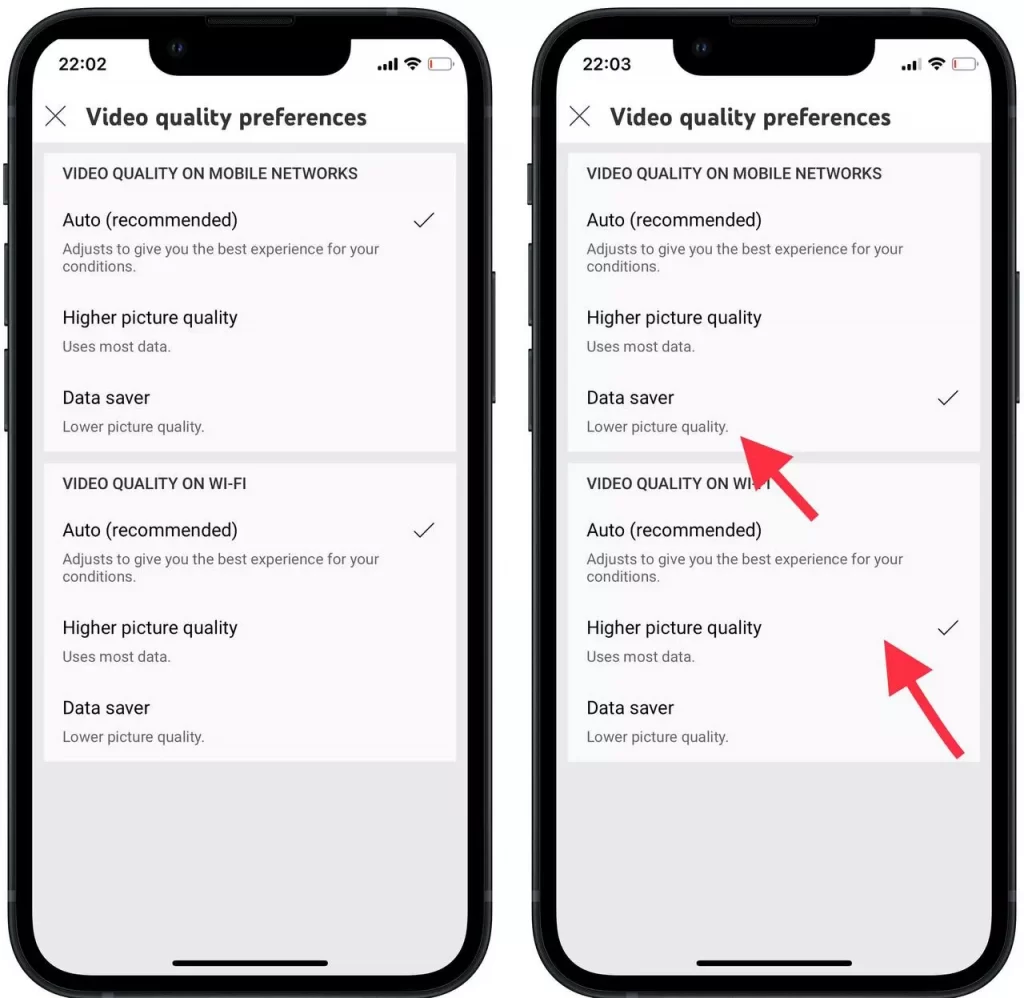
- So after these steps, you will see two windows with the tab ‘Video quality on mobile networks’ and ‘Video quality on Wi-fi’. Set the desired settings for each type of Internet connection, focusing on the capabilities of your Internet.
It’s also important to note that if you’re using the ‘Auto’ setting, this change won’t bother you. However, if your goal is to save data and you always use the highest possible resolution or even a lower resolution. You’ll have to go through an extra step to adjust the video quality.


