")
If you are here, you want to know how to make a bootable flash drive for Windows 11. You need a bootable USB to install a clean version of Windows on your PC or virtual machine. Microsoft has created the Media Creation Tool utility, which allows you to create a bootable USB in several steps. You can download it from the official Microsoft website for free.
You can also use older methods, such as downloading the Windows ISO image. However, this method is complicated and more suitable for installing Windows on a virtual machine. You may also use the Rufus app to create a bootable flash drive quickly.
What you need to know before you start creating a bootable USB
- You can only install Windows 11 on a device with 64-bit architecture, so make sure your device can support the new OS.
- You will need a USB with at least 8 GB of memory to boot Windows.
- All data on your flash drive will be deleted.
- You will need an internet connection to install Windows via the Media Creation Tool.
- I advise you to make a backup of your important files before you install Windows 11.
How to make a bootable USB via Media Creation Tool
Media Creation Tool is a utility from Microsoft that you can use to create a USB installation media to install Windows 11. With this tool, you can upgrade your old system to the latest Windows or do a clean installation of the OS on a new device. The Media Creation Tool’s interface is like a step-by-step installation wizard. Let me show you how to use this tool:
- First, insert a flash drive of at least 8 gigabytes into your PC, and pre-clean it from all files.
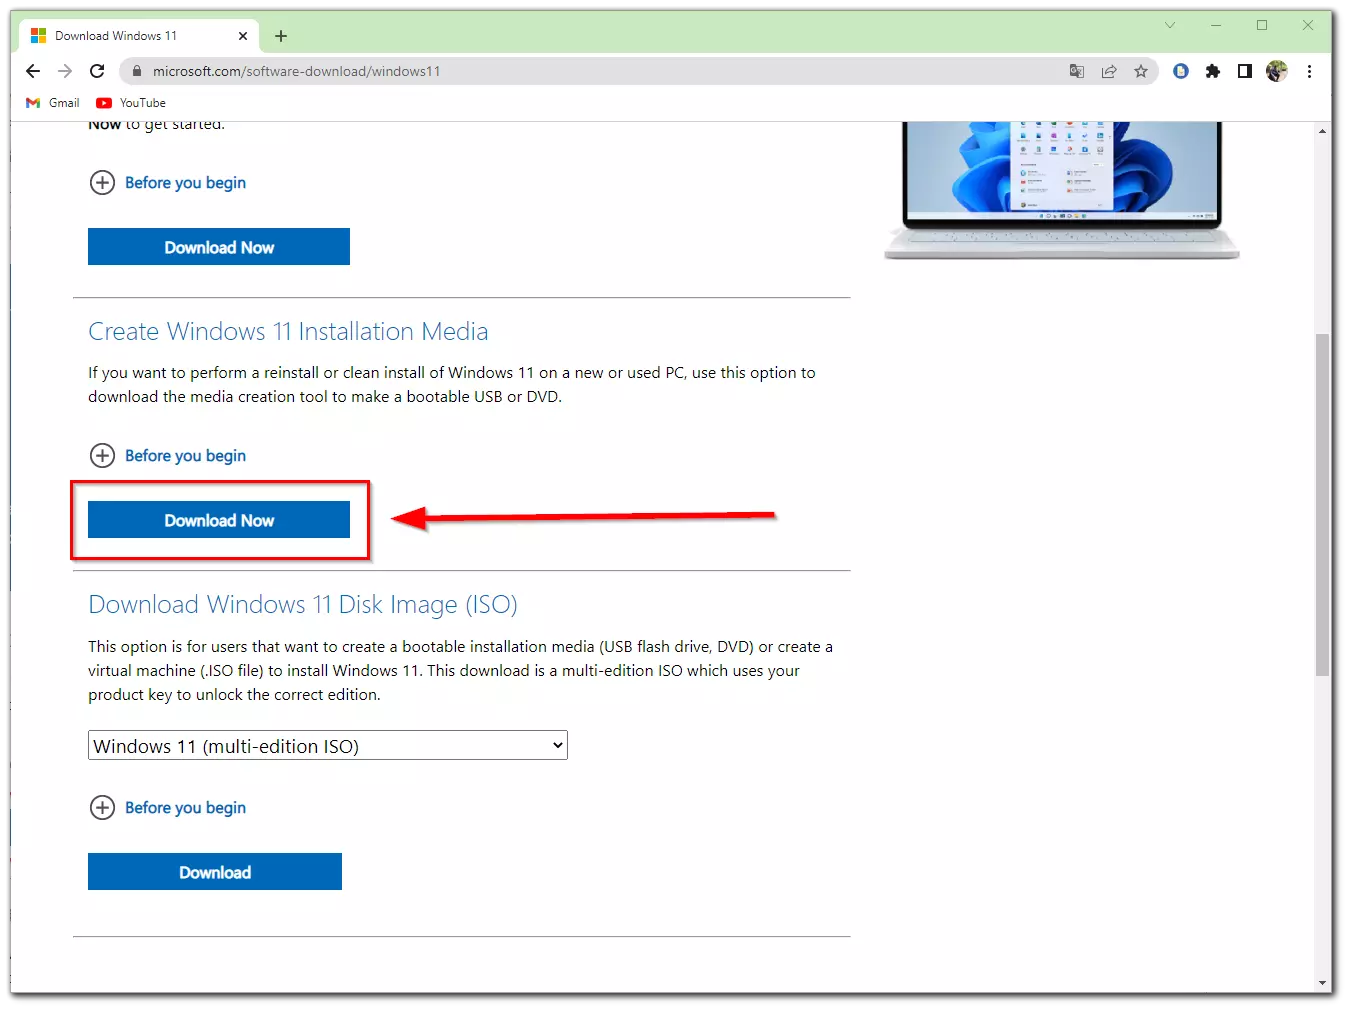
- Go to the official Microsoft website at this link.
- Find Create Windows 11 Installation Media and click the Download Now button.
- Open the downloaded file. Now you need to read the license, then click Accept.

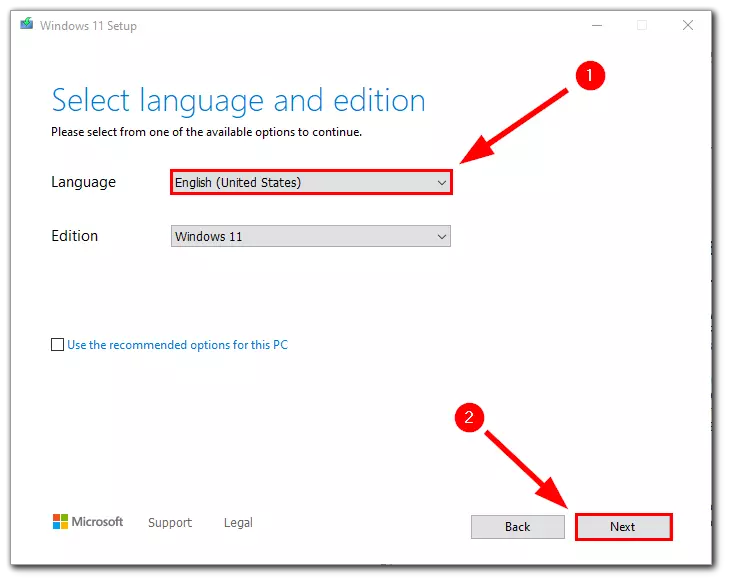
- Now you need to select the language of your future Windows system and click Next.
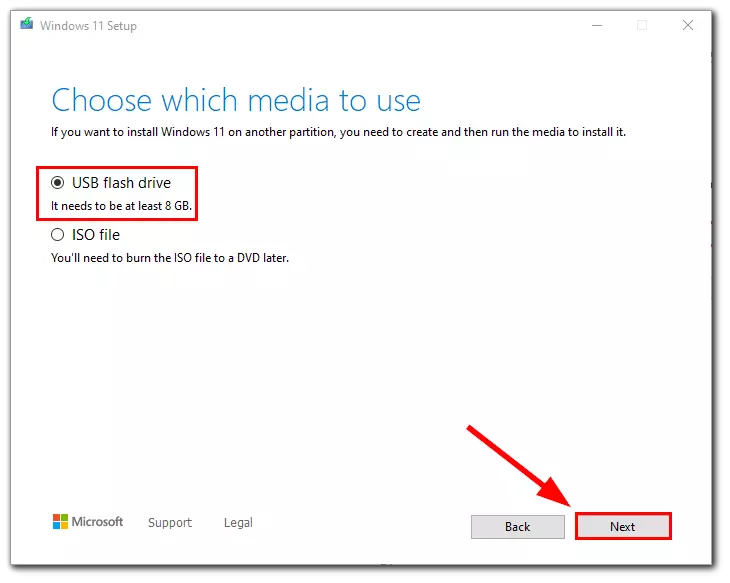
- Select a USB flash drive and press the Next button.
- Select the USB flash drive and press the Next button.

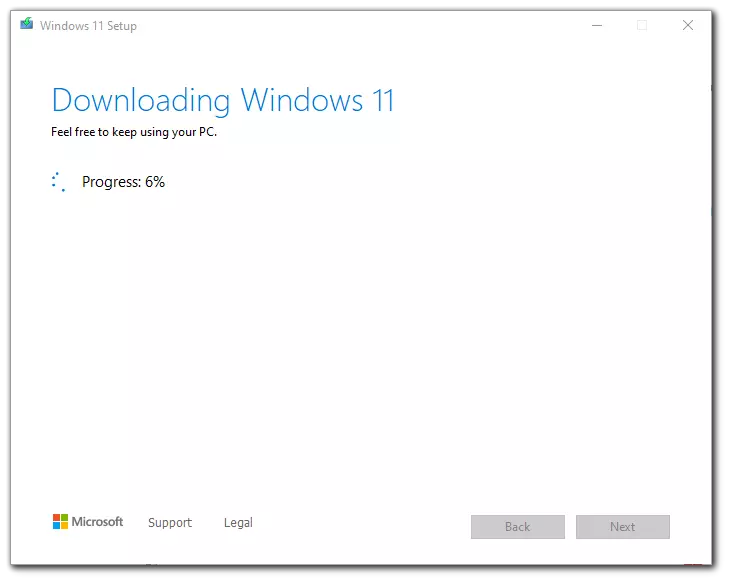
- The upload process may take a long time. When it’s done, press Finish.
Now you can use your flash drive to install Windows 11. To boot Windows 11 from USB, you need to select your media in the BIOS boot settings. You can also use Boot Menu to install the new operating system. To activate Boot Menu, you should press Esc, F2, F10, or F12 keys when the PC starts.
How to create a bootable USB with Disk Image (ISO)
The Media Creation Tool method is easier, but if you can’t run it for some reason, you can make a bootable flash drive from an ISO file.
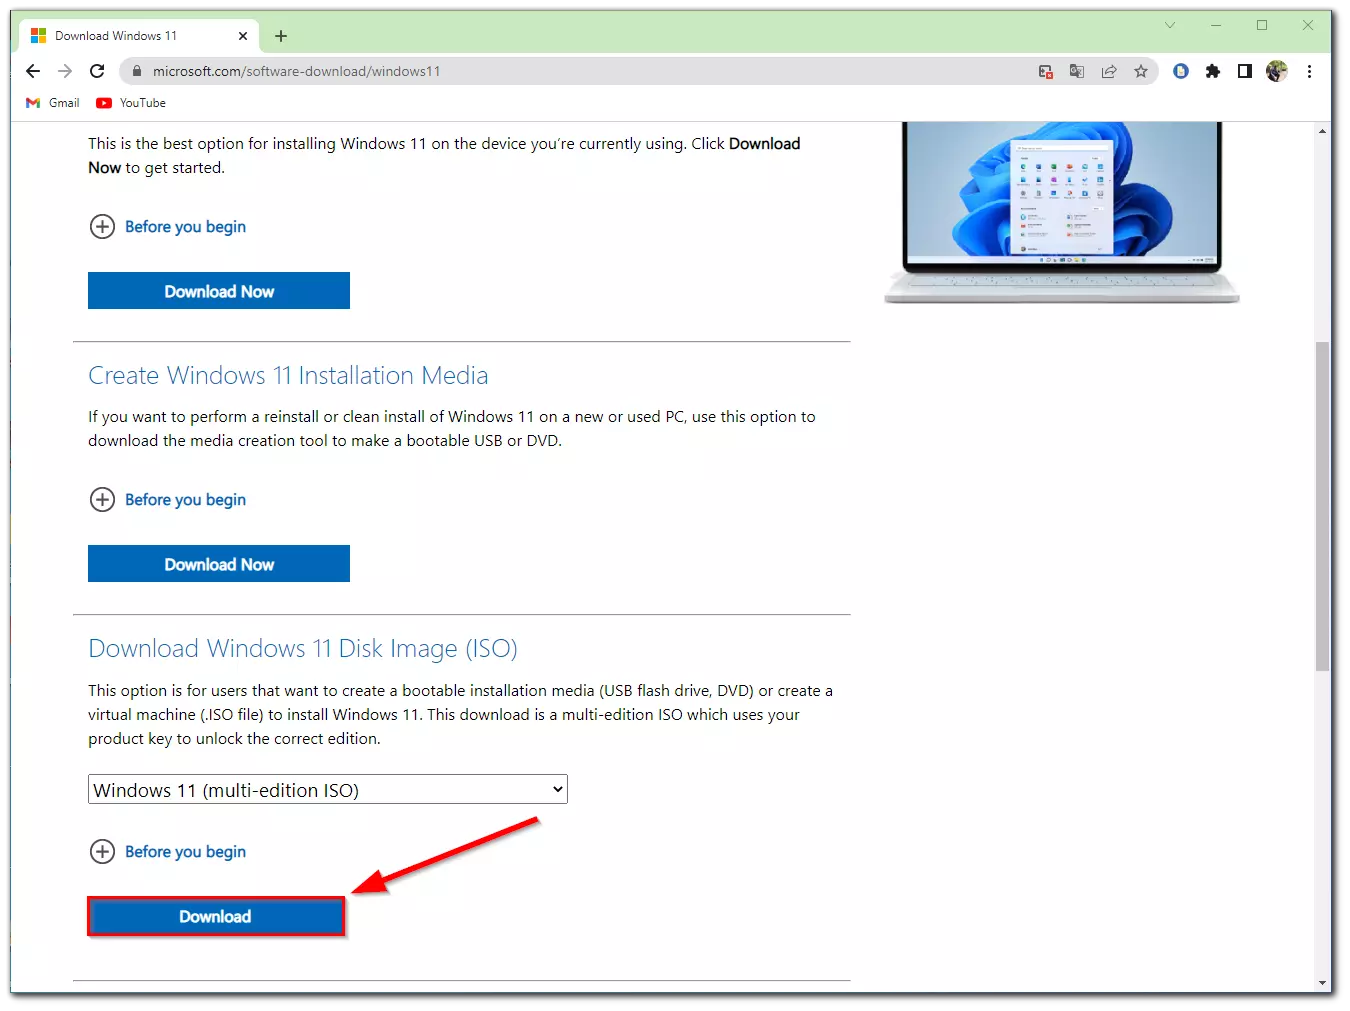
How to Download a Windows 11 ISO File
You can download the Windows ISO file from the official Microsoft website. Then you have to follow these steps to download the correct Disk Image:
Go to Download Windows 11 Disk Image (ISO), select Windows 11, and click Download.
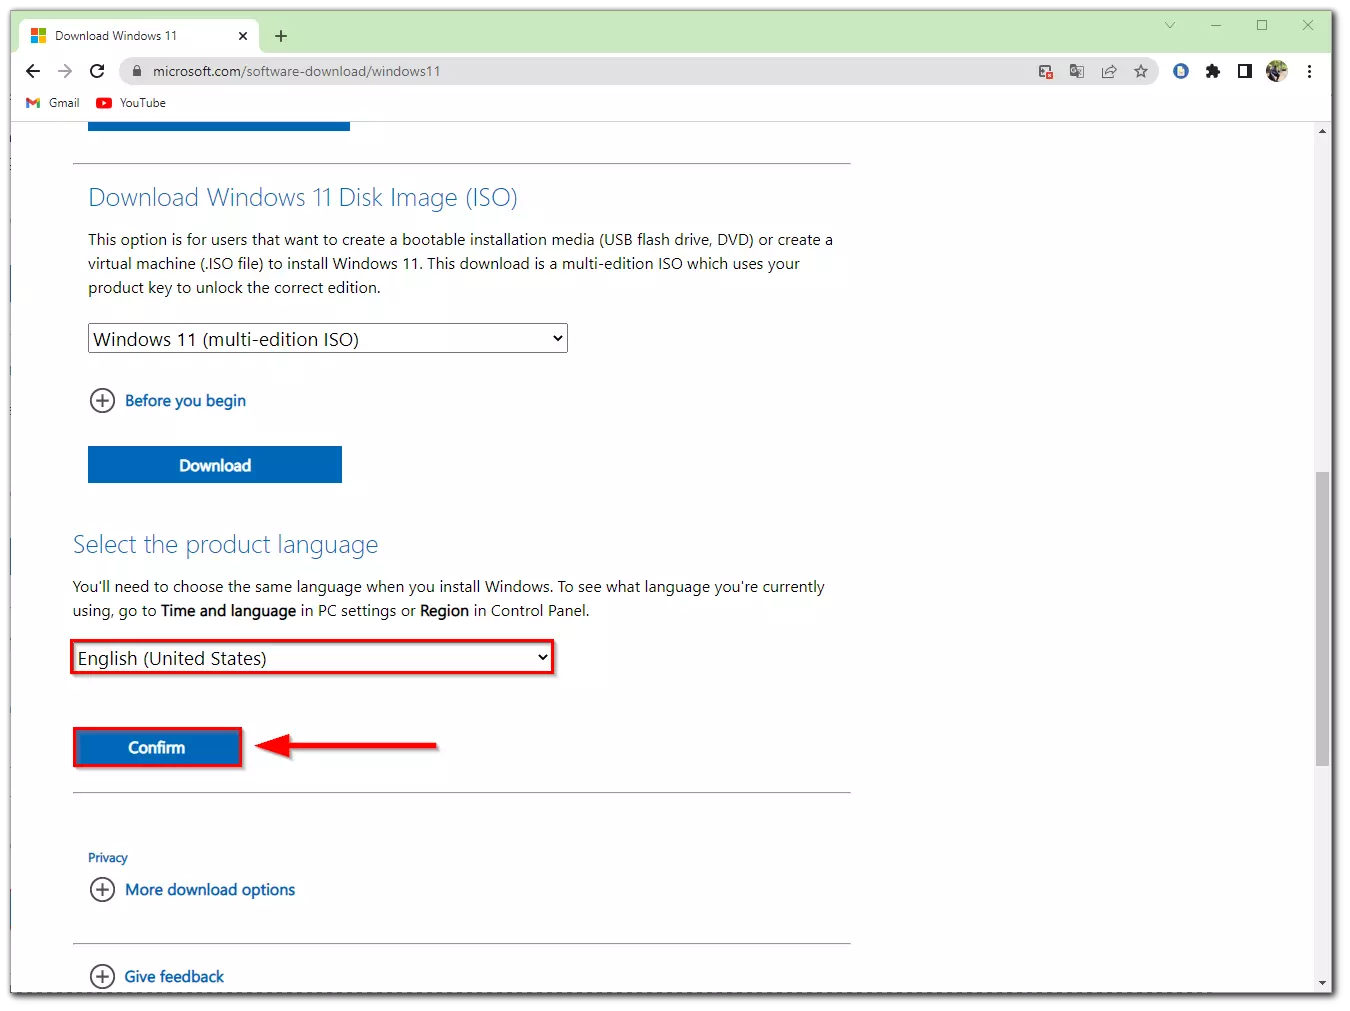
- Choose a language for your future OS and click Confirm.
- Now click on 64bit Download.
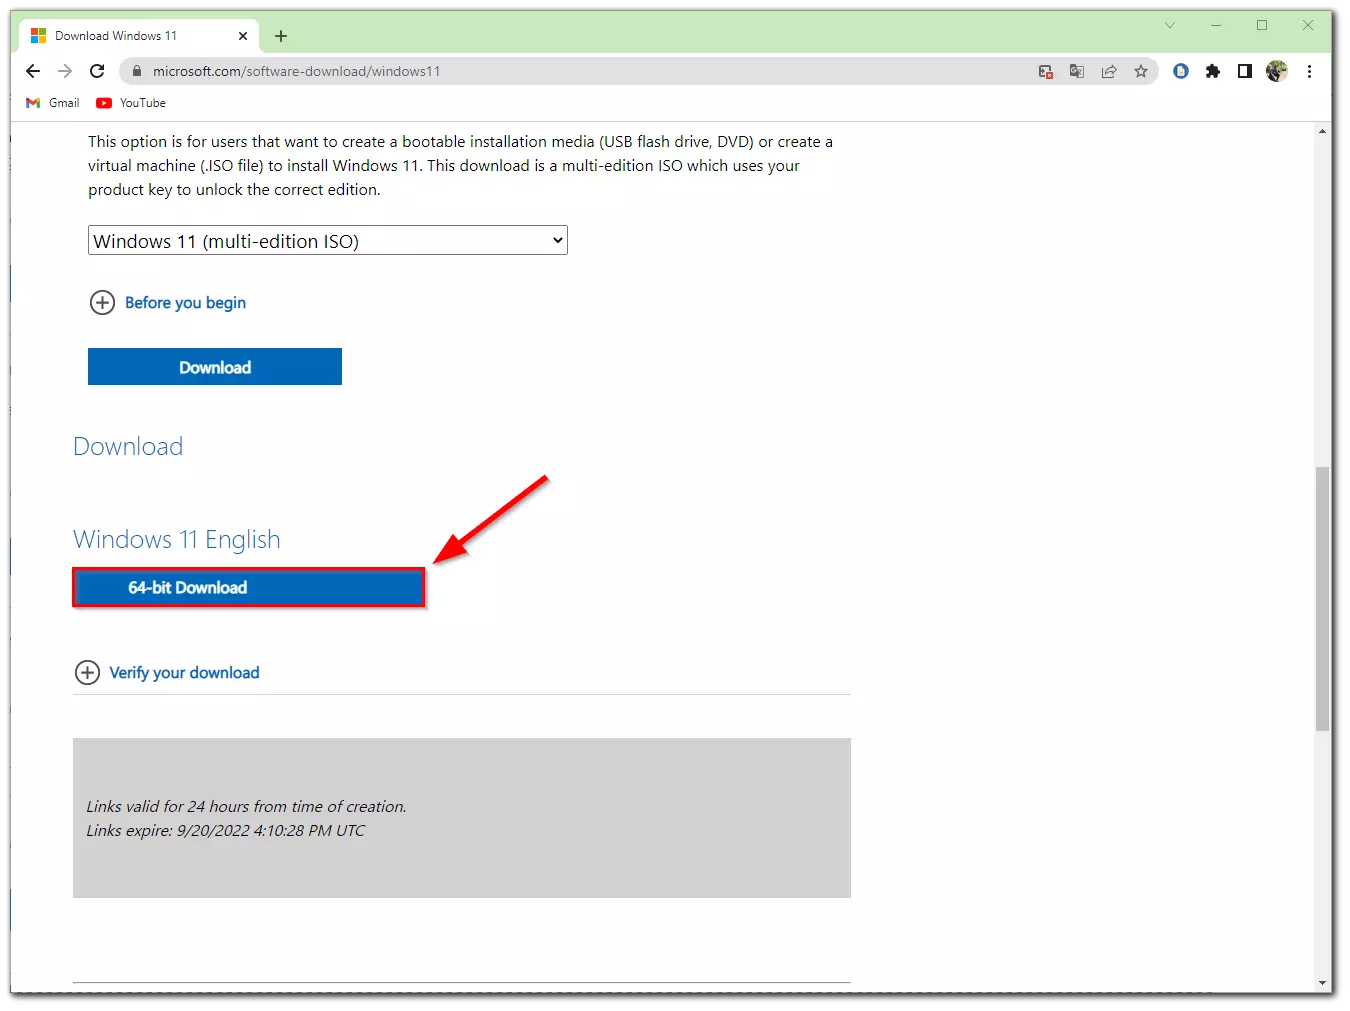
- Now Windows 11 ISO file will download on your PC.
How to create a Windows 11 bootable USB with the Rufus app
Rufus is a utility designed to format and create bootable USB sticks. This app is small (only 1.3MB) but works fast. You can download it from Rufus official site (Rufus.ie). To make a bootable flash drive with Rufus you need to:
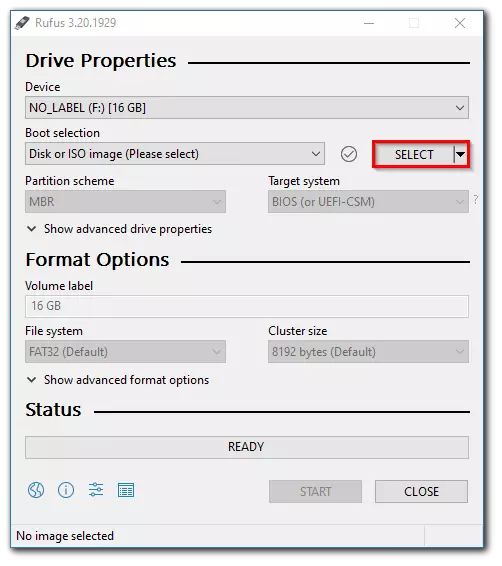
- In the Device window, select your bootable flash drive.
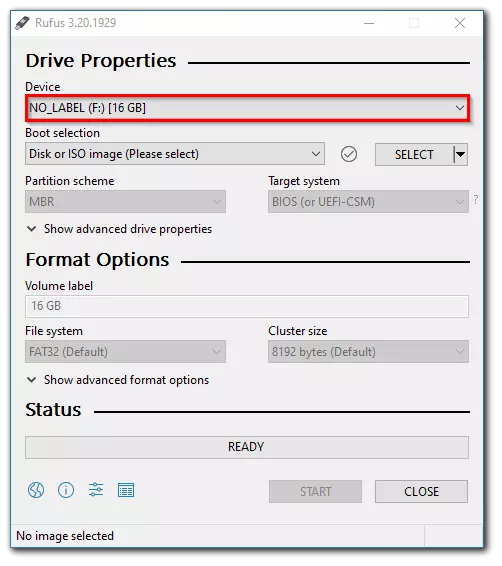
- Now you should click on the Select icon.
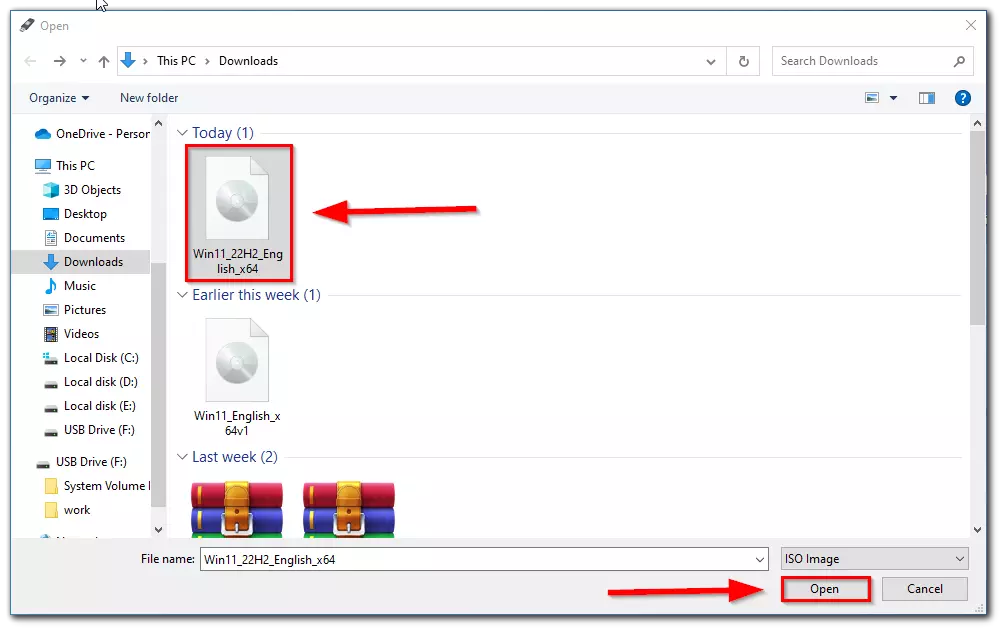
- Select the ISO file with Windows 11 downloaded from the Microsoft website. Сlick Open.
- The program will find the correct settings, and you just have to click Start.
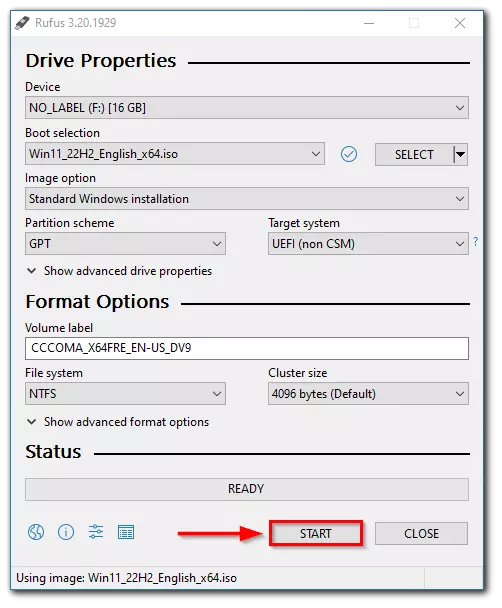
Confirm that you want to purge all data on your USB stick. In a few minutes, you can use your USB flash drive to install Windows 11 on your PC.


