
Google Docs is one of the most popular applications for writing and editing text documents. Its advantage is that it uses the cloud to store your documents and there should be no problem with losing documents. Plus, Google Docs offers its users a wide range of tools to use.
One of Google Docs’ features is Hanging Indent, which is a text formatting style often used in academic citations, bibliographies, and by people who just want a cool text effect in their document.
Why is this feature called “hanging indent”? The point is that the name appeared because of the way the text looks as a result. That is, when you use this feature, the top line of the paragraph is slightly forward because the other lines are moved a little further to the right. Thus you get the “hanging out” effect.
How to manage a Hanging Indento on Google Docs
In fact, you’re able to use three ways to create a hanging indent in Google Docs:
- Using a menu option
- Using a keyboard command
- Using the ruler tool
To make a hanging indent using the menu option, follow this guide:
- Add a document in Google Docs, and type the text which you want to make with a hanging indent
- Highlight the text that you want to have the hanging indent. This can be a sentence, a paragraph, multiple paragraphs, etc
- Click the Format menu
- Click Align & Indent
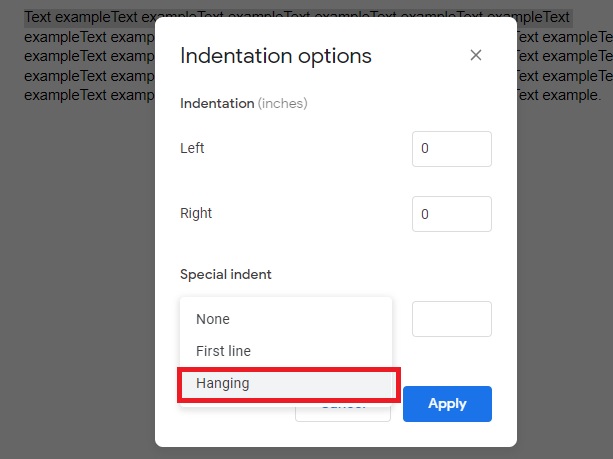
- Click Indentation Options

- In the Special Indent section, click the drop down and then click Hanging
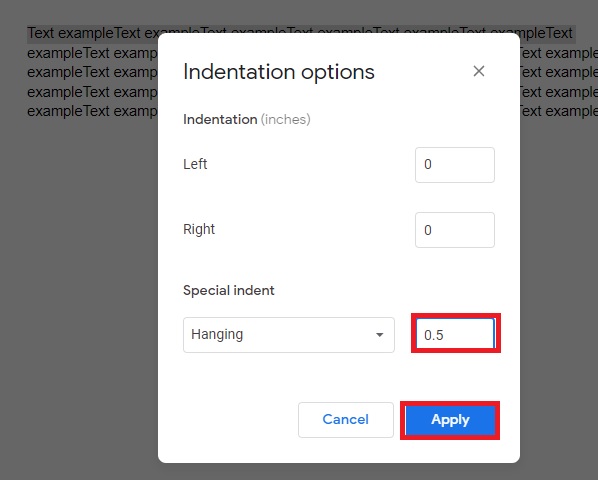
- Yoa can use the box to specify the amount of the indent in inches
- Then select Apply to get the hanging ident with your preferred setting
This way you can easily control the visual appearance of your text and control its position.
How to do a hanging indent in Google Docs via keyboard combination
In order to specifically highlight a line in the text, it is best to use a method that allows you to make a hanging indent through a keyboard combination. Here’s how to do it:
- Insert your cursor where you want to create the hanging indent
- Press Return + Shift at the same time to create a line break (this will be invisible)
- Then click the Tab key to ident the line
This is a useful option if you’re indenting the second line of a two-line section. However, this method is suitable for small documents because it requires manual input every time, so it may take some time if you have a lot of text.
How to do a Hanging Indent on Google Docs via ruler
The most standard way to create and apply a hanging indent quickly and accurately is to use a ruler. This is suitable when you have a large document and need to apply this function to many paragraphs. Here is a short guide on how to do it:
- Create a document in Google Docs and add the text you want to do a hanging indent on
- Turn on the ruler, if it’s not already showing (View > Show ruler)
- Select the text that you want to edit
- While using the ruler, click and drag the left-indent control (you will see a blue triangle). Drag it to where you need the hanging ident to be. Be careful not to accidentally select the margin control, as they’re very close to each other
- After that, select and drag the right-indent control (you will see the blue bar just above the blue triangle in the ruler). Drag this back to where the first line should start, often the left-has margin
- Once you’re done with dragging the text, you’ll see you have created the hanging indent
Now you know how to edit text and create hanging indents in Google Docs.


