iMessage is a very convenient service for communication using Apple devices. One of the advantages of iMessage is that all data is easily and quickly synchronized with each other. That is why if iMessage doesn’t sync on Mac can be a problem for any user.
Thus, iOS and macOS users can no longer rely on iMessage to send and receive messages between Apple devices signed with the same Apple ID via a cellular network or Wi-Fi network. If the messages and chats you sent from your iPhone or iPad, for example, aren’t showing up on your Mac, you should know how to fix it.
How to restart iMessage on Mac and iPhone?
Before you start fixing a situation where iMessage data doesn’t sync on the Mac, you should know that the cause may not just be in your Mac. So you will need to use all of your devices to fix it. For example, if you send messages using your iPhone or iPad and notice no data on the Mac, you will need to fix it on your iPhone and iPad too. Luckily, the steps and methods on your iPhone and iPad are identical since almost all settings are identical.
The easiest and most logical way to fix this is to restart iMessage on your devices. In my opinion, this is the very first thing you need to do to fix this problem. So to restart iMessage on Mac, you need to follow these steps:
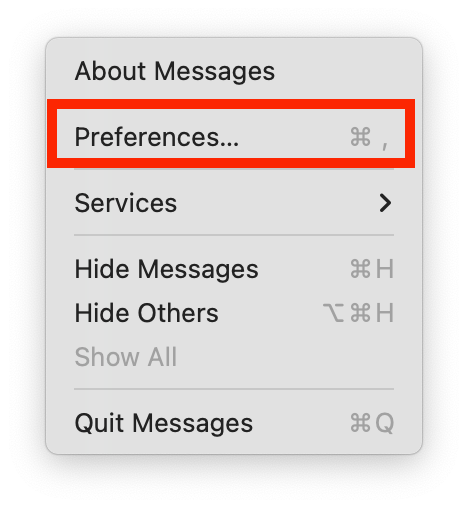
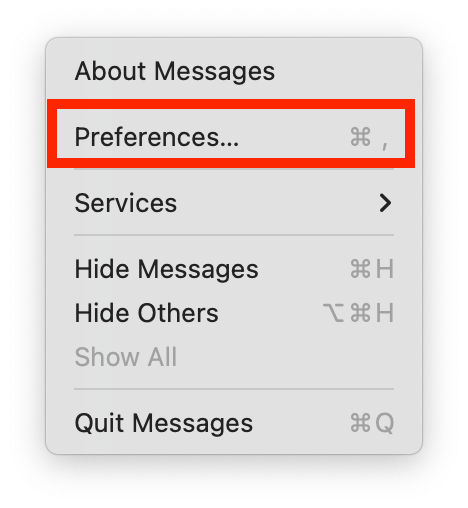
- The first step is to open the Messages app on the Mac, then click on Preferences at the top of the screen.
- Next, you need to select iMessage at the top of the window and click on Sign Out.
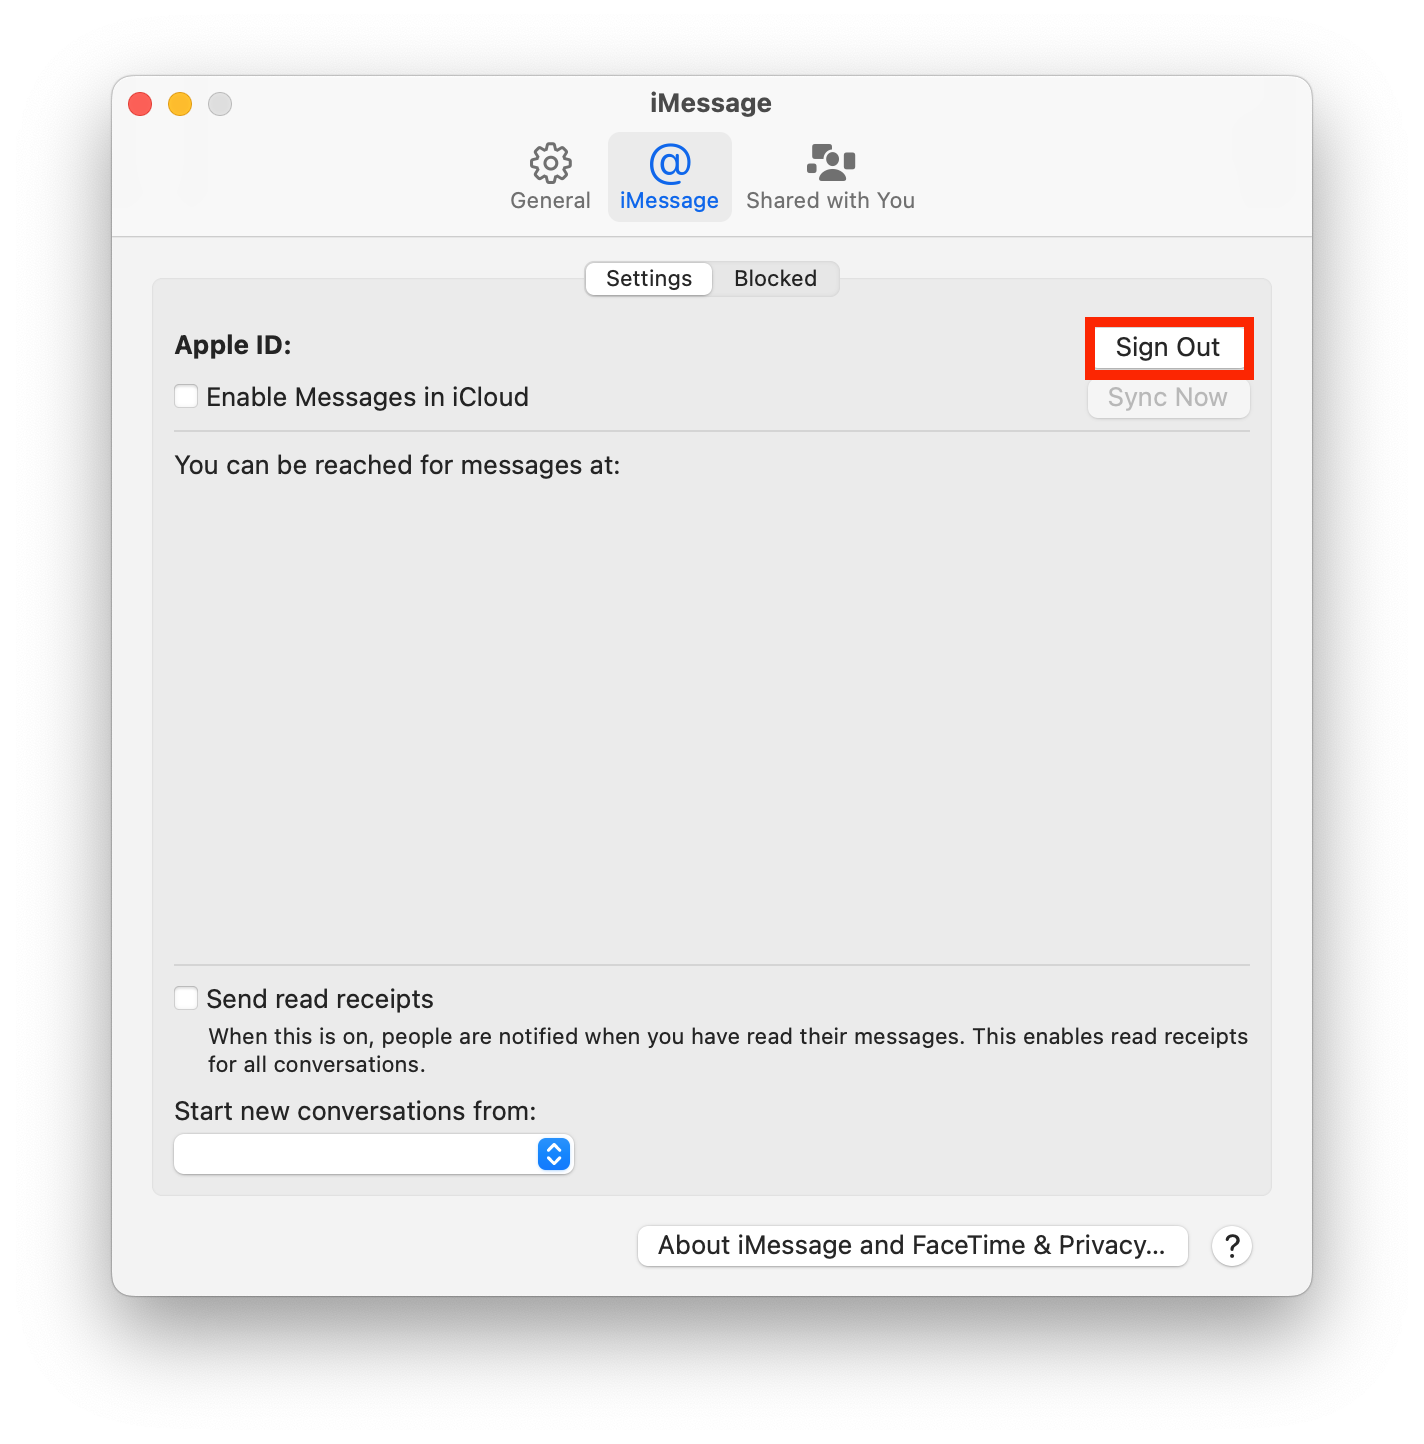
- Then sign in back again.
Then after these steps, you need to do the same on your iPhone or iPad. Since this information is shared and synchronized, you must restart iMessage on all devices. To restart iMessage on iPhone or iPad, you need to follow these steps:
- On your iPhone or iPad, you need to open the Settings app.
- Then select the Messages section.
- After that, drag the slider on the iMessage section so that it’s grayed out.
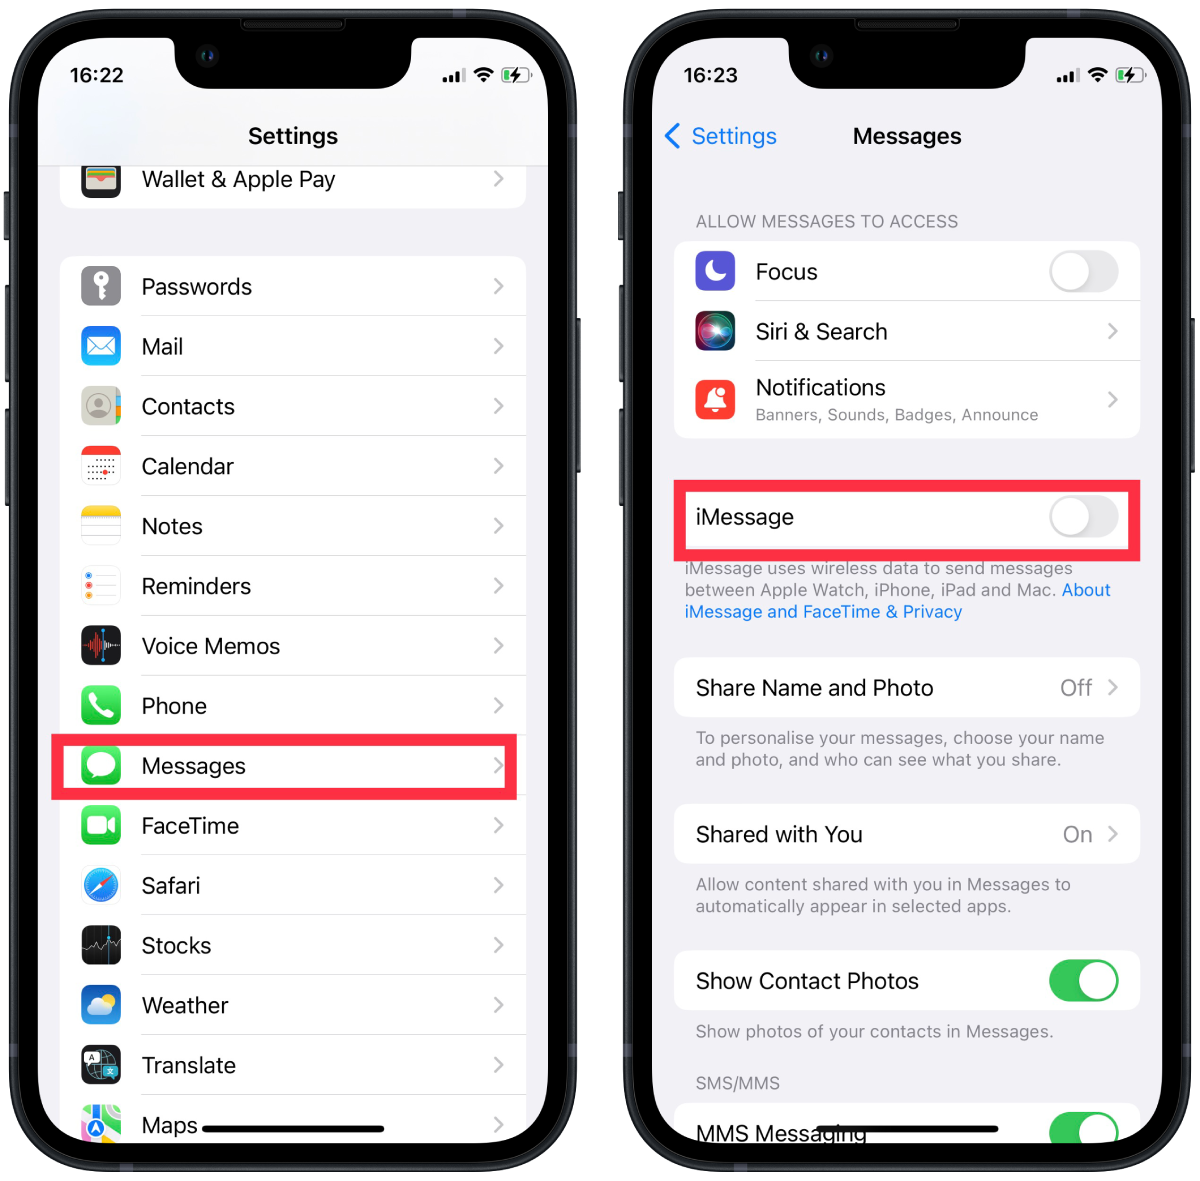
- Then enable this option back again.
After these steps, you need to test iMessage working on all devices.
How to check the iMessage settings on Mac?
In the settings on the Mac, there is one section that controls synchronization. That is, it works so that the window will display your phone number and e-mail, which are tied to your Apple ID. At this stage, you must ensure that all items are checked. If these items aren’t checked, it isn’t surprising that iMessage doesn’t work on the Mac. So to check the iMessage settings on Mac, you need to follow these steps:
- The first step is to open the Messages app, then click on Preferences at the top of the screen.
- After that, you need to select the iMessage section at the top of the window.
- Then in the section “You can be contacted to receive messages by address” make sure that your phone number and Apple ID match your iPhone settings and that these items are checked.
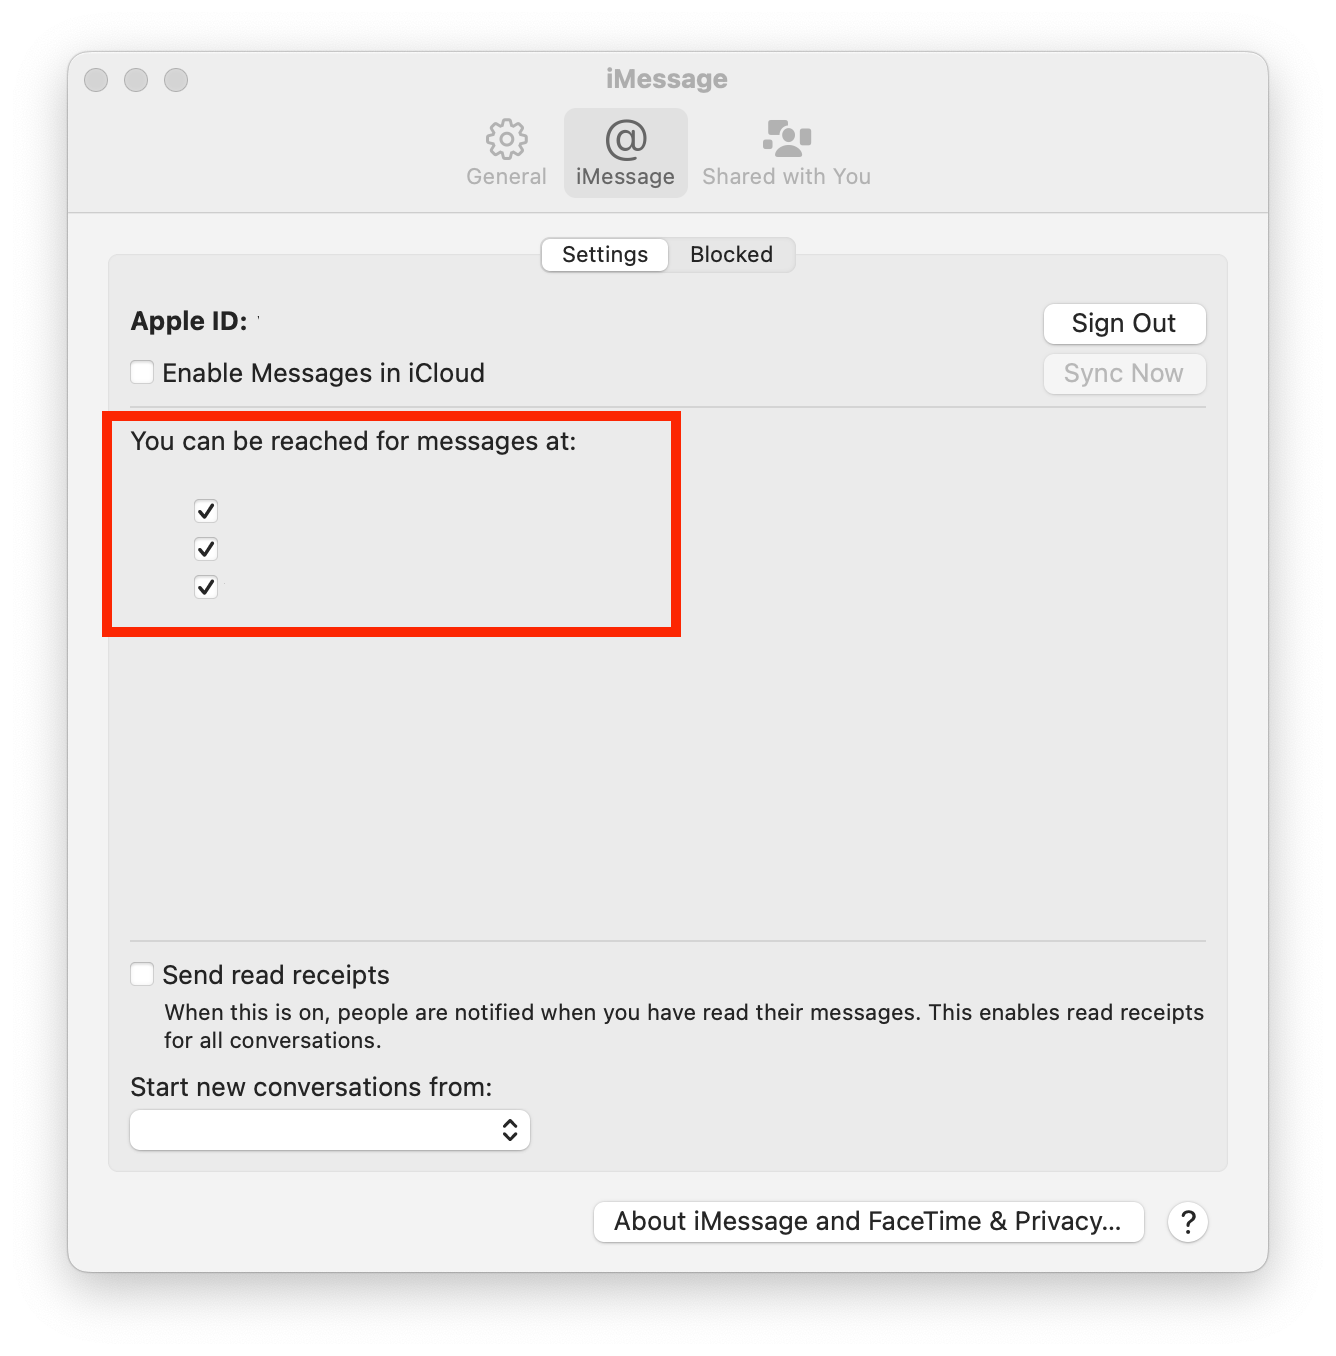
Your iPhone will default to the same data if you use the same Apple ID. So make sure that your phone number and email are the same as on your iPhone. This data must be the same.
How to sync the iMessage contacts on Mac?
Quite often, users are faced with the fact that contacts on Mac aren’t synchronized. To sync the iMessage contacts on Mac, you need to follow these steps:
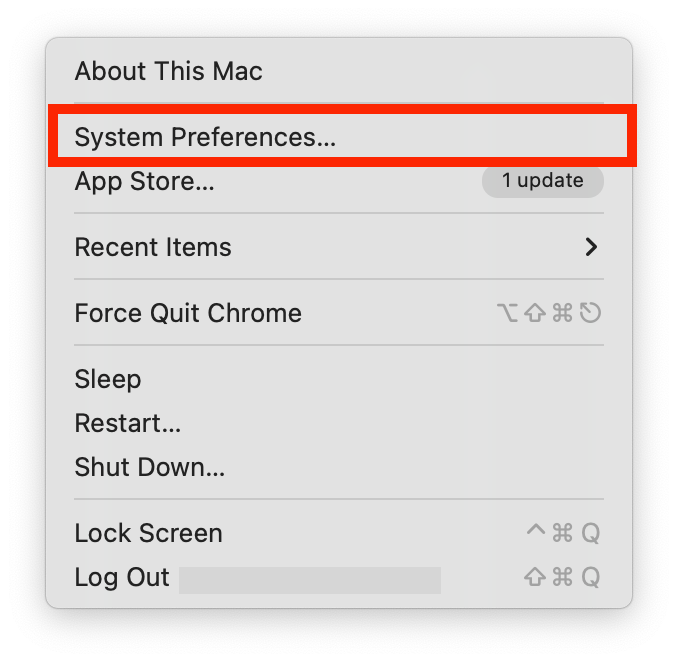
- The first step is to сlick on the Apple icon in the menu bar.
- After that, you need to select from the System Preferences list.
- Next, open the Apple ID section.
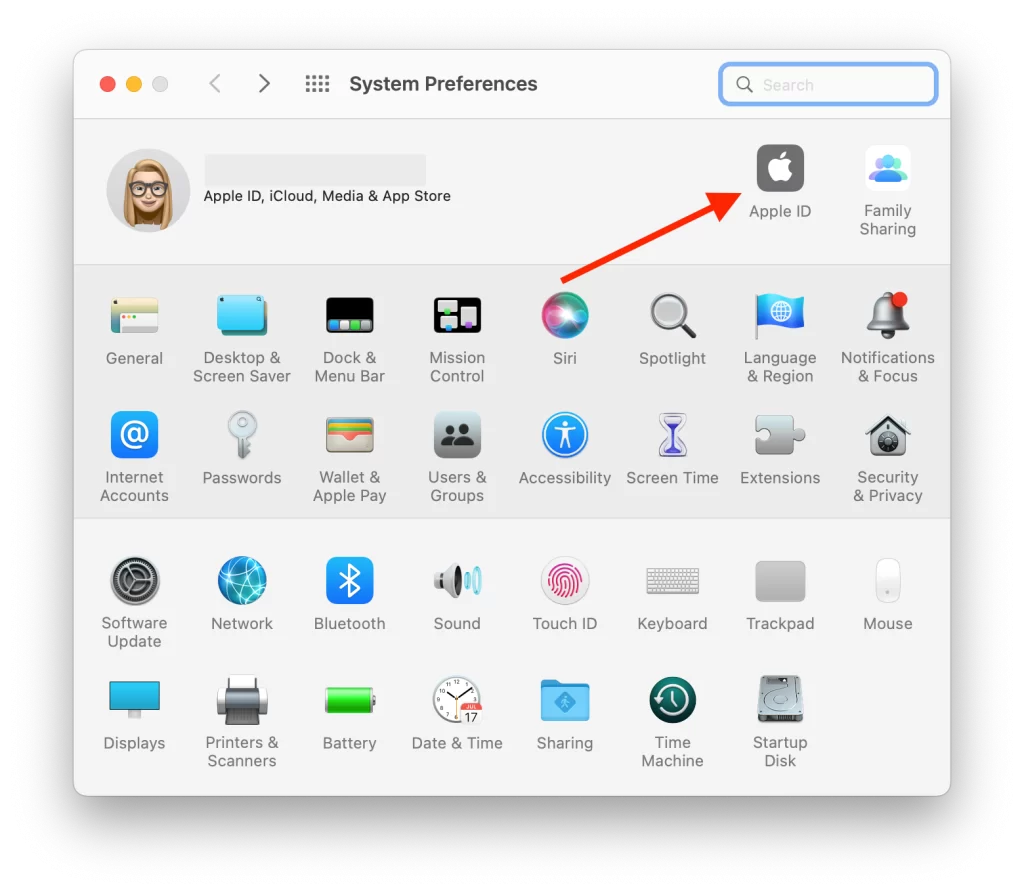
- Then you need to select the iCloud section on the left side of the screen, then after that, on the right side of the screen, you need to scroll to the Contacts section and check this box.
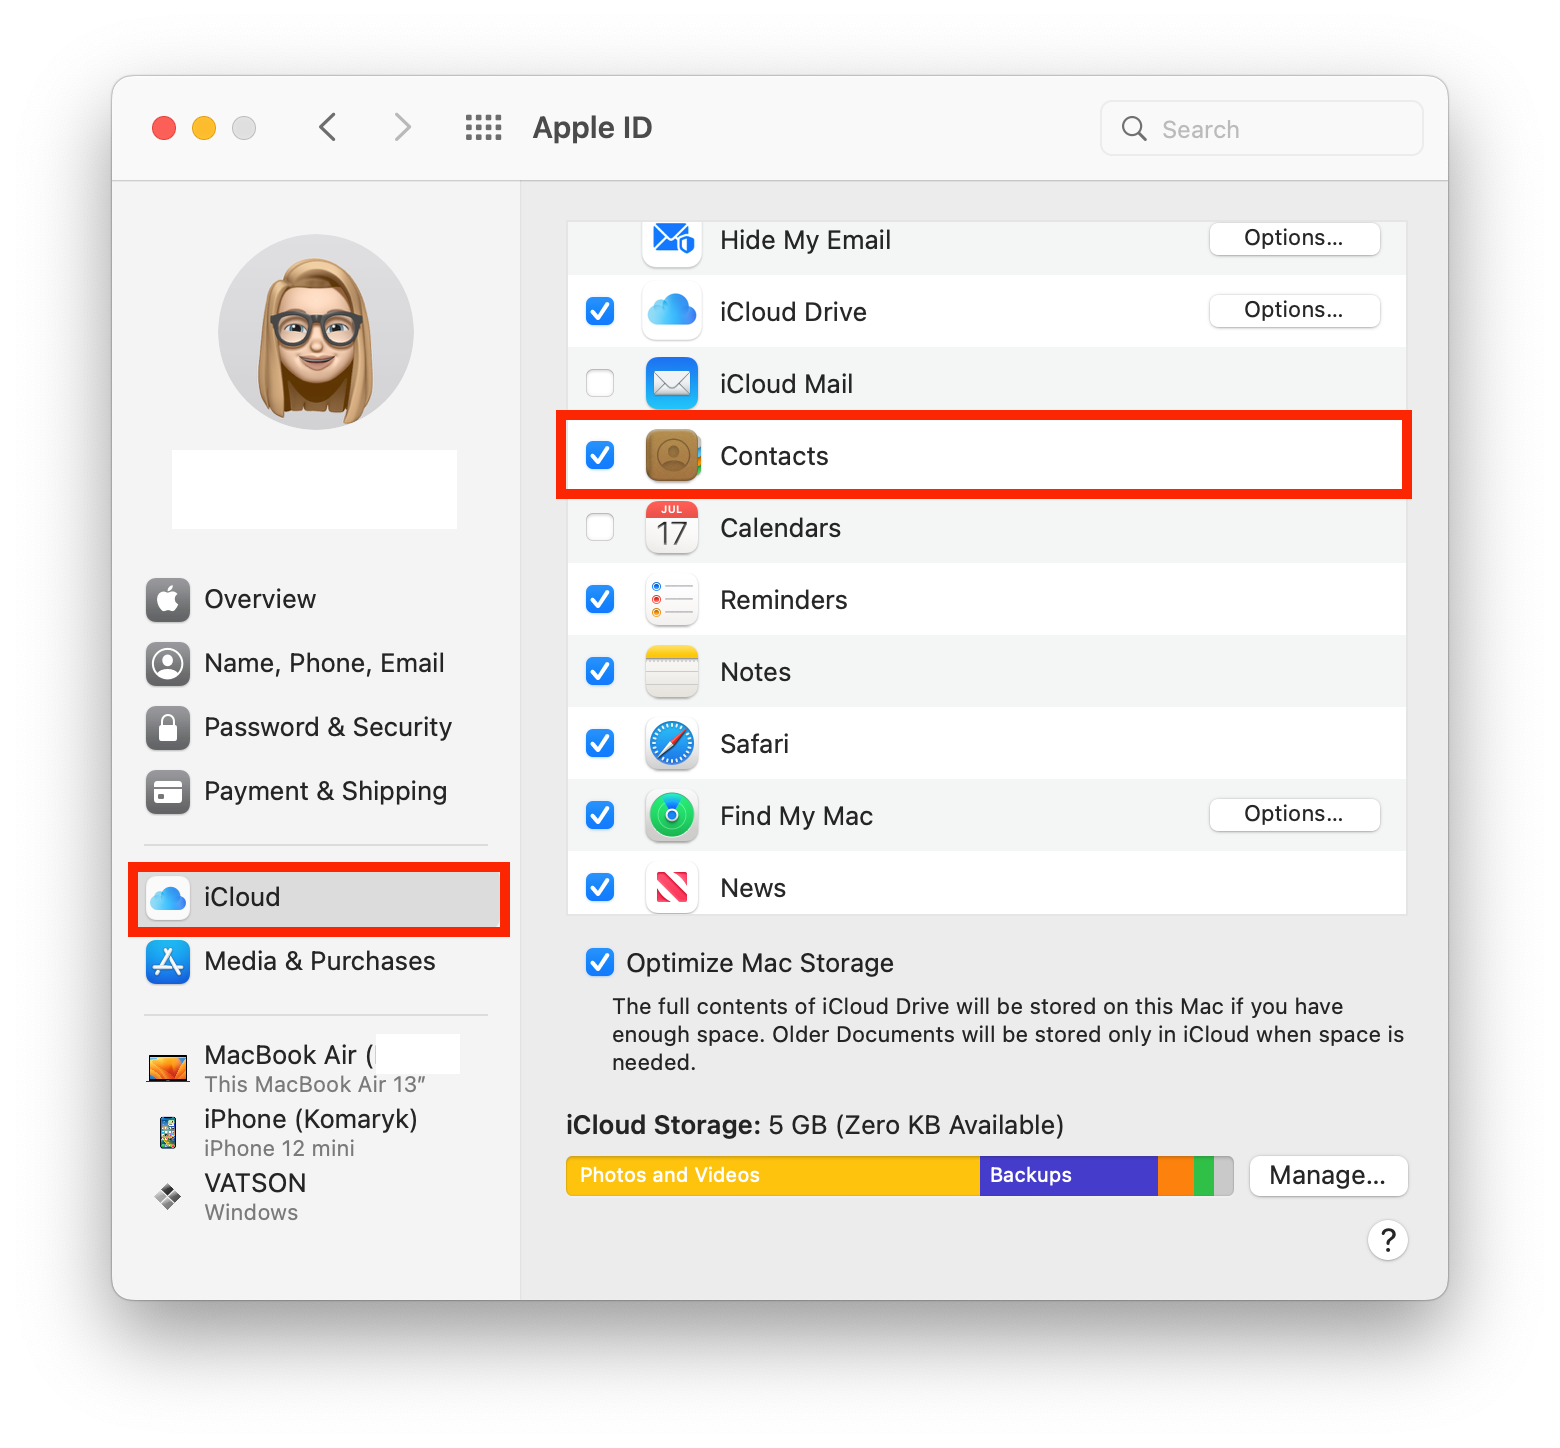
The most important thing for this function to work properly is enabling it in the settings, exactly what you did in the first point. The second equally important thing is the operation of devices on the same Apple ID. These are the basic and basic points that you must adhere to iMessage sync on Mac.


