
Windows 11 is the most popular and newest operating system today. It has earned its popularity because Windows 11 is the most affordable and compatible with most software. Moreover, Windows 11 is the most powerful operating system for regular users, which gives you almost unlimited functionality. Since this operating system has many services and tools that work in parallel and handle many processes, Windows 11 can often have bugs or errors. For example, users often encounter the IRQL_NOT_LESS_OR_EQUAL error in recent times.
This error is related to the memory on your device and corrupted files that can affect the performance of your system. However, you should not run out and buy a new hard disk or take your computer to a repair shop. There are a few simple fixes that anyone can do that will help you fix the IRQL_NOT_LESS_OR_EQUAL error without interfering with your PC’s hardware. Let’s take a closer look at how this works and what you need to do.
What does IRQL_NOT_LESS_OR_EQUAL error mean in Windows 11?
Let’s first find out what error IRQL_NOT_LESS_OR_EQUAL is and for what reasons it can occur in Windows 11. If you are not interested in more detailed information about this error’s causes and the cases you might encounter, you can skip to the next section of this article. There you will find more detailed information on how to fix this error and what you need to do to do it.
Let’s find out what words in IRQL_NOT_LESS_OR_EQUAL mean. First, you should know that IRQL means “Interruption Request Line”; this is what Windows usually assigns to bugs that need an urgent solution. This error occurs when a device driver requests access to memory addresses that do not have the necessary permissions and access rights. That is the reason why we see NOT_LESS_OR_EQUAL in the sequel. This part of the error signals insufficient access rights. Let’s look at the most frequent reasons for the IRQL_NOT_LESS_OR_EQUAL error:
- System files corruption.
- Outdated drivers on the device.
- Malfunction in the hardware that is requesting memory access. The problem can also be related to corrupted RAM after replacing it.
- Problem with software installation. This means that the software was corrupted when installed and does not work correctly.
As you might have realized, all of these causes are related to external devices you connect to the computer and interact with. This problem is also directly related to your device’s memory, so most of the fixes will be related to it. Let’s move on to IRQL_NOT_LESS_OR_EQUAL error fixes.
What to do to fix IRQL_NOT_LESS_OR_EQUAL error in Windows 11
Let’s now look at the fixes you can use to fix the IRQL_NOT_LESS_OR_EQUAL error quickly. I recommend you try the fixes from this list one by one to find the one that can help you. To fix IRQL_NOT_LESS_OR_EQUAL, you will need the following:
Run Startup Repair
First, you will need to start your computer in Safe Mode. This will help you avoid errors and conflicts within your Windows. It’s pretty easy to do, but you should follow the instructions precisely so that you don’t accidentally click on something unnecessary and damage your computer. To do this, you need to:
- Click on the Start menu.
- Here, select the power button.
- Hold down the Shift key and click Restart.
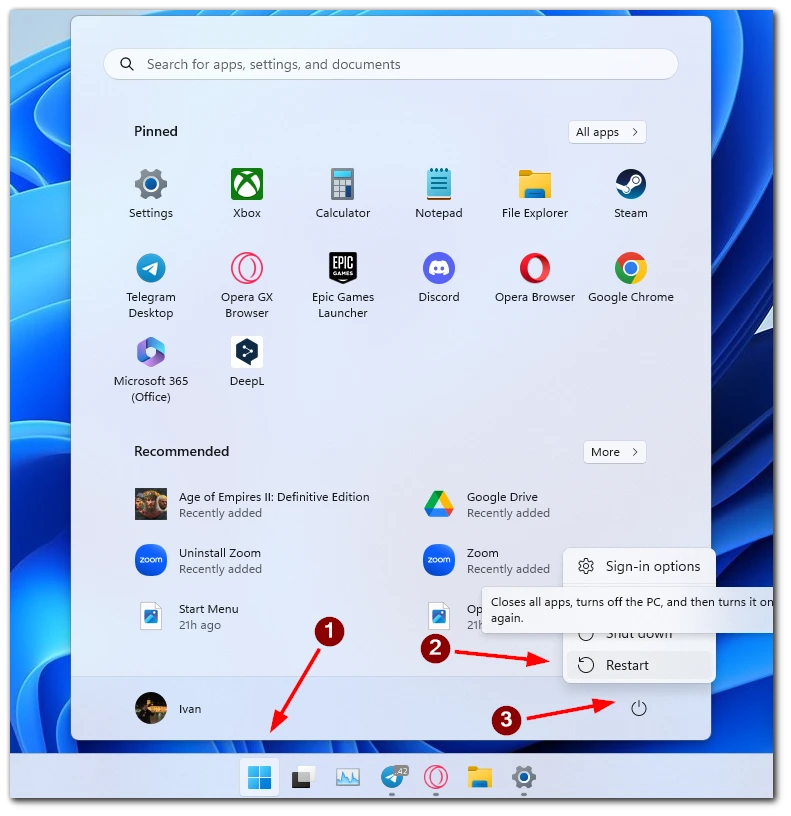
- In the menu that appears, select Troubleshoot.
- Then you need to click on Advanced options, then choose Startup Repair.
- Your computer will run diagnostics and try to find errors. Wait for this process to finish.
- Click on Advanced options.
- Here again, select Troubleshoot and Advanced options.
- Click on Startup Settings and click on Restart.
Please note that in this case, your computer will start in safe mode, and some applications may not work correctly or may not work as you expect. You can also select Uninstall Updates in the Advanced options to revert to a previous version of Windows if the problem started after the upgrade.
Run diagnostics on your PC memory
Often the problem is caused by corruption in your computer memory. You can use a tool to diagnose your computer memory to find and repair them. To do this, you will need to:
- From the Start menu, type memory diagnostic and launch the Windows Memory Diagnostic app.
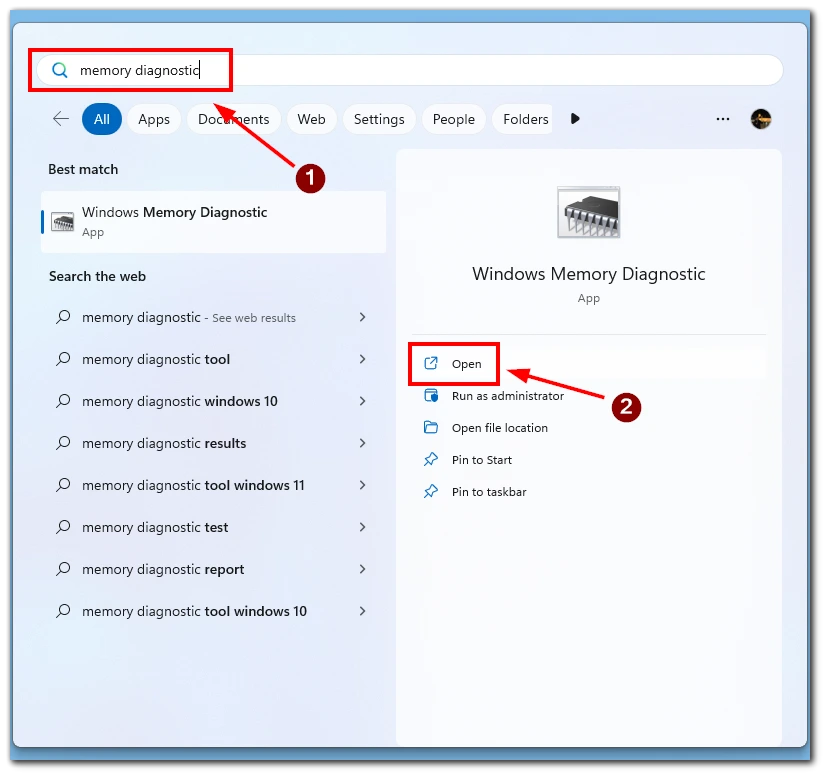
- When the menu opens, select Restart now and check for problems.
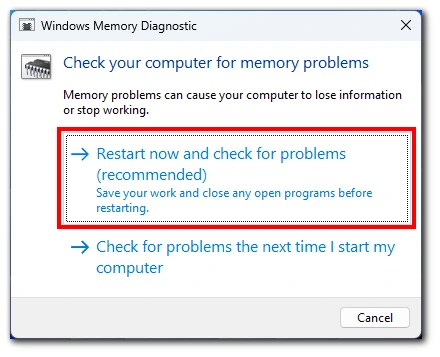
Your computer will restart, and the system will run a memory diagnostic. If a problem is found, you will receive a report when you restart your computer.
Update your device drivers
If you notice that the error occurs when you use a specific device, you can update its drivers. This may be the problem. To do this, you need to:
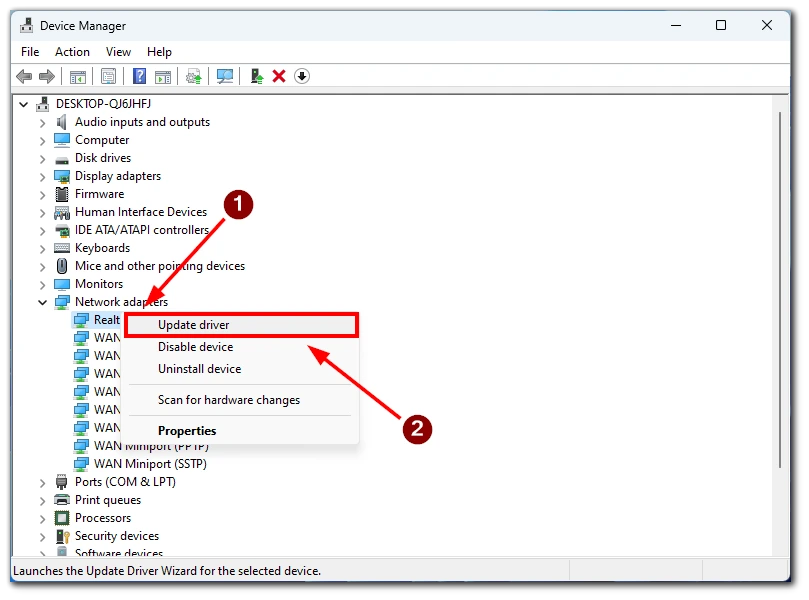
- From the start menu, type Device Manager and open the appropriate application.
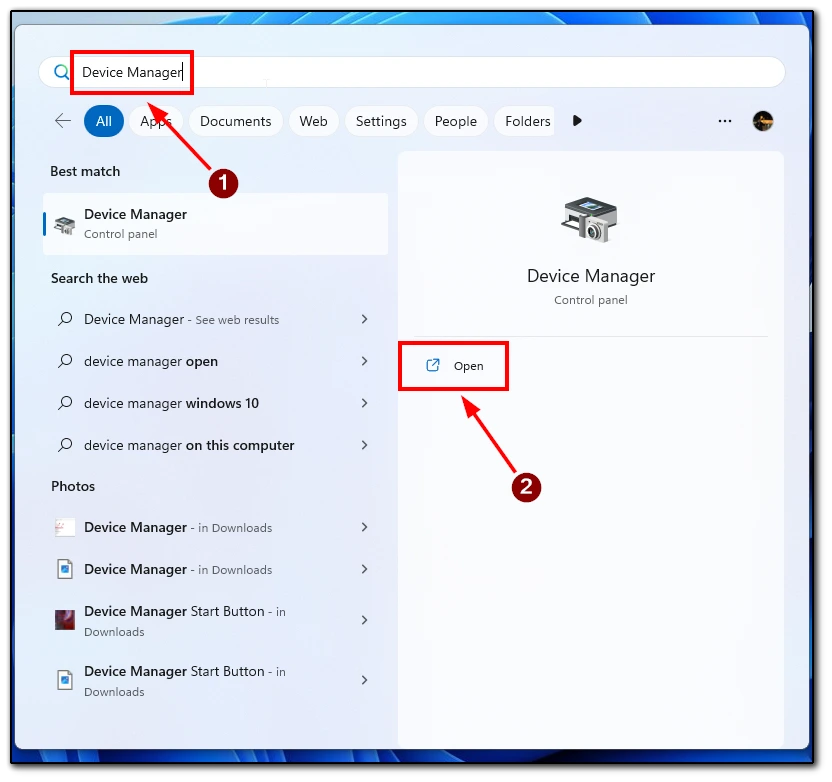
- Find the device you want in the list and right-click on it.
- Select Update Driver.
- Select Auto Update or Manual Update.
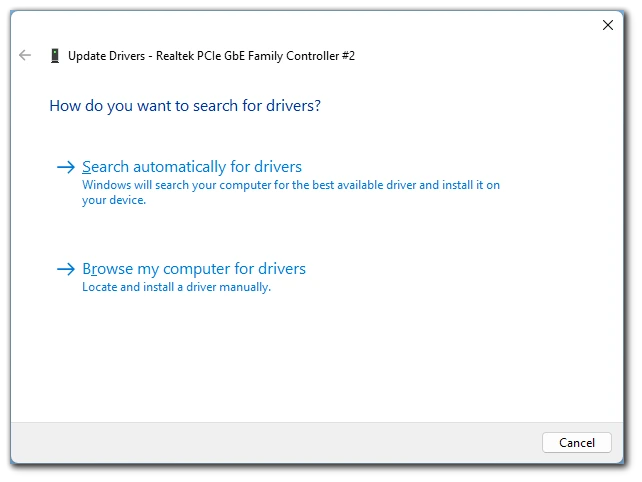
- Restart your computer.
Please note that Windows can’t always find all up-to-date drivers by itself, so you might want to check the manufacturer’s website.


