In today’s world, Zoom plays an important role in many people’s lives. Using this platform, people can hold meetings with loved ones, conduct interviews, call colleagues, or hold meetings with subordinates. At such times, the Zoom app must run smoothly. But many Zoom users faced with a fairly common problem – ‘Zoom failed to start the video camera’.
If someone has such an error, it is impossible to participate in a video meeting fully. Such an error is displayed with users on computers. Therefore, figure out what causes camera errors using Zoom and then in the correction methods.
Why may it have camera errors using Zoom?
There are several common reasons why Zoom users have trouble connecting a camera during a meeting. Of course, if you fail to connect your camera during a meeting, you can continue talking to people, but you will only be heard in that case.
Most of the time, users see a ‘Zoom failed to start video camera’ error because they don’t have permission to use it. It works the same way with the microphone. After installing the app, users click to deny access to the camera and microphone.
This can also be because the wrong device is selected in the Zoom app. This can be solved quite easily and quickly. Sometimes the cause is in the drivers. So follow the following universal methods that will help you fix it.
What to do to fix ‘Zoom failed to start video camera’?
Even if you haven’t figured out the reasons for camera errors using Zoom, you should follow universal methods to fix them. Here are the steps to fix it using both Windows and macOS. So follow each of the methods to solve the problem and be able to use Zoom to its full potential.
Allow the Zoom app to use the camera on Mac
The most common reason you can have camera errors using Zoom is that you have not given the app access to the camera. After you install the Zoom app and open it for the first time, a popup window appears asking if you want the app to have access to the camera. Many people, out of habit, select Don’t give access, perhaps without even noticing it. In this case, open Settings and allow the Zoom app to use the camera. To Allow the Zoom app to use the camera on Mac, you need to follow these steps:
- The first step is to click on System Preferences.
- After that, you need to select the Security & Privacy section.
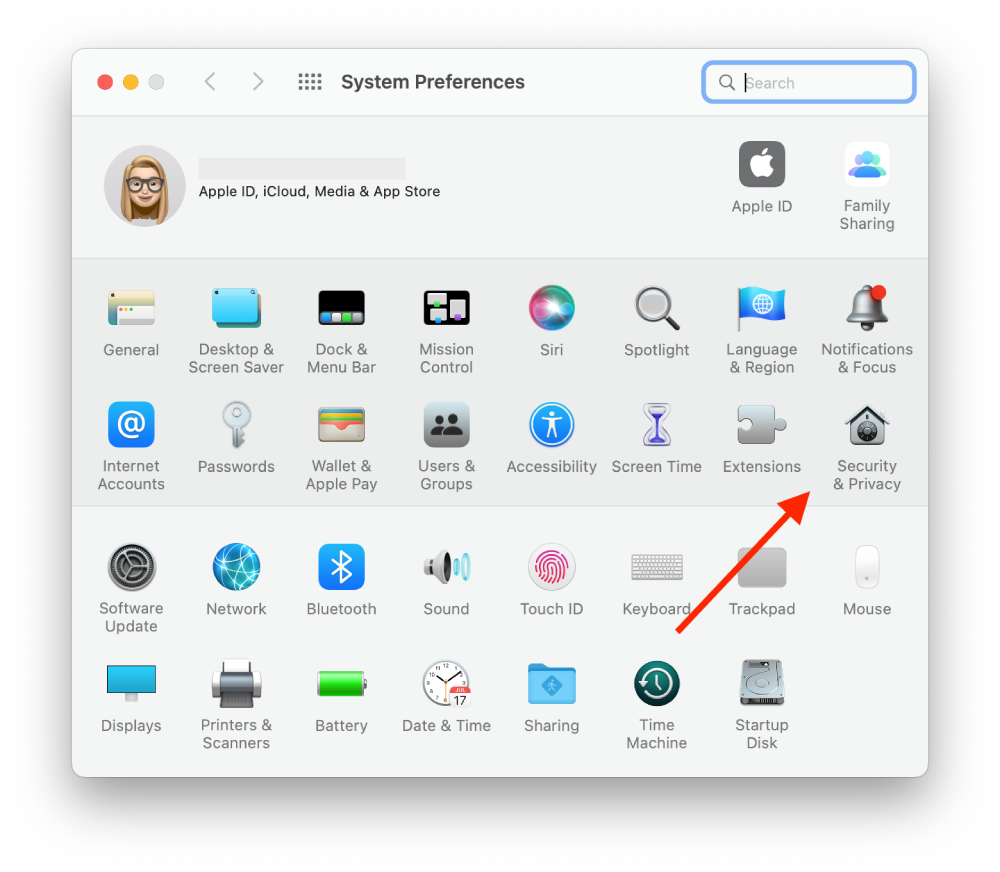
- Then select the ‘Privacy’ tab and the Camera setting from the left panel.
- Then scroll down on the list to find Zoom and ensure it’s enabled.
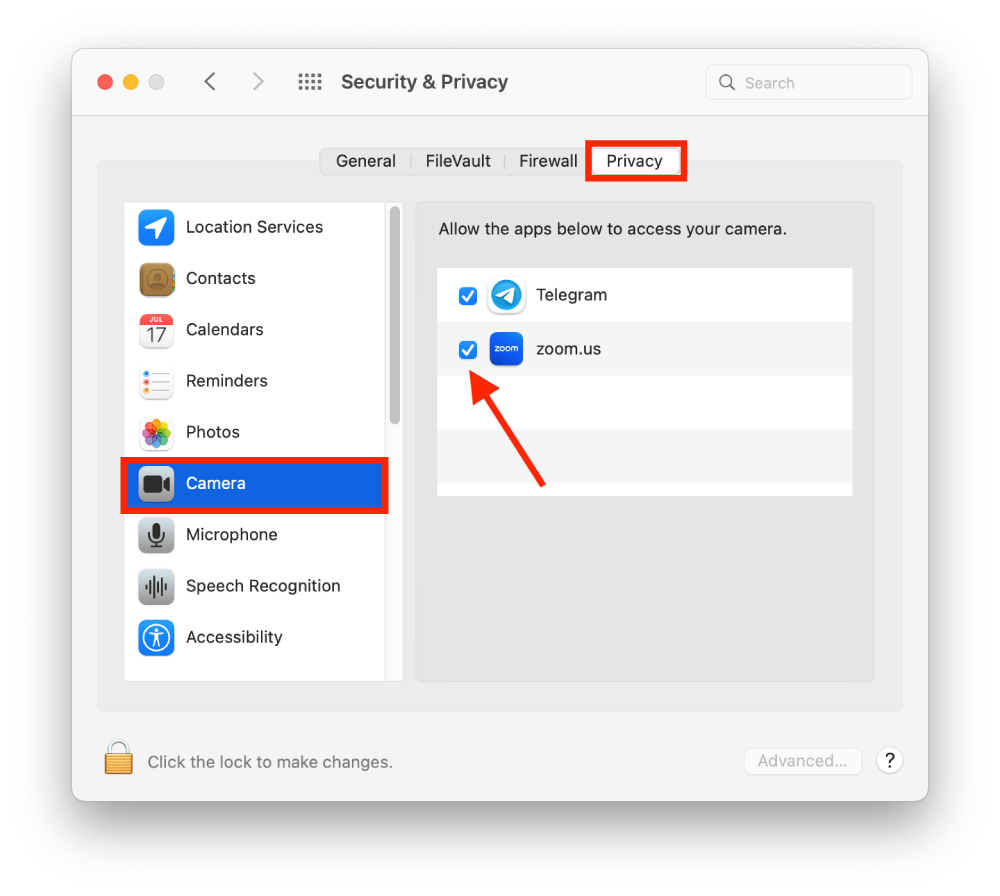
After these steps, open the app and test the Zoom work during the video meeting.
Allow the Zoom app to use the camera on Windows
If your PC also has a problem with camera errors using Zoom, you need to Allow the Zoom app to use the camera on Windows. For that, you need to follow these steps:
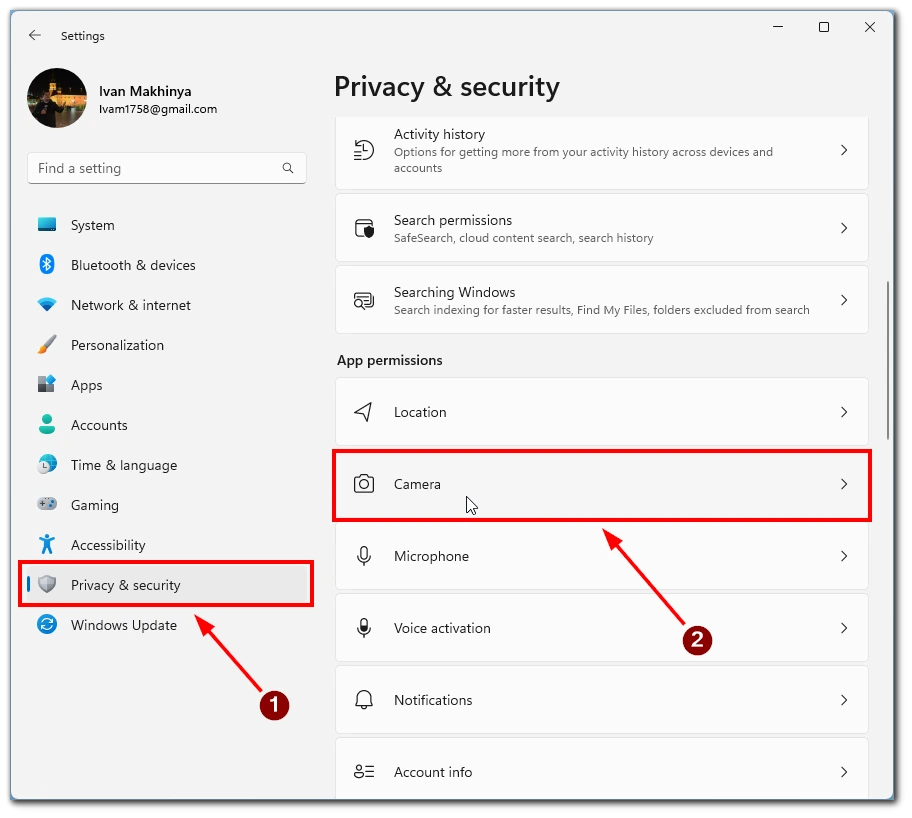
- The first step is to open Settings on your PC by pressing Start or the Win + I key combinations.
- Next, you need to click on the Privacy & security tab.
- After that, the next step is to click on Camera.
- Then a list of all apps will open before you, and you need to find Zoom and mark it enabled.
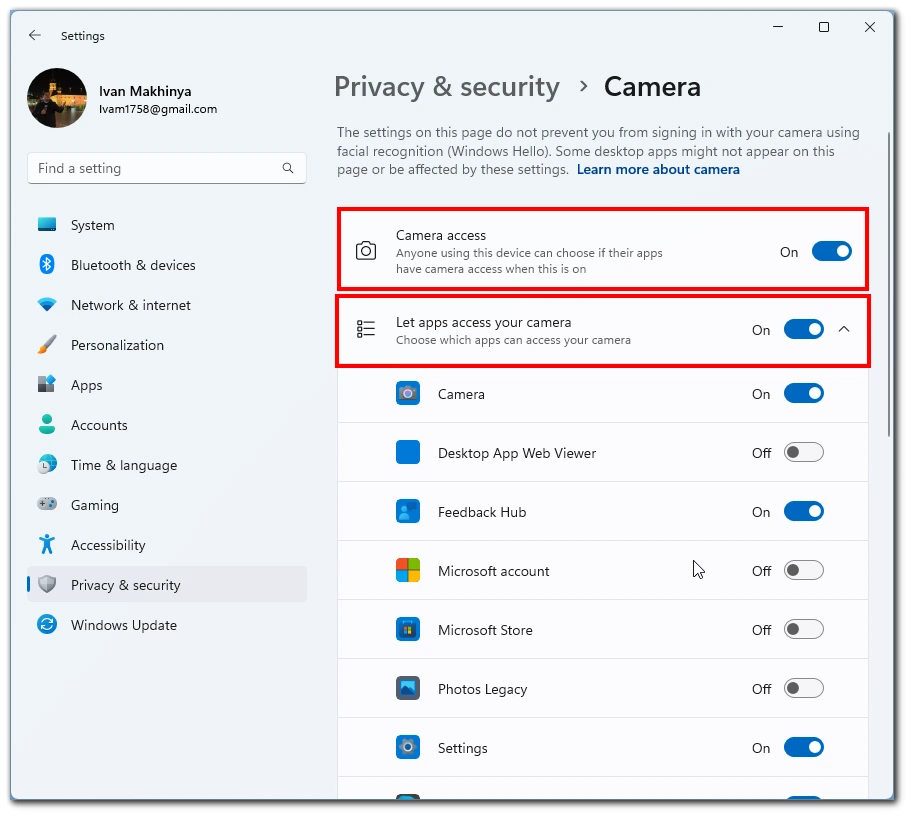
Once you’ve checked that Zoom isn’t blocked in the list of apps available for the camcorder, you’ll need to check to see if it works.
Select the correct camera in the Zoom settings
You should also try to correct this situation by selecting the correct input device in the Zoom app. The steps will be the same for Windows and macOS. So you need to follow these steps:
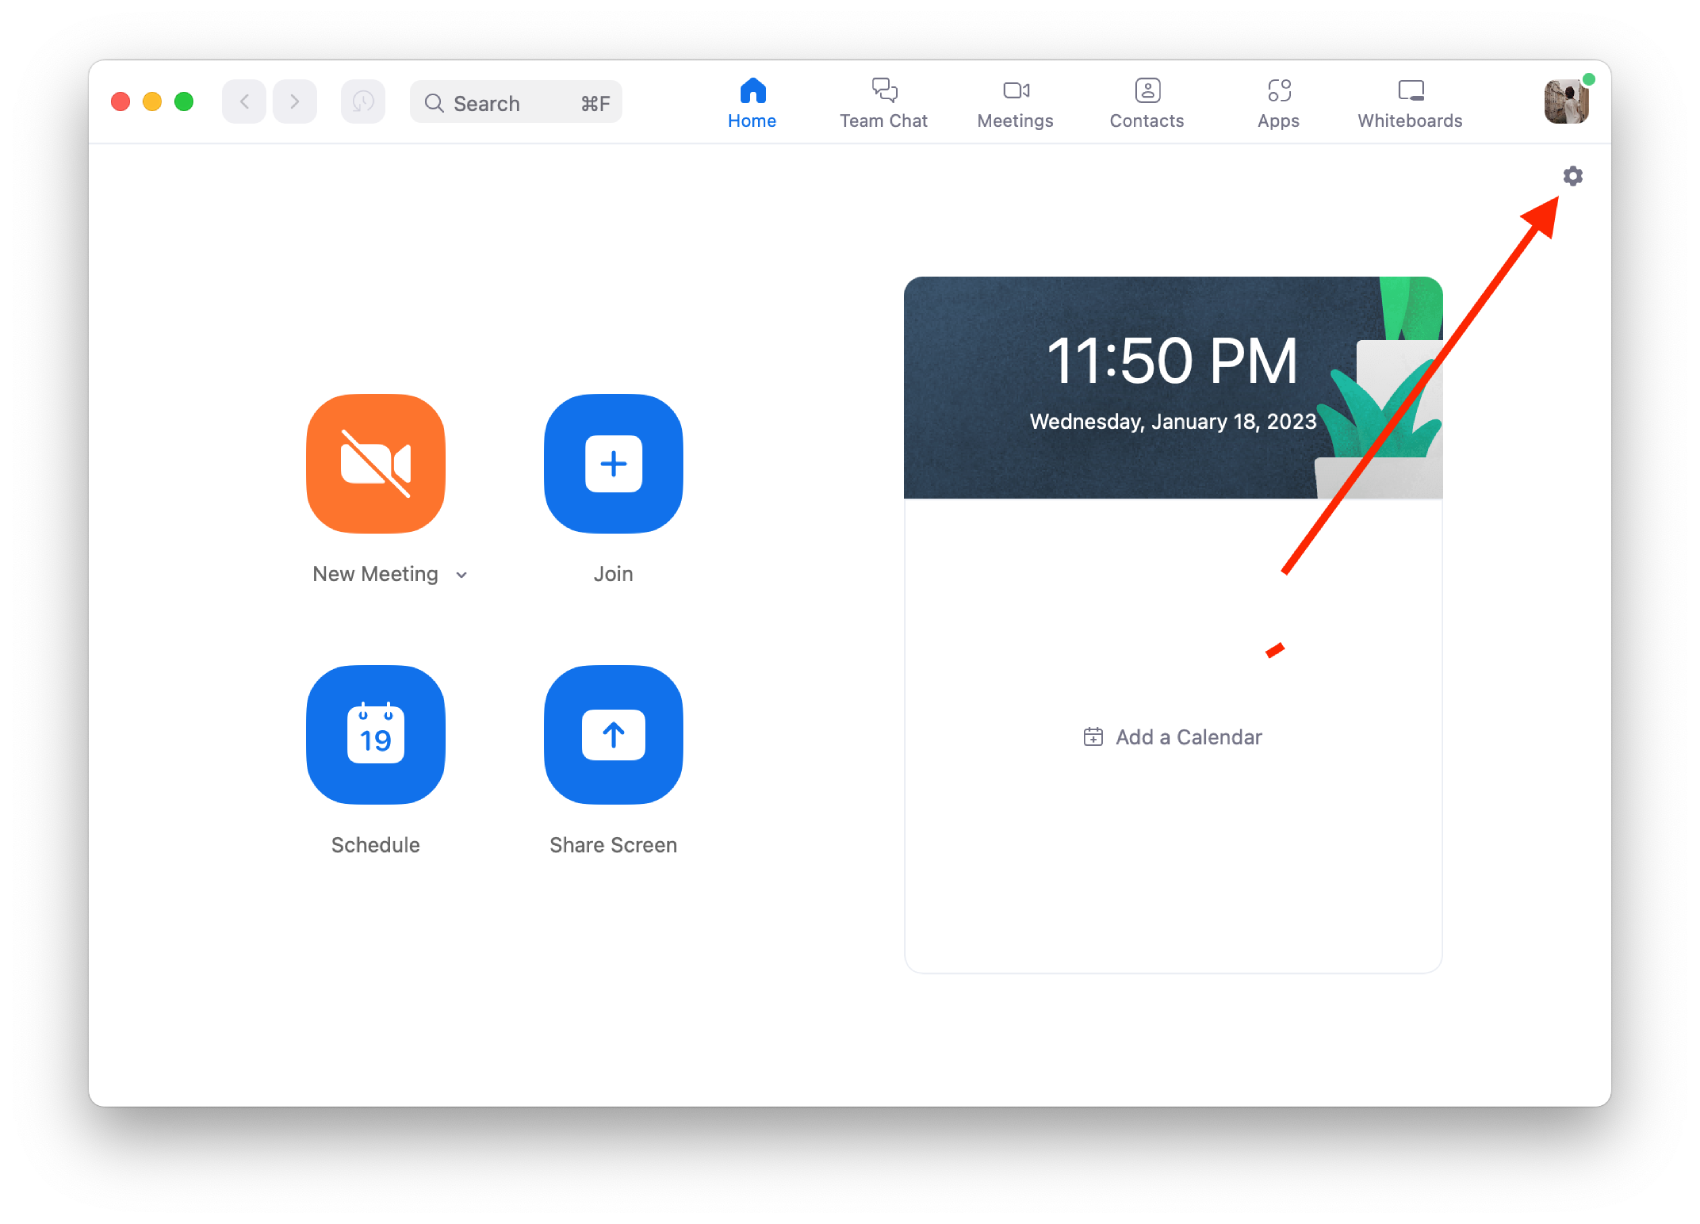
- The first step is to open the Zoom app.
- Next, click on the gear icon in the upper right corner.
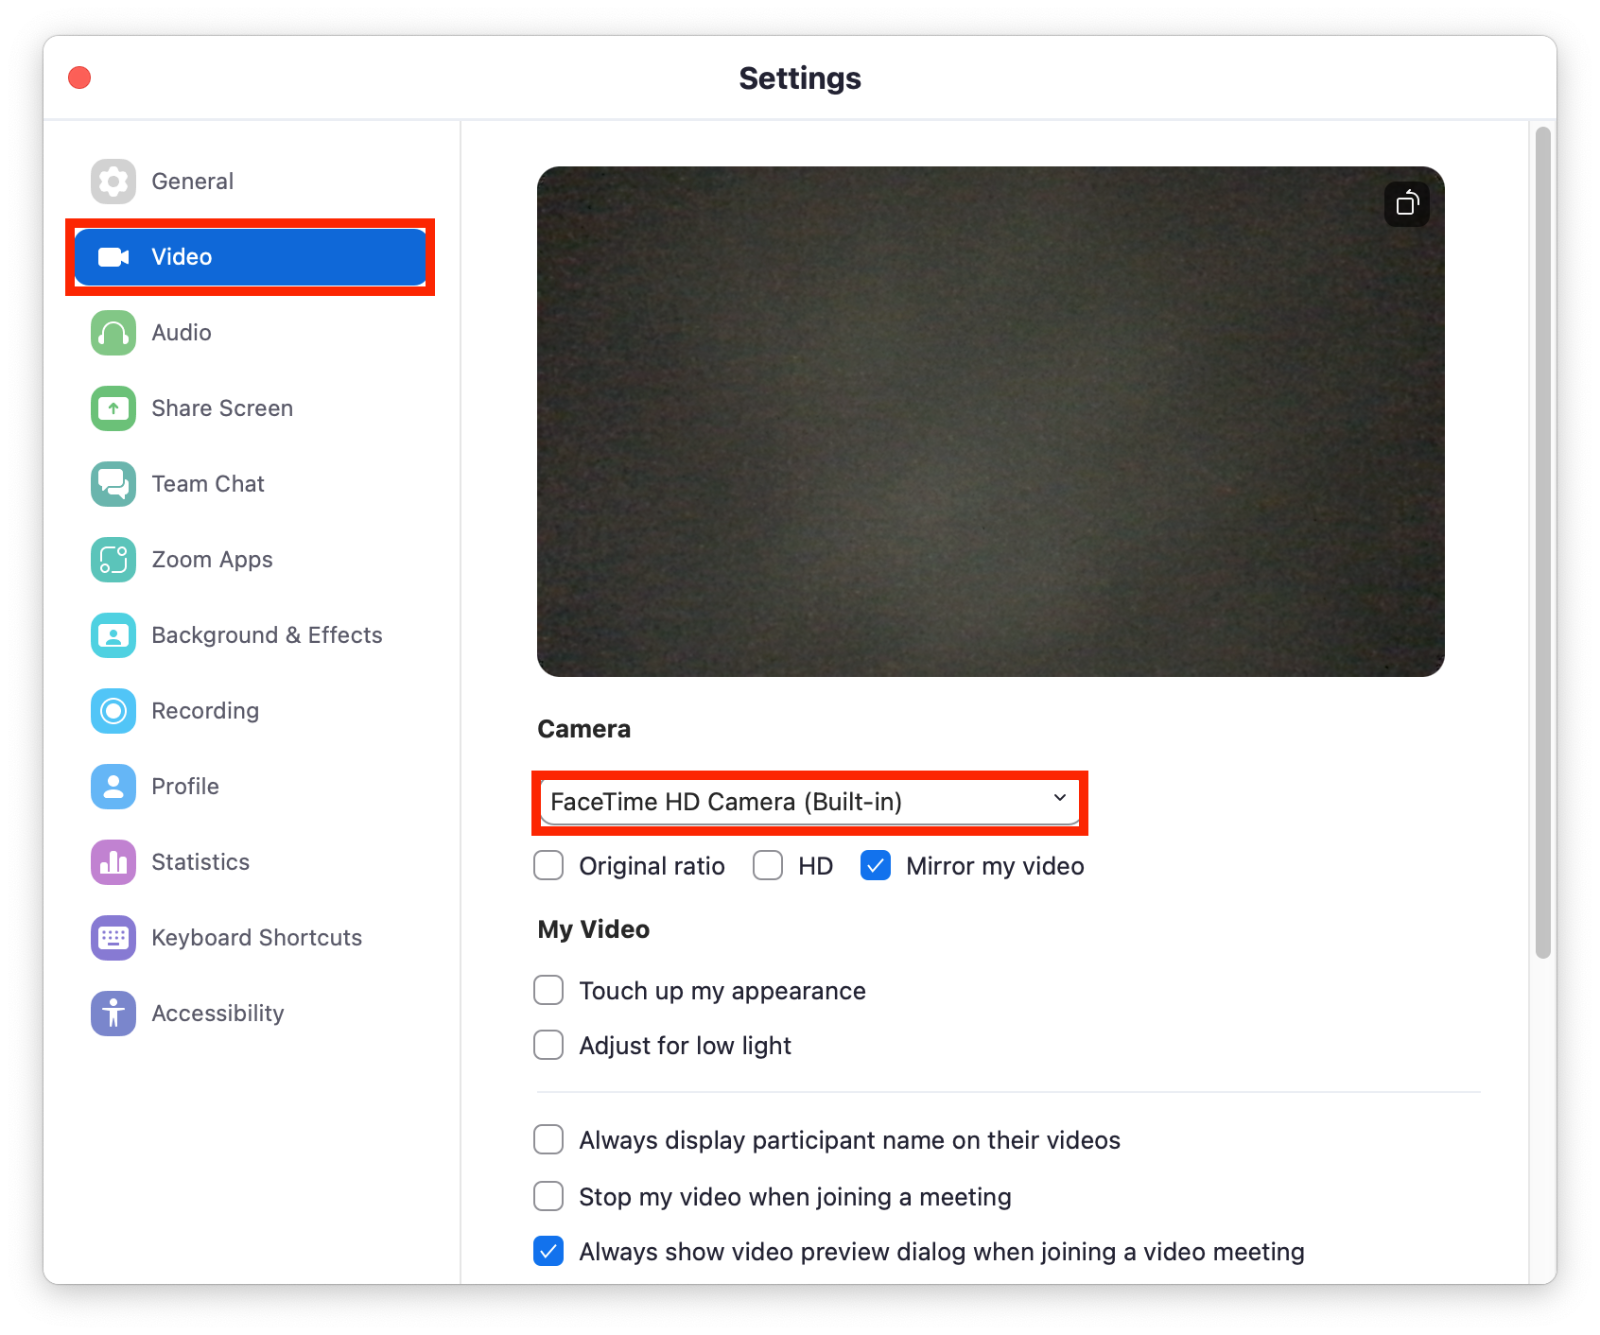
- Then select the Video section.
- Also, select the device you want under the Camera tab in the drop-down menu.
Upgrade your camera driver on Windows
The same reason you have camera errors using Zoom may be a problem with drivers. This solution is quite common and often solves the problem. All you need to do is to download the latest drivers for your webcam. To do this, you need to use one of the driver update programs. Follow the link to your webcam manufacturer’s website and follow the steps.


