
Nowadays, most people take a lot of pictures every day. This happens for many reasons, some are addicted to social media and want to share their lives. Others use this tool as a source of income. Regardless, everyone wants to take the best quality photos possible. There’re times when some may want to flip a picture on their iPhone to get it mirrored. Fortunately, it’s easy enough to do.
What to do to flip a picture on your iPhone to get it mirrored
It took Apple quite a few years to add a mirror-image switch to its camera settings. The user can now choose between a mirror image or an unmirrored photo from their front camera. This new and useful setting is available on any iPhone and iPod touch devices with iOS 14 software, as well as iPads compatible with the iPadOS 14 updates. Before iOS 14, images taken with the front camera had an original, non-mirrored composition.
As a result, your photo was exactly what the camera saw when it was taken, not what you saw on the viewfinder. So in other words, when you take a picture and look at your image in the front camera, you see a mirrored reflection of yourself. However, when you press the shutter button, the resulting image is reversed. That way it shows you what the camera actually sees, not the mirror image.
It’s actually quite easy to set up your iPhone so that the camera captures whatever you actually see. Just pay attention and make sure that the photo doesn’t look ridiculous because the image will be upside down. This can happen when there’re captions or trademarks in the photo. However, this is rather an exception, and most often the mirror image is good for you. There’re many ways to flip a photo so that it’s a mirror image.
What steps to take to get the front camera to take mirror photos on its own
You can change the settings, you only need to make a couple of clicks to have your selfies automatically in the mirror image. That way you don’t need to edit the photo after you’ve taken it. So for your selfies to be automatically mirrored, you need to follow these steps:
- The first step to do this is to open the Settings app on your iPhone. Use the search bar by swiping to the right or search for the app yourself.
- Next, you need to scroll down and find the ‘Camera’ section.
- Once the ‘Camera’ section is open in front of you, find the ‘Composition’ sub-item.
- The next step is to drag the ‘Mirror front Camera’ slider. It should be displayed in green.
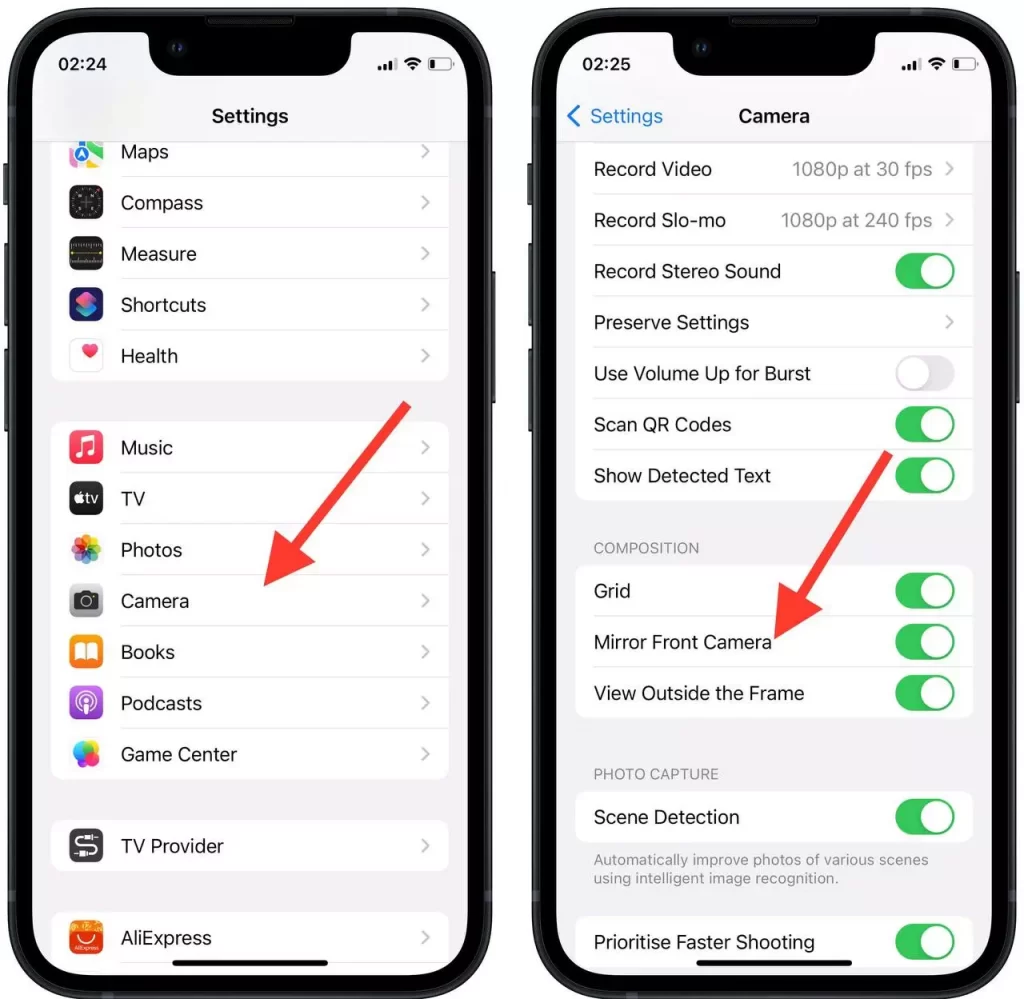
From now on, the Camera app will save selfies in mirror mode. In other words, the photo you take with the front camera will now match what you saw on the viewfinder. As you took those selfies, rather than being saved in an unreversed view.
What steps to take to manually flip a photo on your iPhone to get it mirrored
If you find yourself in a situation when your photo is ready. However, you think that you need to flip the photo so that it becomes a mirror image, using the settings there is a way to do it quickly. To do it, follow these steps:
- The first step is to open the default ‘Photos’ app on your iPhone.
- Next, in the gallery of your photos, select the desired one.
- After that, when you have opened the photo, click on it to display all the actions that can be done with it.
- In the upper right corner, click on ‘Edit’.
- Once you have clicked on ‘Edit’, a window will open in which you can edit your photo.
- You need to click on the third icon below, which is placed to the right of the ‘Done’ button.
- After this click in the upper left corner on the icon that shows a triangle with an arrow.
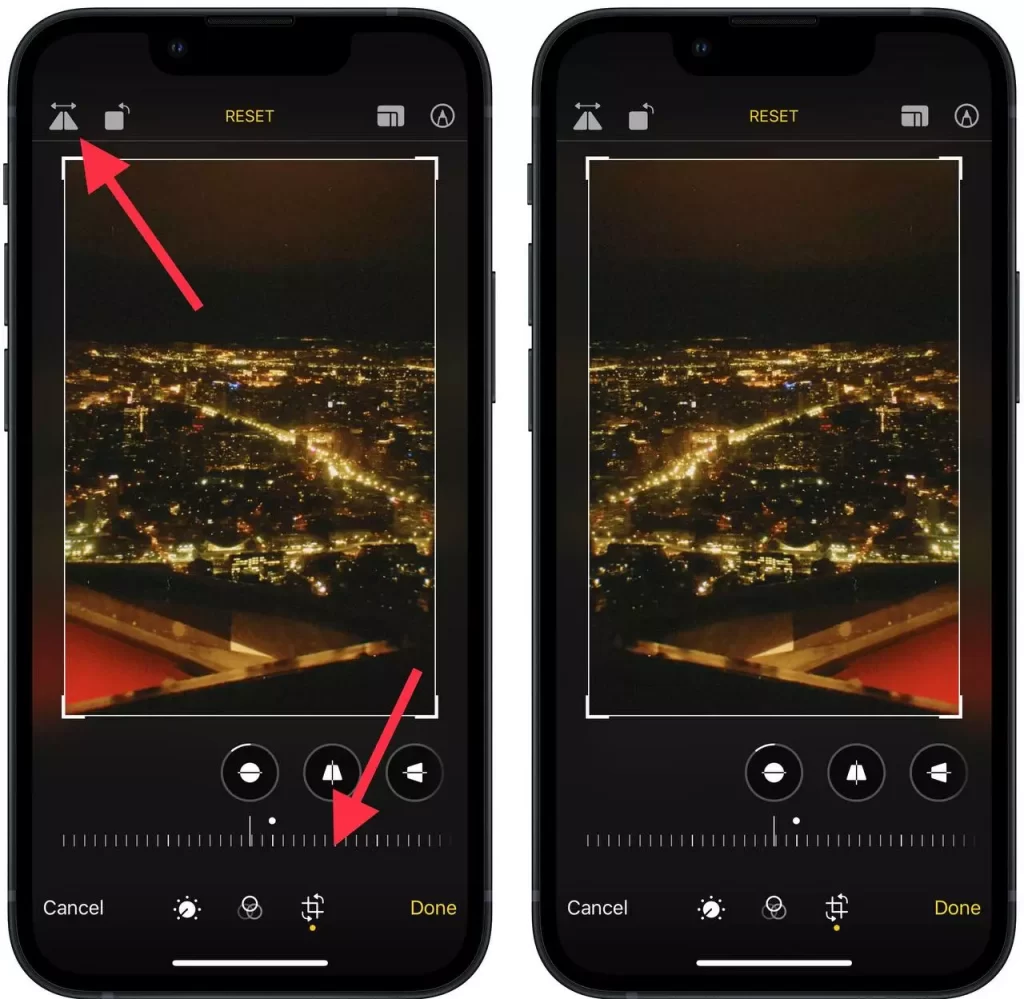
After these actions, your photo will be instantly mirrored. However, there’re also ways to flip a photo on your iPhone to make it mirror-like. If you need to make more adjustments to your photo to save time you can use other photo editing apps such as Snapseed, Flipper, Movavi, and others.


