There may be many situations when you need to transfer Google Photos to iCloud. If this happens, you will need to do some simple steps, but you should expect that uploading files from Google Photos may take some time. At the same time, figure out which is better than Google Photos or iCloud.
How to download all photos from Google Photos?
Using this method of uploading data from Google Photos you can apply it for many purposes. With this method, you can download data from Chrome, Calendar, Drive, Google Play Books, Hangouts, YouTube and YouTube Music, and many other Google products. So to download all photos from Google Photos follow these steps:
- The first step to uploading all the photos you need to open the account settings in Google.
- After that, select the ‘Data mad Privacy’ section and go to the ‘Google Takeout’ section.
- Then you need in the window ‘Export Data’ to check the box next to ‘Google Photos’.
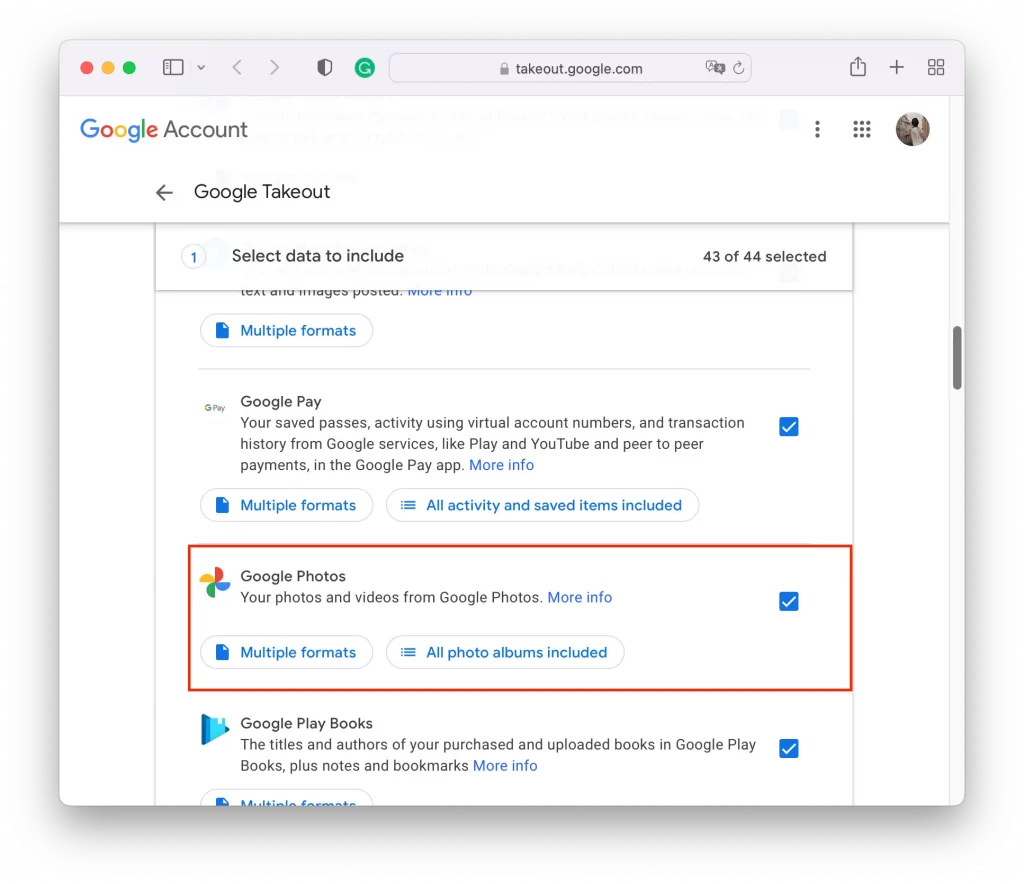
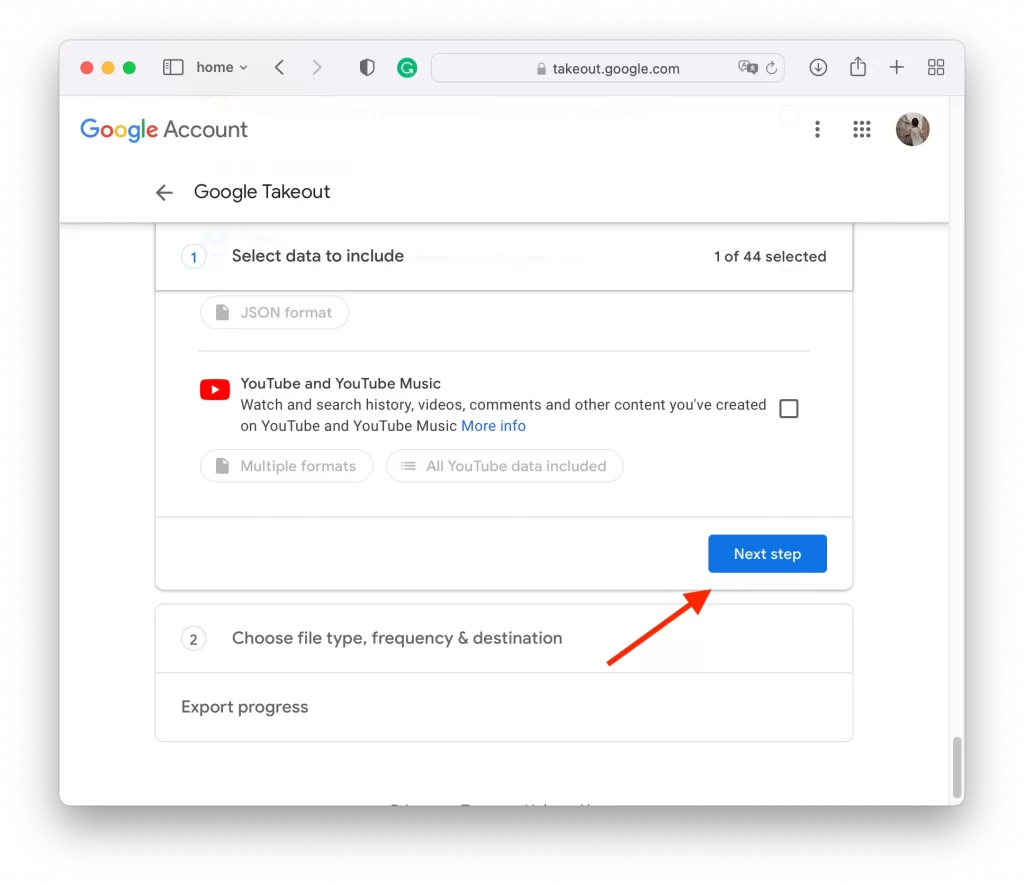
- Next, you need to scroll down and click ‘Next step’.
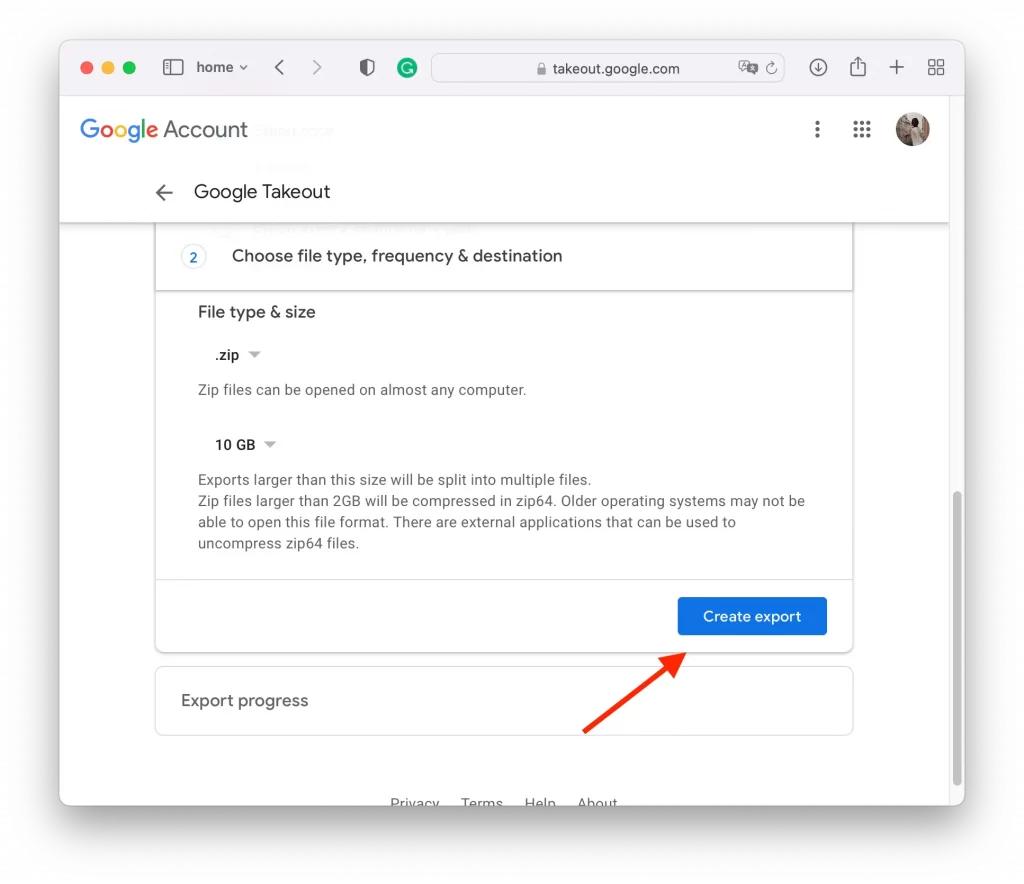
- The next step is to choose how you want to retrieve the link, as well as the type and size of the archive. It is best to choose the maximum and click on ‘Create export’.
- After that you will receive an archive of data, you will need to click on the ‘Download’ button to download it.
If you have a lot of files in Google Photos don’t count on this process will be fast and you will spend a couple of minutes. If you have a lot of different material stored on Google Photos, it will take hours or days to upload it. However, you will immediately receive an email when the export is complete.
Read also:
- How to check how many Google Photos you have
- How to import Google Photos to Amazon Photos
- How to fix Google Photos not downloading videos
How to download a photo from Google Photos?
If you need to export one photo you will need to follow some other steps. This method will also work for you if you decide to select only the most important images so that you don’t have to wait for a long export. In this case, you need to:
- The first step to uploading a single photo is to open Google Photos.
- After that, select a particular photo or video, so that the necessary file is displayed with a checkmark.
- Then you need to select three dots in the upper right corner and click on the ‘Download’ button.
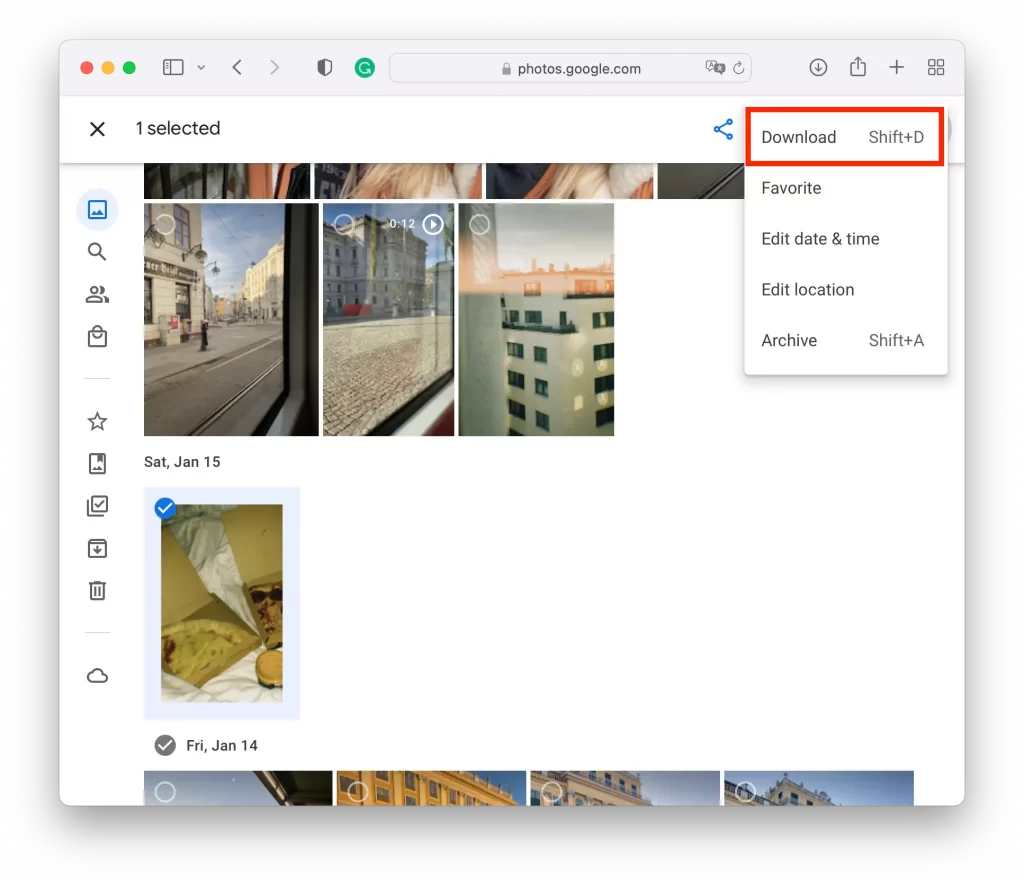
After these steps, there will be a file in the Downloads folder on your device. This method is suitable if you want to limit it to a few pictures. To be able to upload a small amount of material to the iCloud later on.
How to upload photos to iCloud?
Now you just need to transfer all the data to iCloud. This is just as easy to do. In principle, you can do it through the ‘Photos’ app on the Mac, but I find it easier to import to the web version of the cloud storage. So to upload photos to iCloud follow these steps:
- The first step is to go to the iCloud site and log in.
- Then select Photos in the Library section.
- Next, click the iCloud icon on the top bar.
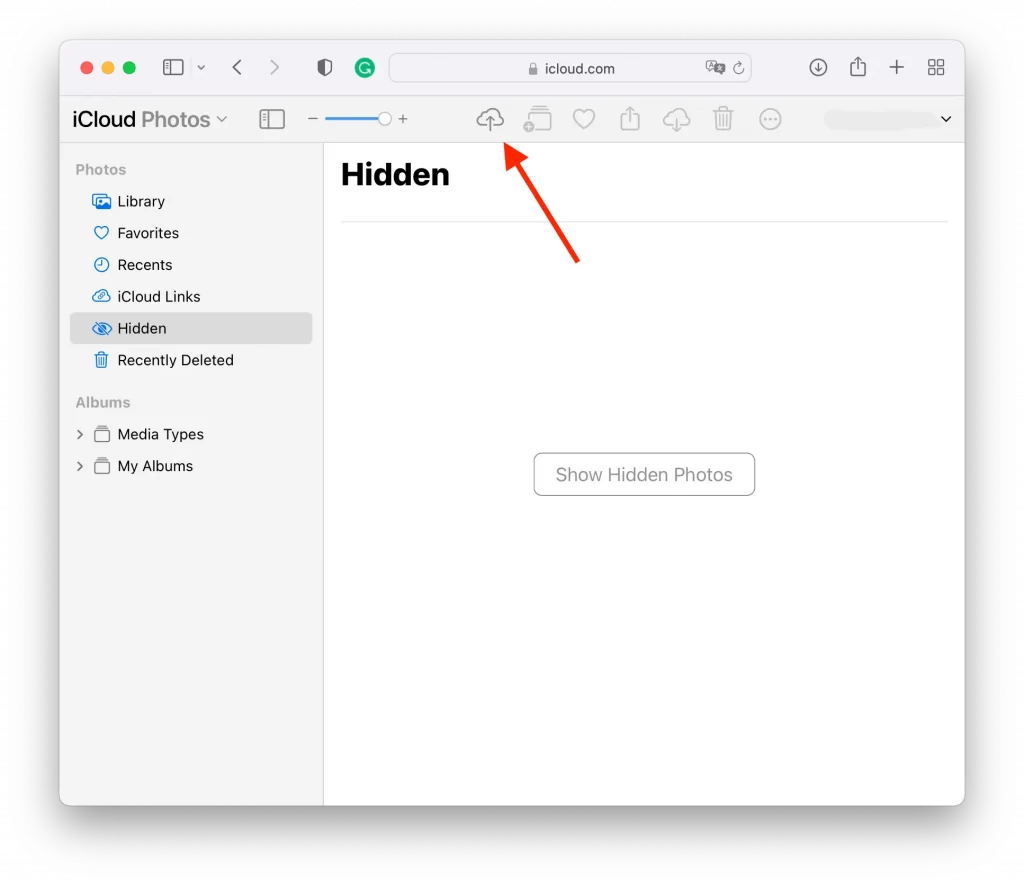
- The next step is to select the photos you want to transfer on your device.
- Drag and drop them directly into the iCloud interface and wait for the upload to complete.
At this point, you can choose to upload a single picture or select multiple pictures at once. Also at this stage, you can fully manage your pictures in iCloud, delete, move or mark them as favorites.
Which are better iCloud photos or Google Photos?
iCloud and Google Photos are the most common solutions for storing and managing photos. However, it makes no sense to use two services at once and it is worth choosing one to store and manage your photos most comfortably.
If you’re using a macOS and iOS device, Photo iCloud has a very clear advantage of native service. Your camera on your iPhone connects directly to iCloud photos. Any changes you make are automatically synced across all devices.
One of the most essential benefits of iCloud Photos is that you can access your entire library from all your devices without having to upload all your photos offline. You can edit photos on your iPad, and the changes will appear on your iPhone and Mac.
Google Photos is Google’s cloud-based photo management solution. For a long time, Google had a price advantage over Apple because the company offered a free plan that met most people’s needs. However, some time ago, Google Photos stopped offering this feature.
Both services are noteworthy and have their pros and cons. Apple offers deep integration with iPhones, iPads, and Macs. Google offers robust family photo-sharing options. Apple provides better editing capabilities because third-party apps can connect directly to the library. However, everyone should decide which service is better based on their needs.


