Webex Meeting is a video conferencing platform developed by Cisco Systems. It allows users to conduct online meetings, presentations, and webinars with real-time video, audio, and screen-sharing capabilities. Users can join meetings through a web browser, mobile app, or dedicated software. Webex Meetings offers additional features such as instant messaging, file sharing, and recording capabilities.
During the various meetings, you may need to change your name. Sometimes you need to do this for privacy. If you join a meeting anonymously, you can change your name to one that does not reveal your identity. Similarly, if you are joining a meeting on behalf of your company, you can change your name to something more professional and consistent with your company’s branding. So if you need to do this, follow the methods below.
What to do to change the host name on the Webex meeting using a browser?
To change the host name of a Webex meeting using a browser, you can follow these steps:
- Log in to your Webex account using your web browser.
- Click the meeting whose name you want to change.
- Click the “Manage Participants” button in the lower right corner of the meeting.
- In the “Edit Meeting” pop-up window, you will find the “Meeting Name” field. Enter the new name you want to use for the meeting.
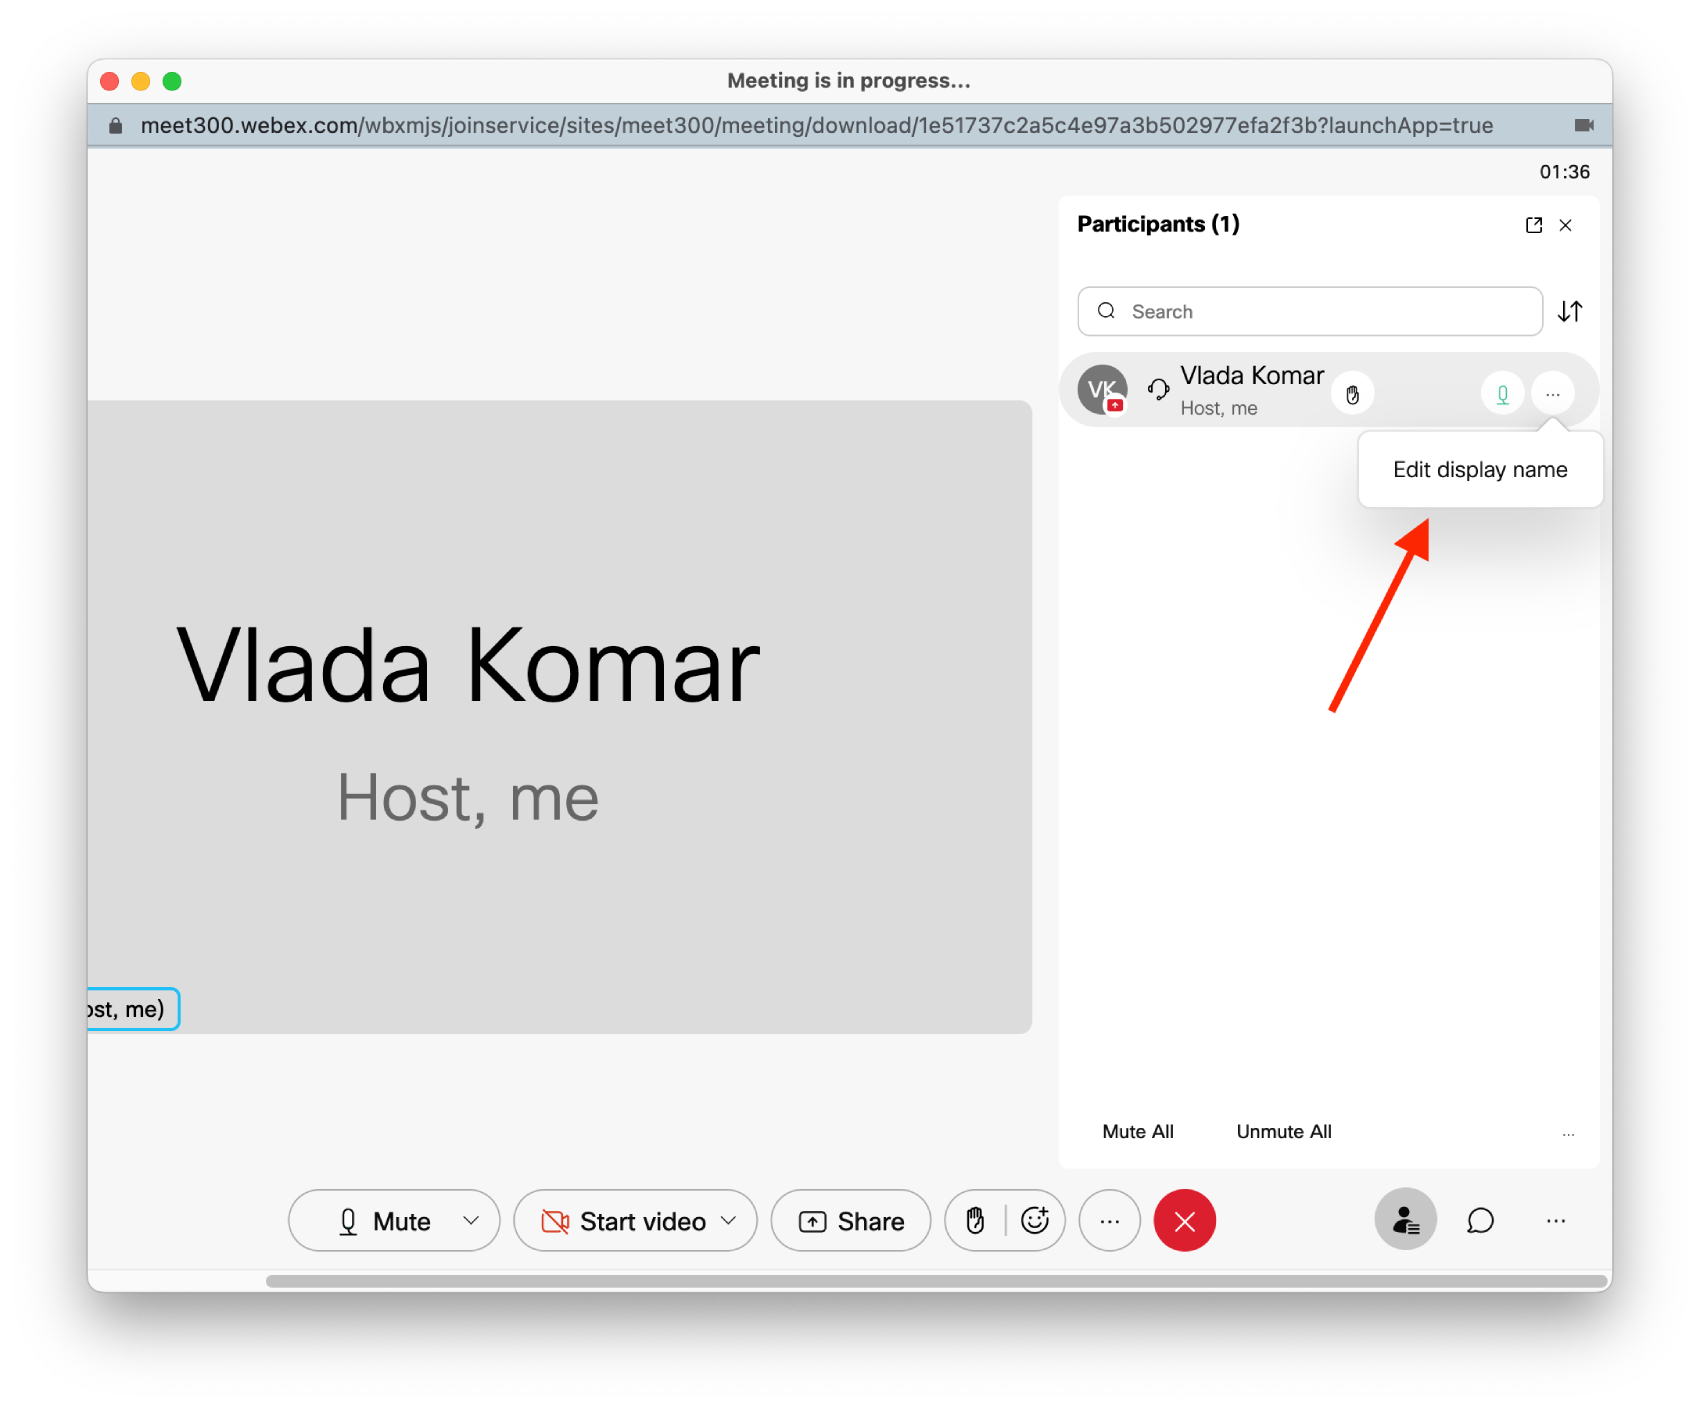
- Click the “Save” button to save your changes.
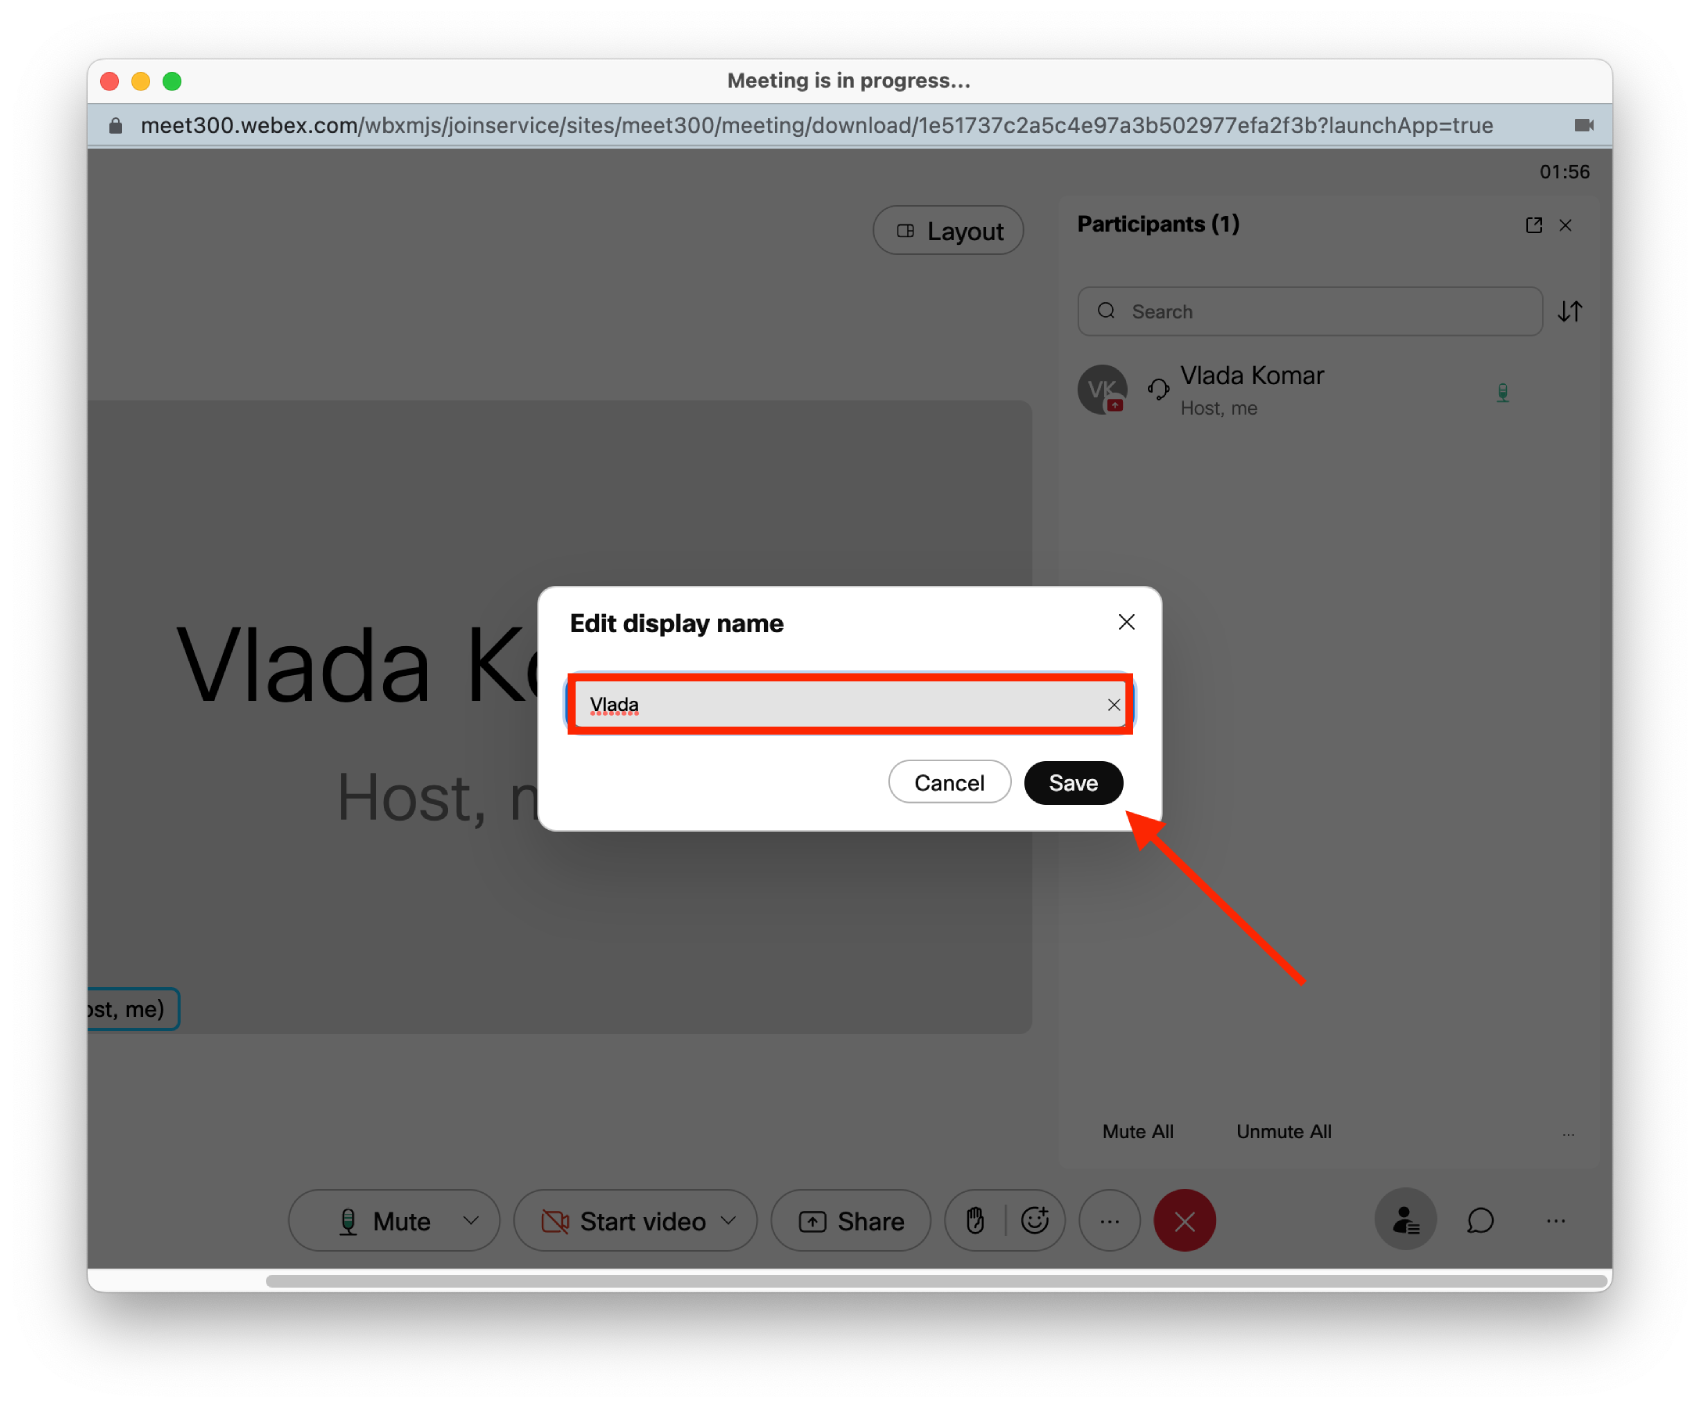
If you are the host of the meeting, you can change the name. If you are a participant, you must ask the host to change your name.
Please note that changing your name in one meeting doesn’t change it in all future or past meetings, if you want your name to be changed permanently, you will need to do it in your Webex account settings.
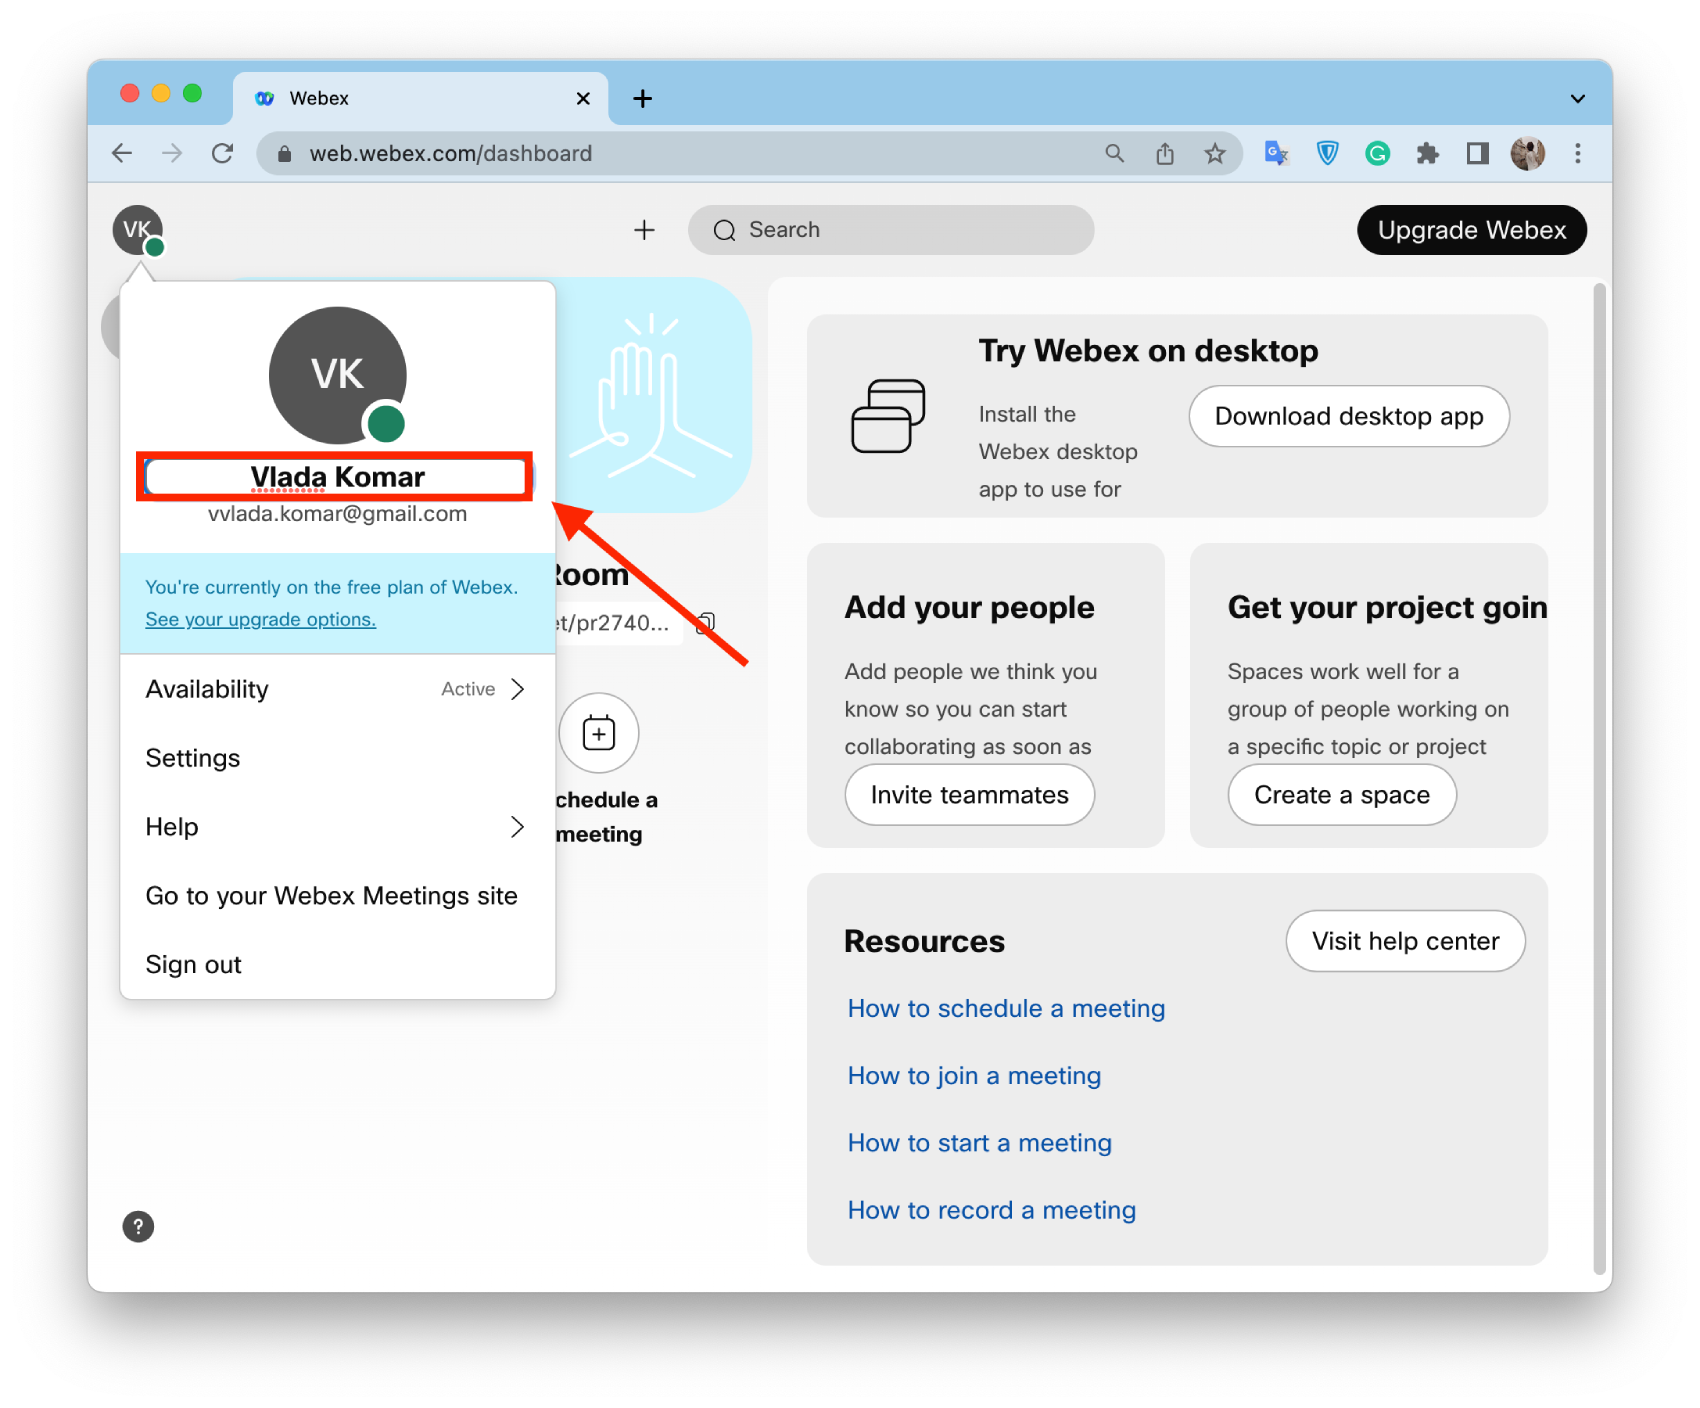
To do this, you need to click on the profile icon on the home page and specify the actual username.
What to change the guest name on the Webex meeting using a browser?
You can change your name when you have just joined a meeting. That is, the following method is suitable for non-registered users. If you were invited and clicked on the link, you can change your name this way:
- To change a guest’s name, you must first join the meeting.
- Then you will see your name in the upper left corner of the meeting window.
- You need to hover over it and click on the pencil icon to change it.
After these steps, another name will appear in the upper left corner.
What to do to change the name on the Webex meeting using the mobile app?
This method will help you change your profile name. Then after that, this new name will be displayed in all meetings. To change the name on the Webex meeting using the mobile app, you need to follow these steps:
- The first step is to open the Webex app on your smartphone.
- Then you need to click on the profile icon on the home page of the app.
- Next, click on the “Display Name” section.
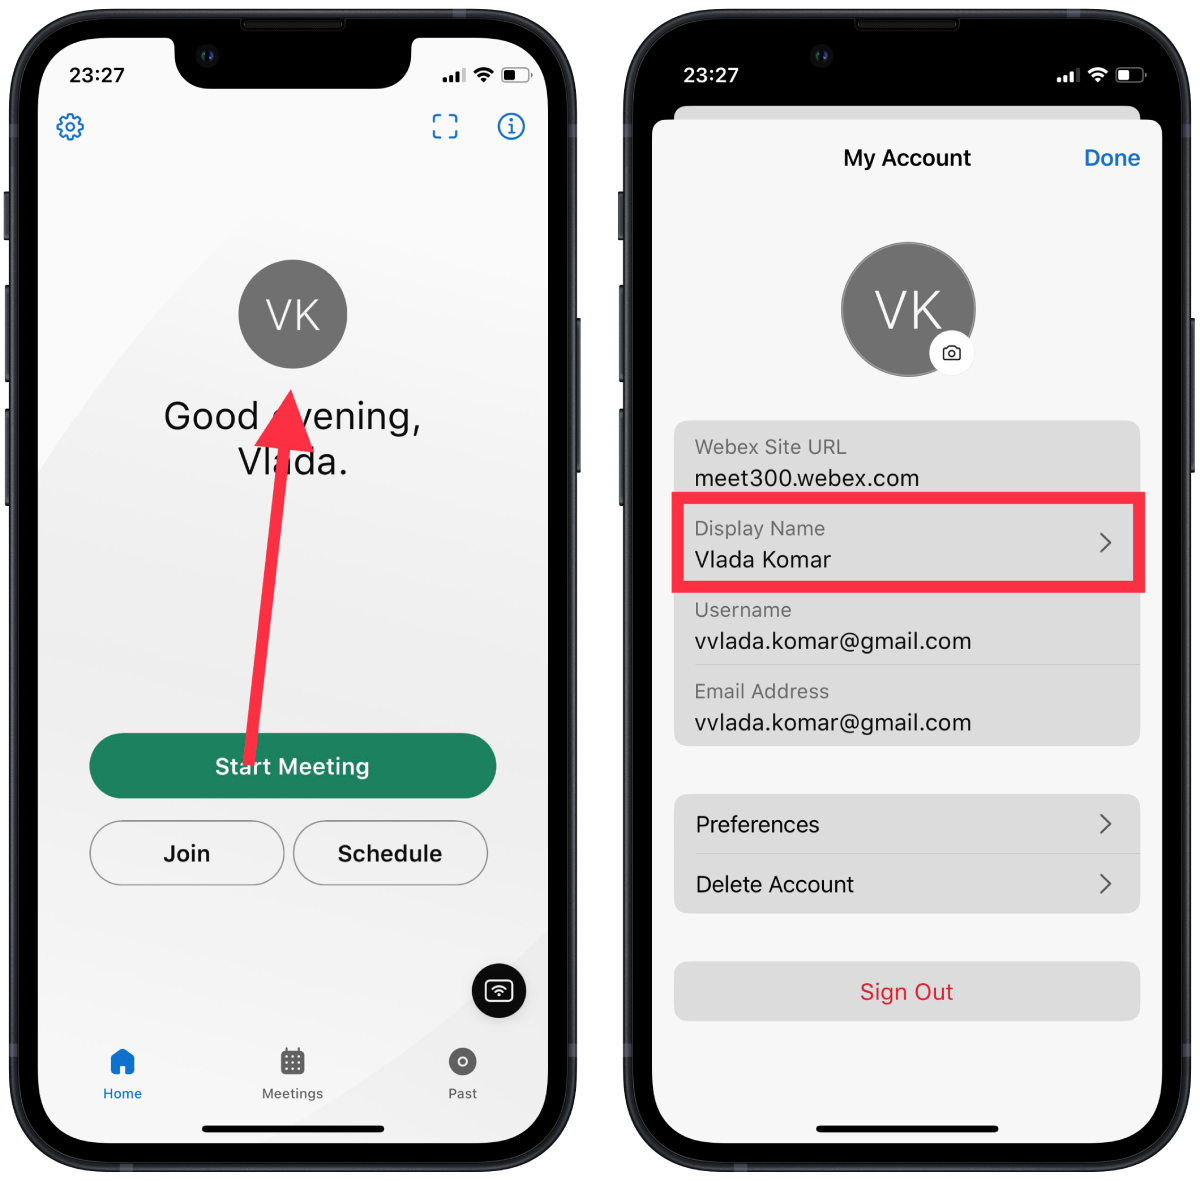
- Then enter a new name in the new window and tap “Save”.
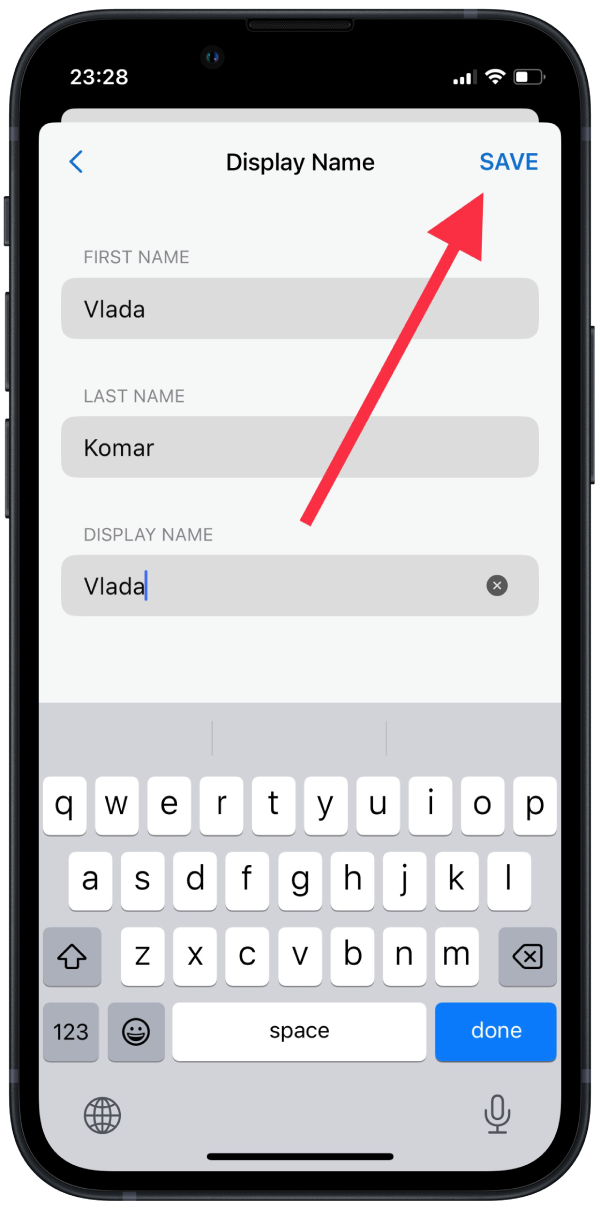
After you save the new name, it will be changed, and other participants will see it. If you need to use a different name during a meeting, follow the next method.
What to do to change the name on the Webex during meetings using the mobile app?
To change your name during a Webex meeting using the mobile app, you can follow these steps:
- Open the Webex Meetings app on your mobile device.
- Join the meeting that you want to change your name for.
- Once you are in the meeting, tap on the “Manage Participants” button.
- Next, click on your name in the participant’s section of the meeting.
- Then a new “Edit display name” button will appear, click on it.
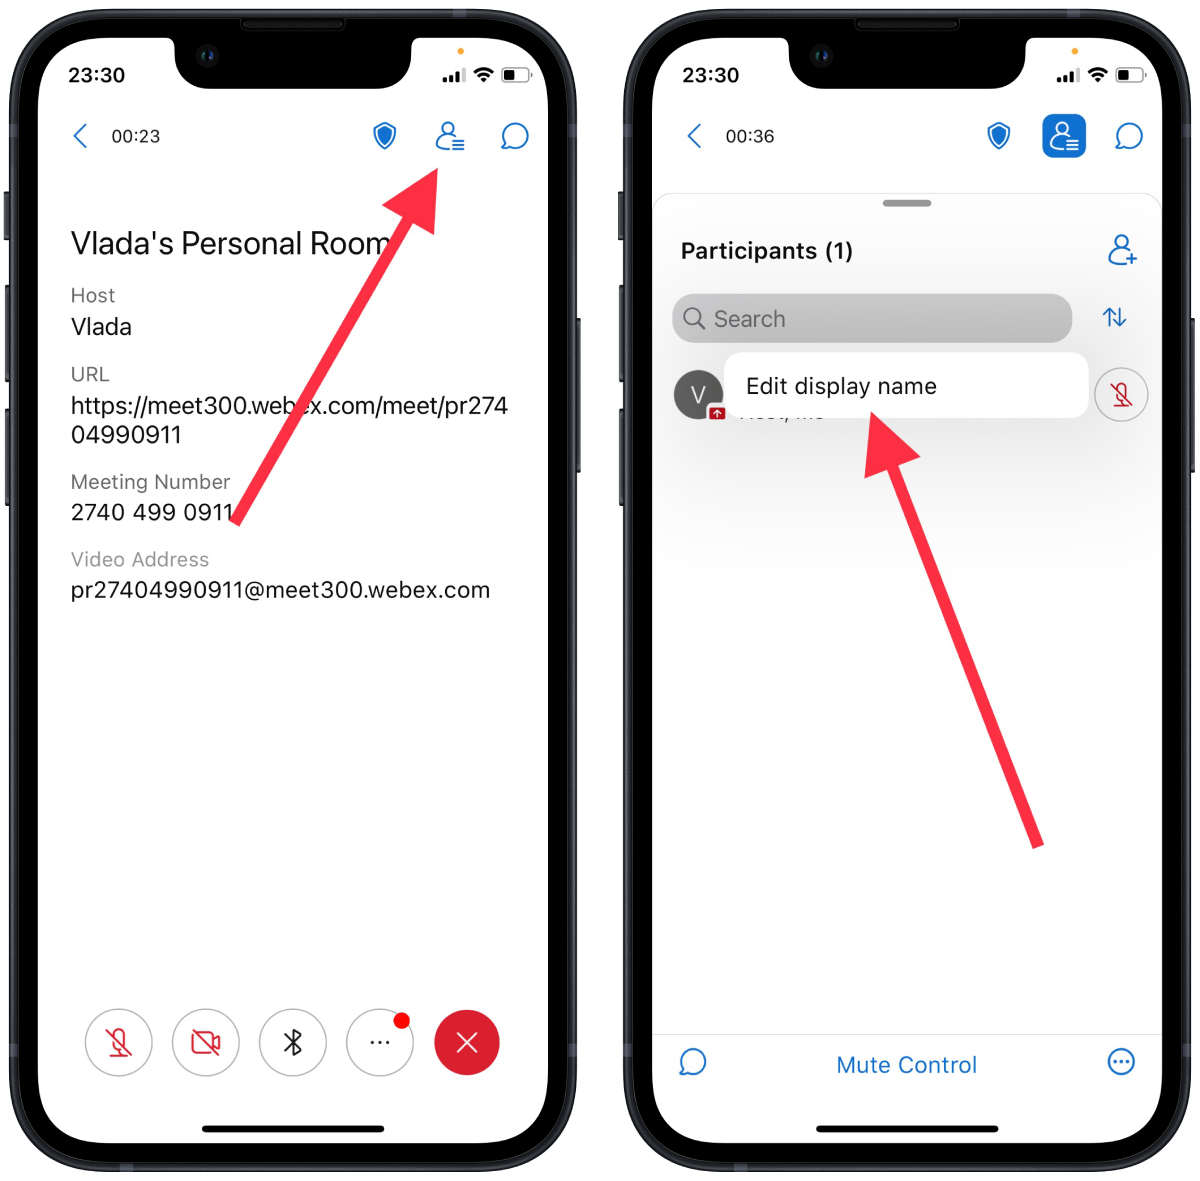
- Enter the new name and click “Save”.
Also, if you’re the host you will be able to change the name of the participants, including guests, by following the same steps.
Note that if you are a participant and you change your name, it will only change it for the current meeting, it won’t change it permanently. To change the name permanently in the mobile version, you need to use the previous method.


