Apple’s a company that gains more and more popularity every day. It’s well-known for its high-quality devices. Many users prefer iPhones, iPads, and Macs to other devices, as the interface and features create a great user experience. Moreover, if you’re a busy person, Apple’s the best choice for you, as the developers have done everything to simplify the usage of the devices and fill them with useful features.
Notifications for busy people are one of the most essential parts of the device. That’s why it’s very important to customize them depending on your needs and interests. By doing this, you’d be able to see the notifications grouped by some characteristic. Fortunately, this opportunity is provided by the developers and the process isn’t complicated at all.
What is notifications grouping on iPhone
Apple has provided all the necessary features on their devices. Even though Apple products are very popular and widely-sed, not everyone knows that they’re also filled with important features that can really simplify your working process and your life. For example, for your convenience, you can even set up a recovery contact to use someone’s device to renew yours.
Busy people always should be in touch with others and phones are one of the most common ways to communicate. That’s why influencers and businessman always keep their phones near to them. All the notifications are announced on the phone.
However, can you imagine if there were several messages from one app and several from another one and all of them would be shown separately? It’s very inconvenient and you can just not notice something important and, for example, miss the meetings. That’s why there’s a great feature provided on Apple devices, called notifications grouping
How to change group notifications settings
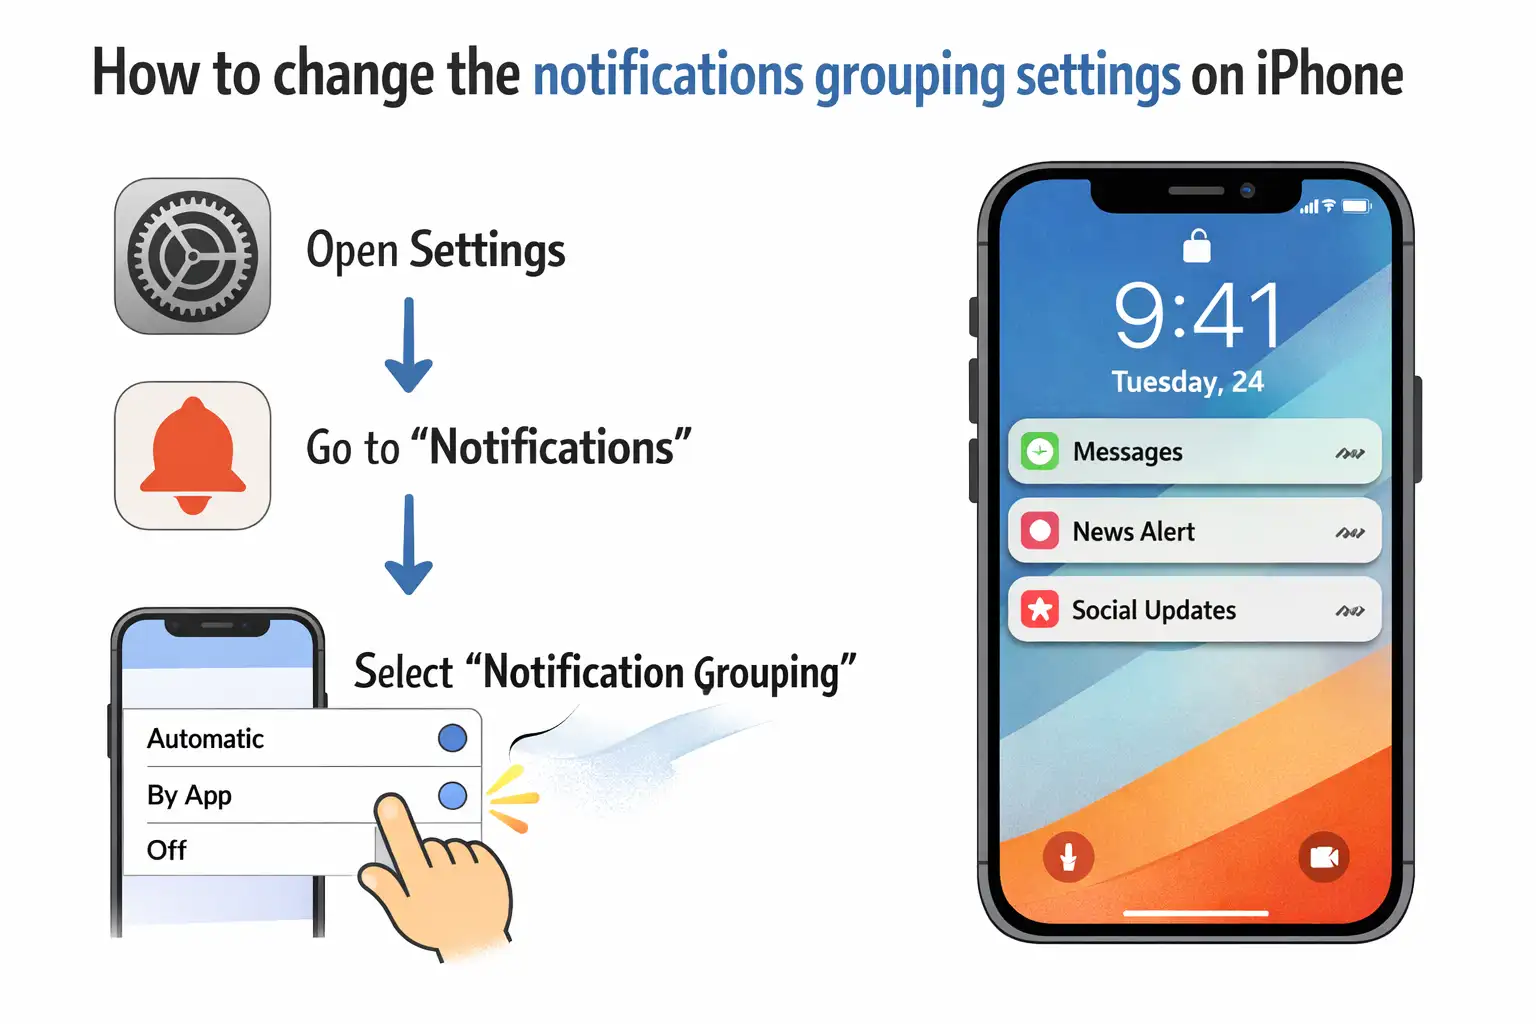
Notifications are an essential part of iPhone usage. The main advantage of notifications in iPhones is that it’s possible to customize them and divide the by several options. This can be very useful, especially, when you don’t want to miss anything important. So, if you want to customize group notifications settings, you should follow the steps which would be mentioned in the section below:
- First of all, you should switch on your iPhone.
- After that, you should open the Settings and head to the “Notifications” tab.
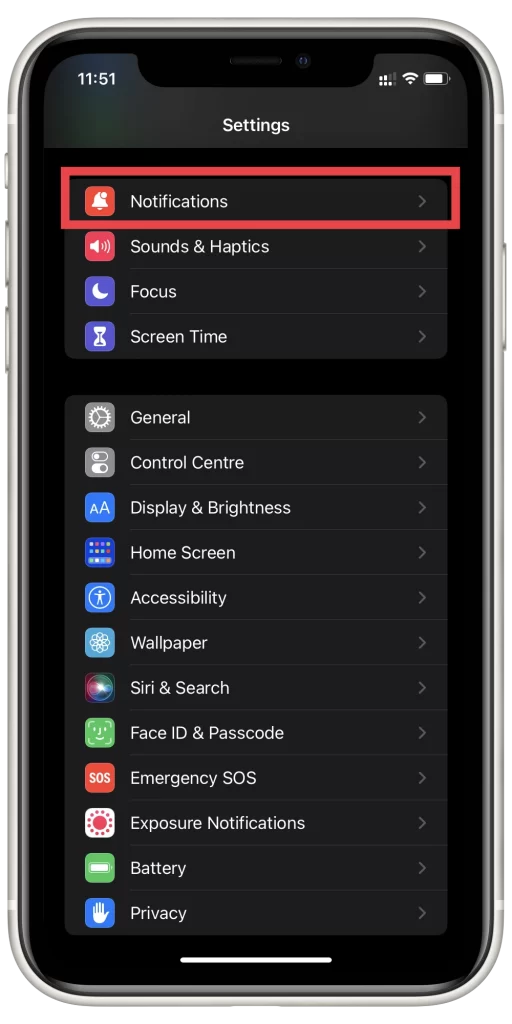
- Then, you should choose the app and click on the “Notification Grouping” option.
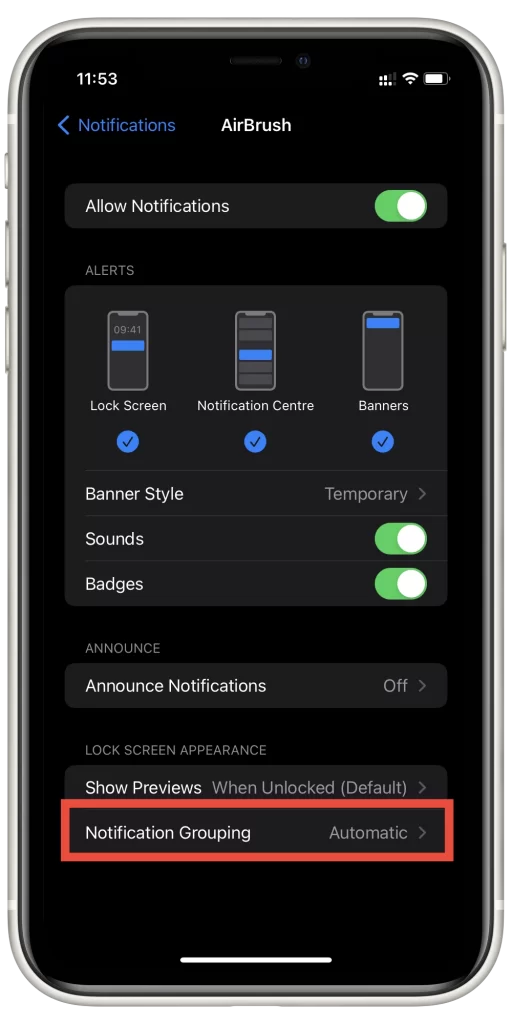
- To complete the process, you should set one of those options:
- Automatic: the notifications from the app will be grouped according to organizing criteria within the app, such as by topic or thread.
- By App: all of the notifications from the app will be grouped together.
- Off: turn off grouping.
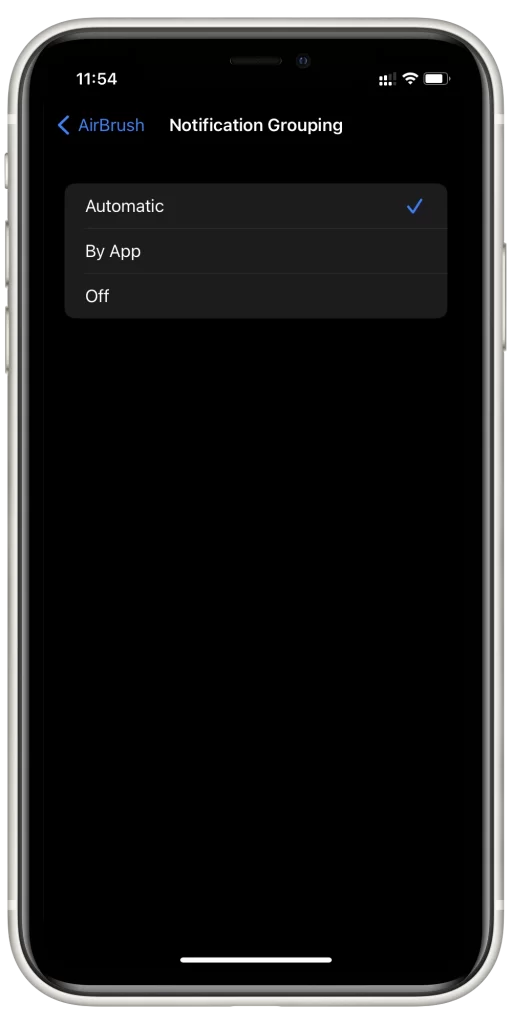
Since then, your notifications grouping settings would be customized and you won’t miss any important message from the app. However, not only many notifications can lead you to miss some important meetings, for example. It’s important to remember that during the silent mode, you may not hear that you’ve received a message, so it’s better to make sure that it’s turned off.
What you can do with notifications on the Lock Screen
As we all know, each notification would be displayed on your Lock Screen until you read it. The only time, when the notifications wouldn’t be shown, it’s when you’ve forgotten to switch off the DND Mode. So, it means, that if you’ve customized the notifications grouping settings, you won’t miss anything important. So when you look at your Lock Screen, you can do the following actions:
- If you want to open the app from the notifications, you can click on it once.
- If you want to see all the notifications that have been recently received from a particular app, you should click on a group of notifications.
- If you want to manage the alerts or delete the notification, you can tap on it and move your finger to the left.
- If you want to reply to a message, you can click and hold a notification to view it fully and make some actions.
Now you know, that it’s not obligatory to unlock your screen to do some actions with the notifications. Moreover, it’s very convenient to be able to take some actions with them using your Lock Screen.
How to schedule a notifications summary
Since Apple released the iOS 15 update, there have been many interesting new features presented on iPhones. One of those is scheduling a notifications summary. It’s very convenient, especially, if you don’t want to be distracted from something important, as you can schedule the time when all the summary would be displayed. So, if you want to schedule it, you should follow the prompts which would be mentioned in the section below:
- First of all, you should switch on your device and head to the Settings, tap on the “Notifications” tab, then click on the “Scheduled Summary“.
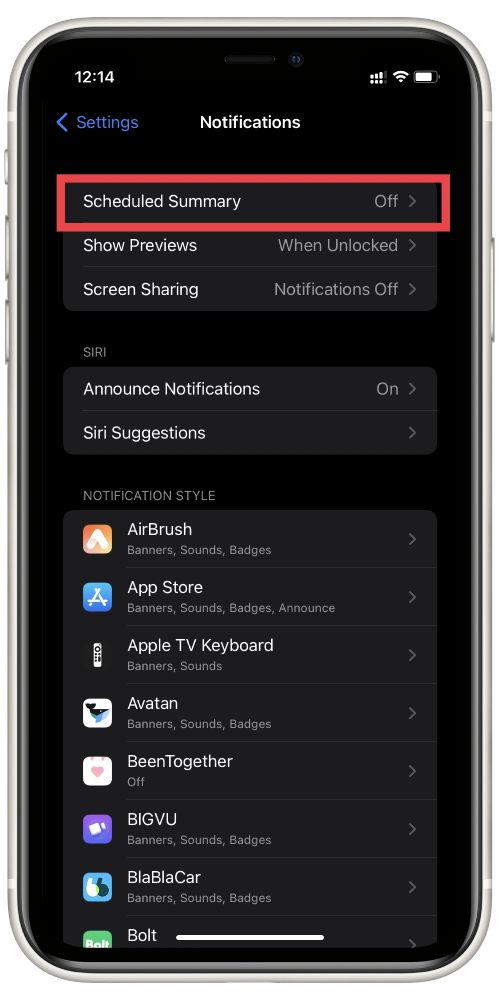
- After that, you should click on the “Scheduled Summary” option to switch it on.
- Then, you should choose the apps you want to include in your notification summary under the “Apps in Summary” section.
- To complete the process, you should click on the “Add” button to add a new schedule or the “Remove” button to remove a schedule. You can customize the time for each scheduled summary you’ve set up.
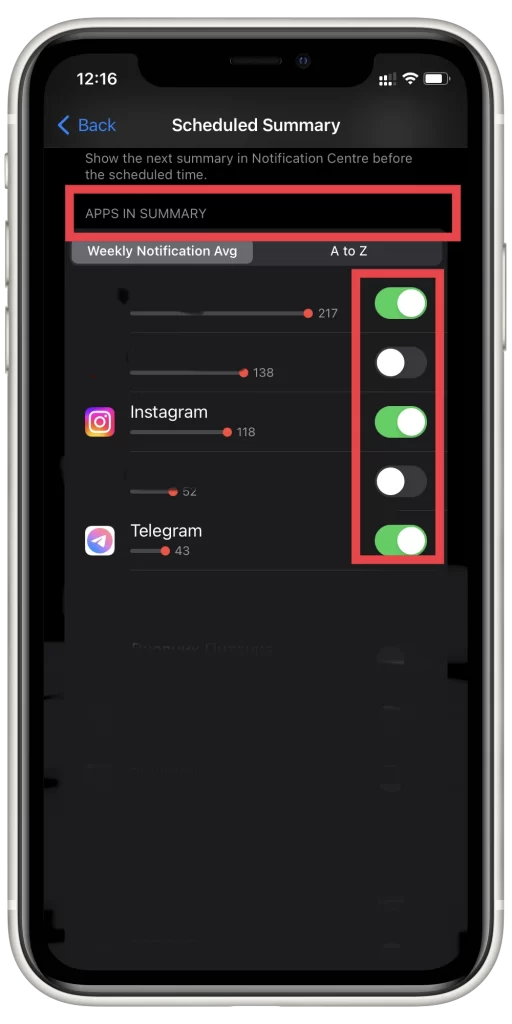
Since then, you’d be able to view the grouped notifications only in the scheduled time in order not to get distracted. However, if you want to have the same notification settings on your iPhone and iPad, you can sync them.
How to set up location-based alerts
There are some apps that would send you notifications depending on the place where you are at a particular moment. For example, your mom asked you to call her when you’d be at home, and in order not to forget, as soon as you come home, you’d be reminded to call your mom.
In case you don’t want to receive those types of messages, you can always switch them off. To do that, you should head to the Settings, after clicking on the “Privacy” tab ad then head to the “Location Services” section. Choose the app and turn the alerts on or off.
As you can see, features that are presented in Apple products are really useful and can greatly simplify the life of the users. Moreover, all the notifications settings are greatly grouped and you can easily adjust the in the way you want to.


