
Modern computers are pretty complex devices with many different components that constantly interact with each other and solve the problems set by the user. One of the essential parts of your computer is the video card. It is needed to display images on your computer. And graphics cards have long been the measure of the power of your computer because they play the most significant role in how your games and other graphics will work. For this reason, many users try to optimize their graphics cards. To do this, you will probably need to know VRAM usage.
In Windows 11, several tools can give you access to information about how much VRAM is currently being used. You can also use third-party applications to do this. Even if you are not playing games and notice that the picture on your PC can be jerky or you notice lags, it is worth checking your VRAM usage. This is often the problem that causes lags in Windows 11. Let’s take a closer look at what you need for that.
What is VRAM in Windows 11
Let’s start by explaining what VRAM is on your Windows computer and why you need to know what VRAM is. If you are not interested in more information about this and want to know how to view VRAM consumption, you can skip to the next section of this article. There you will find step-by-step instructions on how to view VRAM consumption.
VRAM stands for Video random access memory and is the specific memory your computer needs to store pixels and other graphics data in a buffer to display on your monitor later. Usually, this type of memory differs from your computer’s other types of memory. This makes it easier to read quickly to render an image. However, there are computers where this memory is treated like regular memory.
This memory is similar to RAM but is next to the video chip to reduce latency. As I mentioned, your computer uses VRAM to handle complex graphics applications such as games or photo or video editing programs. In this case, the available memory of your graphics card can be used wholly or partially.
To help you optimize your computer and graphics card, you should keep track of how much VRAM your application uses and adjust its settings so you don’t exceed the limit for your graphics card. Otherwise, you risk slow computer performance or damage to your graphics card due to overheating.
How to see how much VRAM you use in Windows 11
Let’s see what tools and programs you can use in Windows 11 to check your VRAM usage. I have found four different ways to see your VRAM usage. You can do it with third-party applications and the built-in tools in your Windows 11. Let’s go through them one by one. To check VRAM usage in Windows 11, you’ll need the following:
Use the Task Manager to check VRAM
The first and easiest thing you should do is check the Task Manager. I’m sure you have seen this application more than once in Windows 11. However, besides being a convenient manager for closing unnecessary applications, it can also monitor your computer’s resource consumption. To do this, you need the following:
- Press the key combination Ctrl + Shift + Esc or use the right mouse button on the taskbar to open the task manager.
- After this, you need to select the Performance tab. This is the icon with a graph on the left side of the window.
- Scroll down and select your GPU. Here under the graphs, you will see the following parameters:
- GPU Memory – the total amount of VRAM you have available.
- Dedicated GPU memory – The VRAM is available on this particular video card.
- Shared GPU memory – The VRAM capacity of the integrated GPU is utilized when the dedicated GPU is low on VRAM.
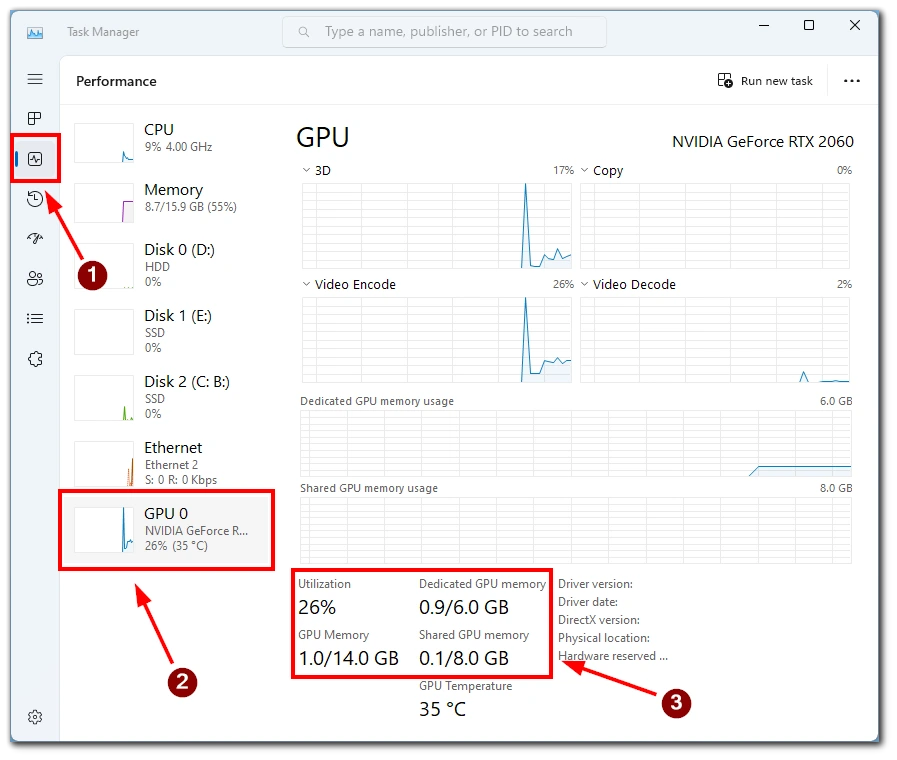
Also, here you can see the VRAM consumption in each section mentioned above. Information about your graphics card temperature and driver versions is also available here.
Use Settings to test your VRAM
You can also check your VRAM using the settings of your computer. To do that, you need to go to your monitor settings and look at the advanced options for your monitor. To do this, you need to
- Press the Windows + I key combination or open Settings from the Start menu.
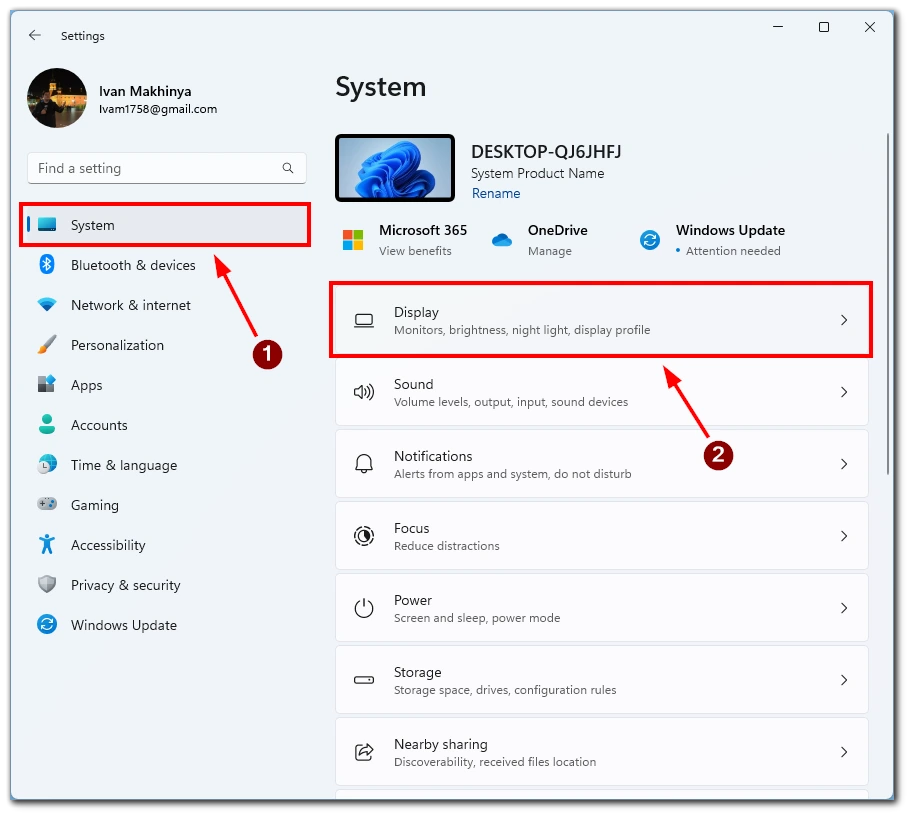
- Then go to the System tab.
- Here, select the Display item.
- Scroll down and select the Advanced display option.
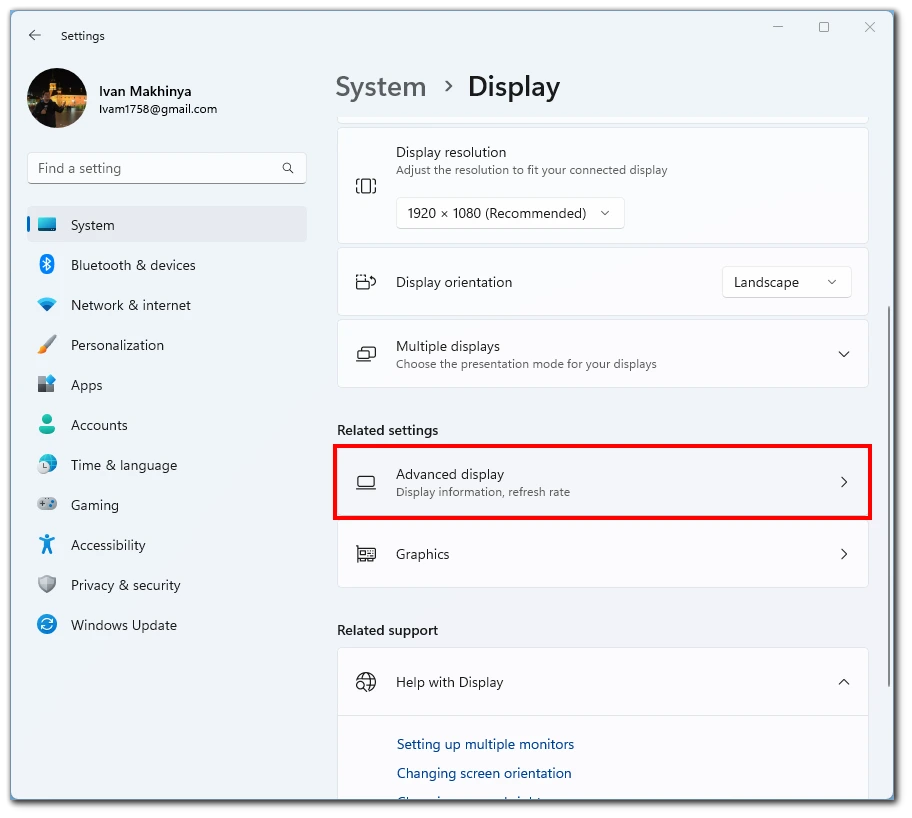
- Then click on Display adapter properties for Display 1.

- In the window that appears, check the Dedicated Video Memory option.
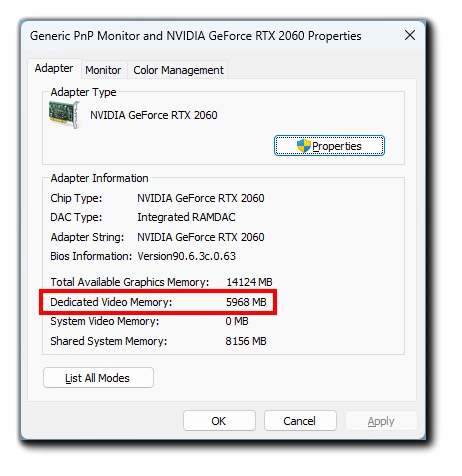
Note that this will show you the video memory usage for the video card you are currently using. If you have a video card installed in standby mode, there is no information about video memory usage.
Use DIRECTX DIAGNOSTIC TOOL to check your VRAM
Another tool you can use is the DIRECTX DIAGNOSTIC TOOL. This is a bit unconventional, but it will help if the first two options do not work for you. To do this, you will need to:
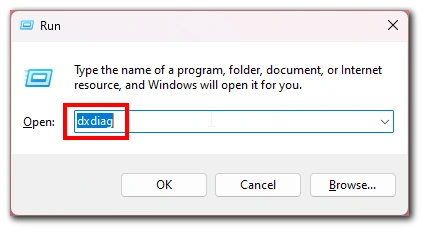
- Press Windows + R to open the Run dialog.
- Type
dxdiagin the line and click OK.
- In the window that appears, click on the Display tab.
- There is an option here for Display Memory. This is using the built-in video memory on your computer in the CPU.
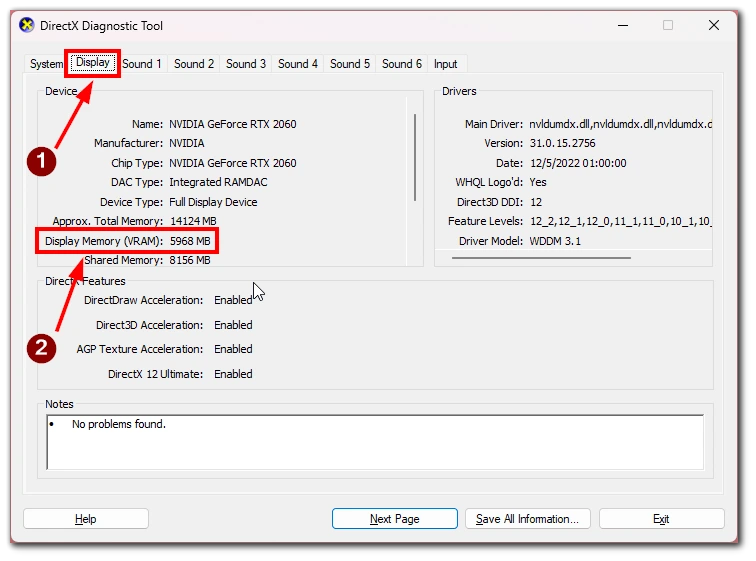
- In the Render tab, you can also find the Display Memory option. This displays all other video memory besides the built-in video memory in the CPU.
Note that on some computers, you may see Display 2 instead of Render.
Use third-party applications to check VRAM
There is a lot of free software you can use to check the VRAM performance. For example, there is utility CPU-Z which will help you.
Also, note that many games show VRAM usage directly in the graphics settings inside the game.


