Labels in Gmail are used to organize emails. Labels are like folders, only better, because they have more functions. You cannot delete or create folders in Gmail, as this is the default division of your mail. The folders are Inbox, Outbox, Spam, Draft, Important, and other categories. Labels are the systematization of the emails that you have created.
After you create a label, it will be located at the bottom of the folders. You will then be able to categorize your emails, which makes them easier to find later.
What to do to create labels in Gmail using Mac
The main use of labels is to structure your emails. So when you receive a new email you can put a label on it. Then you can have quick access to the email. To create a label you need to follow these steps:
- The first step is to open Gmail on your Mac.
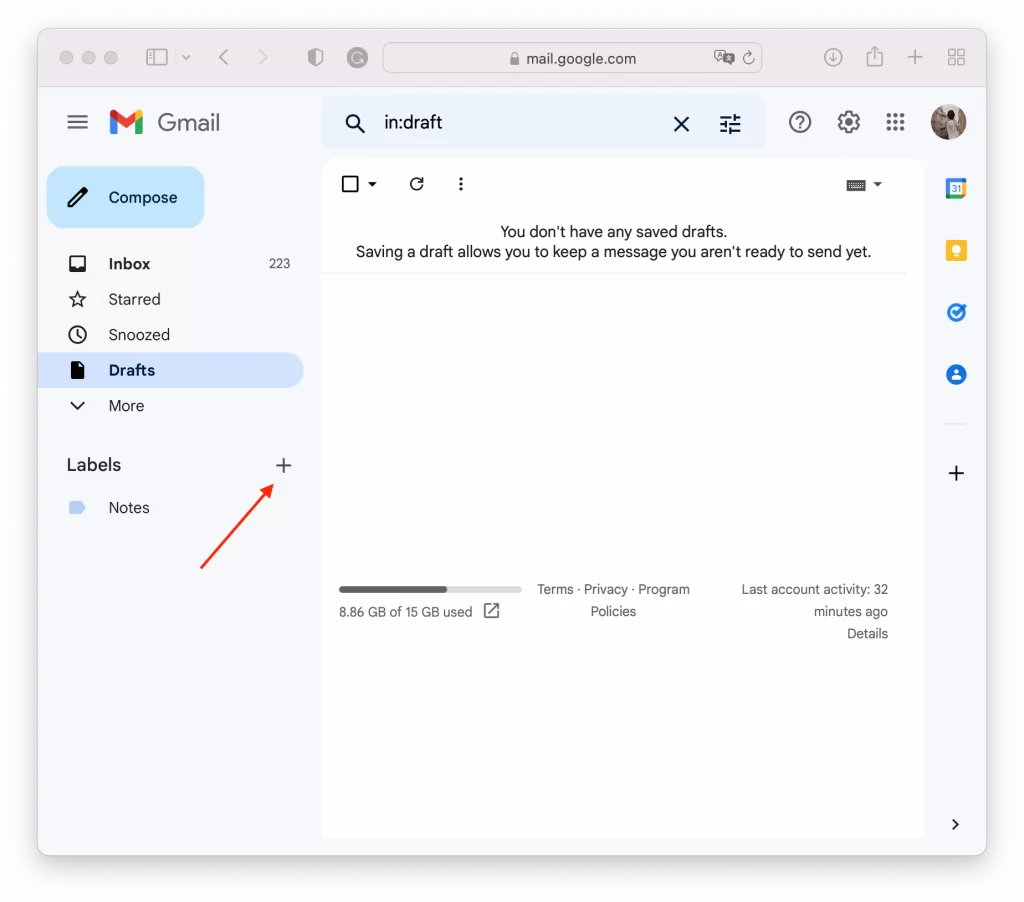
- After that, swipe to the end of the folders and click the ‘+’ icon.
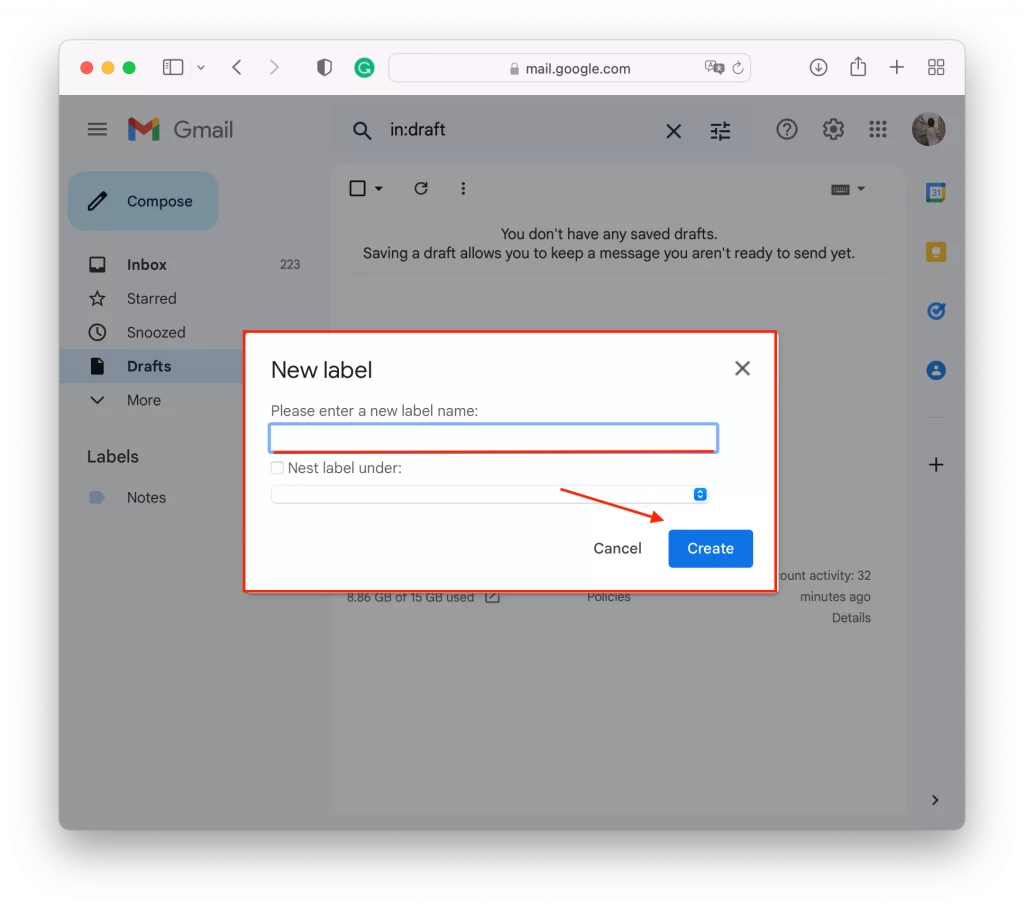
- In the new window, you need to specify the name of your label and then click on ‘Create’.
Once created, you can click on the three dots to add color to the label. By doing so, you can color consciously recognize the importance or add a sublabel.
Read also:
- How to send email to multiple recipients in Gmail
- How to send automatic reply emails in Gmail
- How to add a table to a Gmail email
What to do to create labels in Gmail using iPhone
At the same time, you can manage your labels using your iPhone. To create labels in Gmail using iPhone, follow these steps:
- Open the Gmail app.
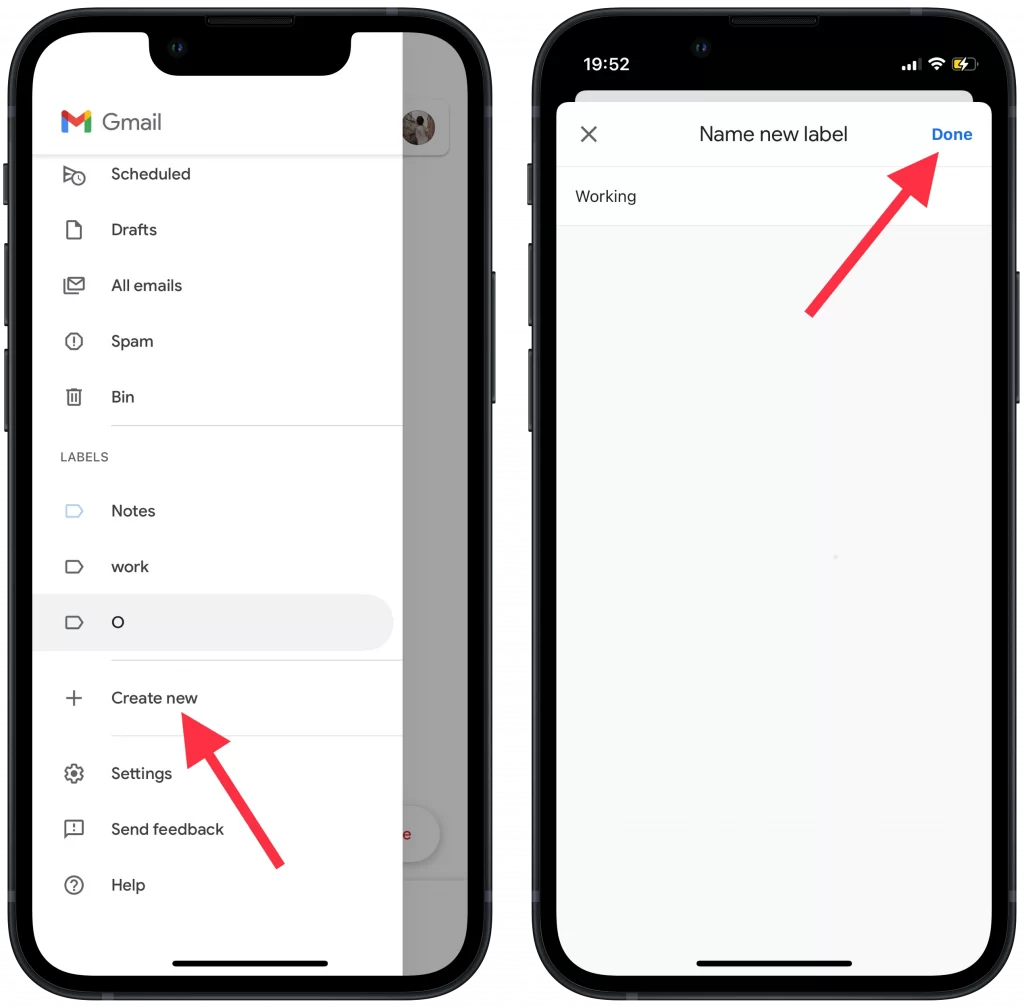
- Then click on ‘Create new‘.
- Give your label a name and click on ‘Done’.
To put a label on the mail using your iPhone, you also need to click on the three dots in the upper right corner. After that, the email will move to the necessary label.
What to do to automatically label incoming emails in Gmail
It’s not convenient to move each incoming email to the necessary label. As these actions aren’t automated and require a lot of time. Therefore, you can set up your incoming emails so that they get to the necessary label by default.
This can be achieved by adding the email address to the label settings. For your emails to be automatically included in the necessary label, you need to follow these steps:
- Open the app Gmail.
- Then click on the 3 lines in the upper left corner to open the menu.
- Next, select ‘Settings’.
- Then scroll to the ‘Labels’ section and select ‘Label settings’.
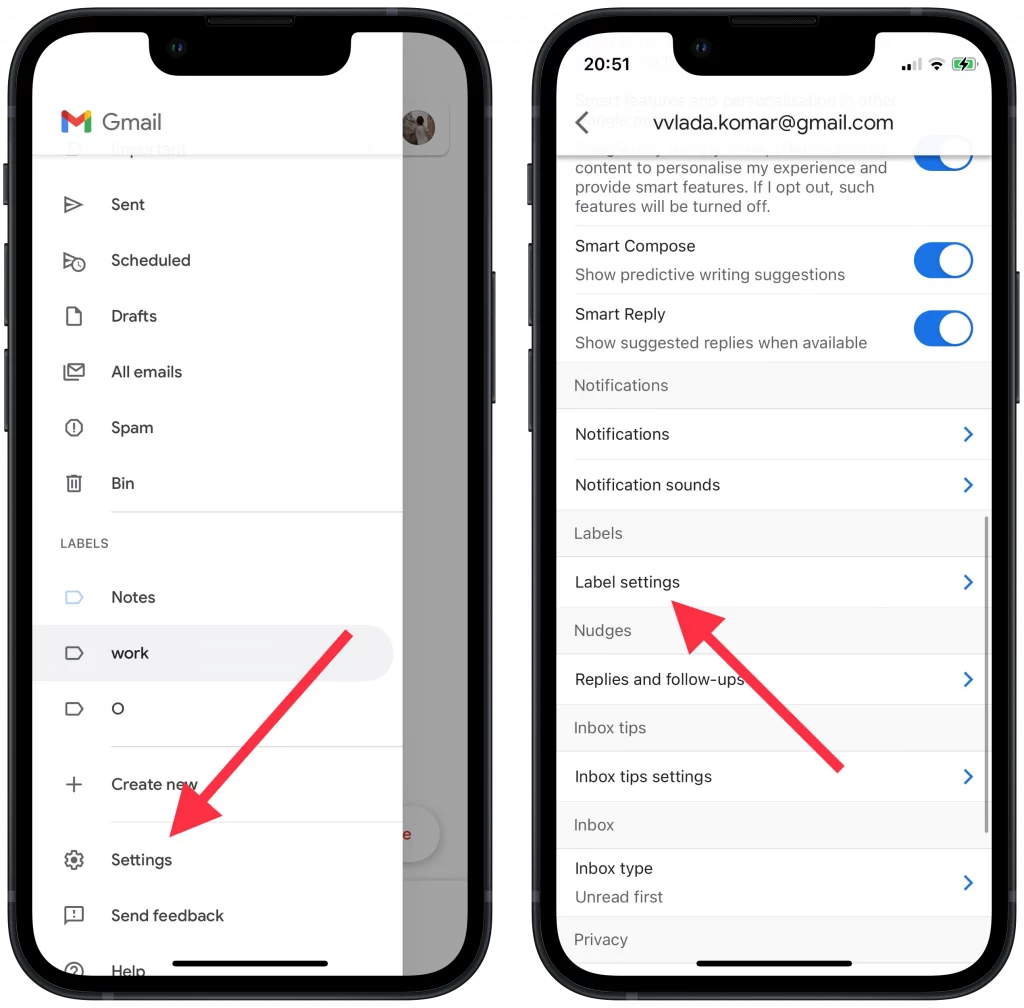
- Then click on the desired label and select ‘Add’.
- Next, in the ‘From’ section, specify the necessary emails and click ‘Save’.
These settings aren’t available using the Android device. You can automatically label incoming emails in Gmail only from a web browser or iOS app using the same steps.
What to do to delete labels in Gmail using Mac
If you have accumulated a lot of unnecessary emails in any of the labels, it’s easier to delete them. When you delete the label, the emails aren’t deleted, you will be able to open them in one of the folders. To delete labels in Gmail using Mac follow these steps:
- Open Gmail on your Mac.
- Then on the home page, swipe to the labels and click on the three dots.
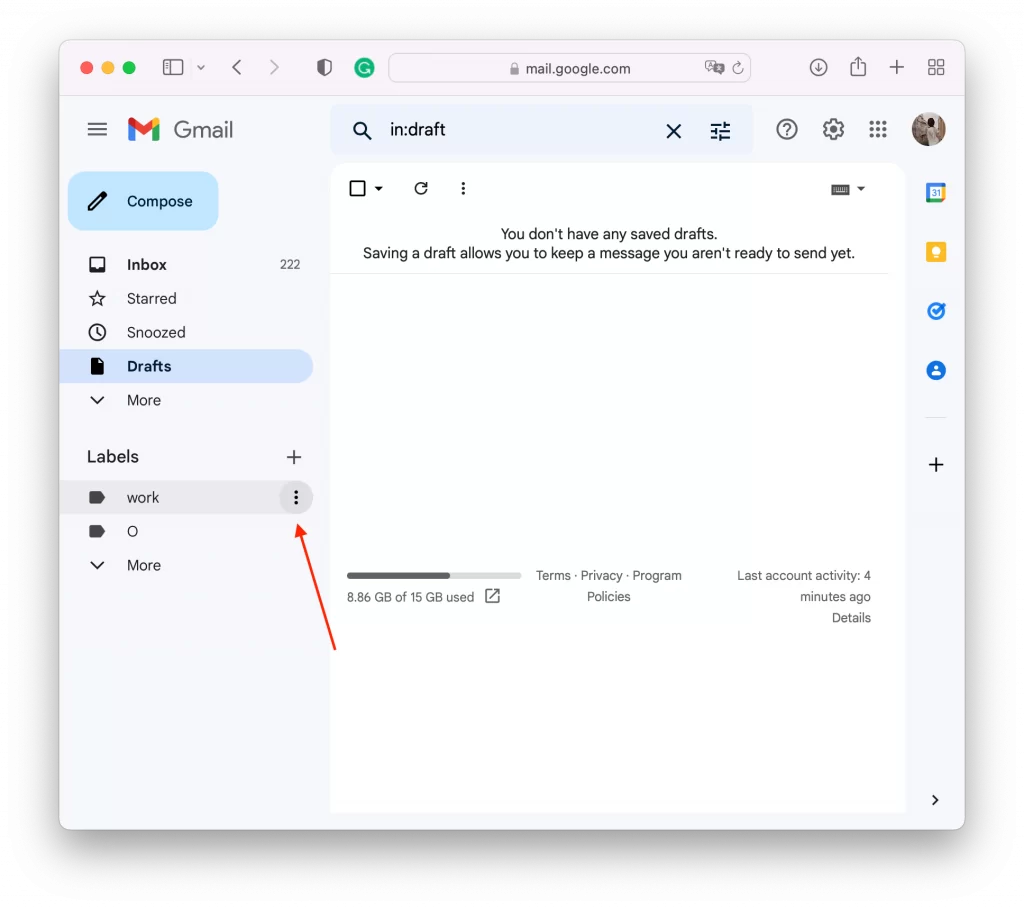
- After that, a menu will open and you need to click on ‘Remove label’.
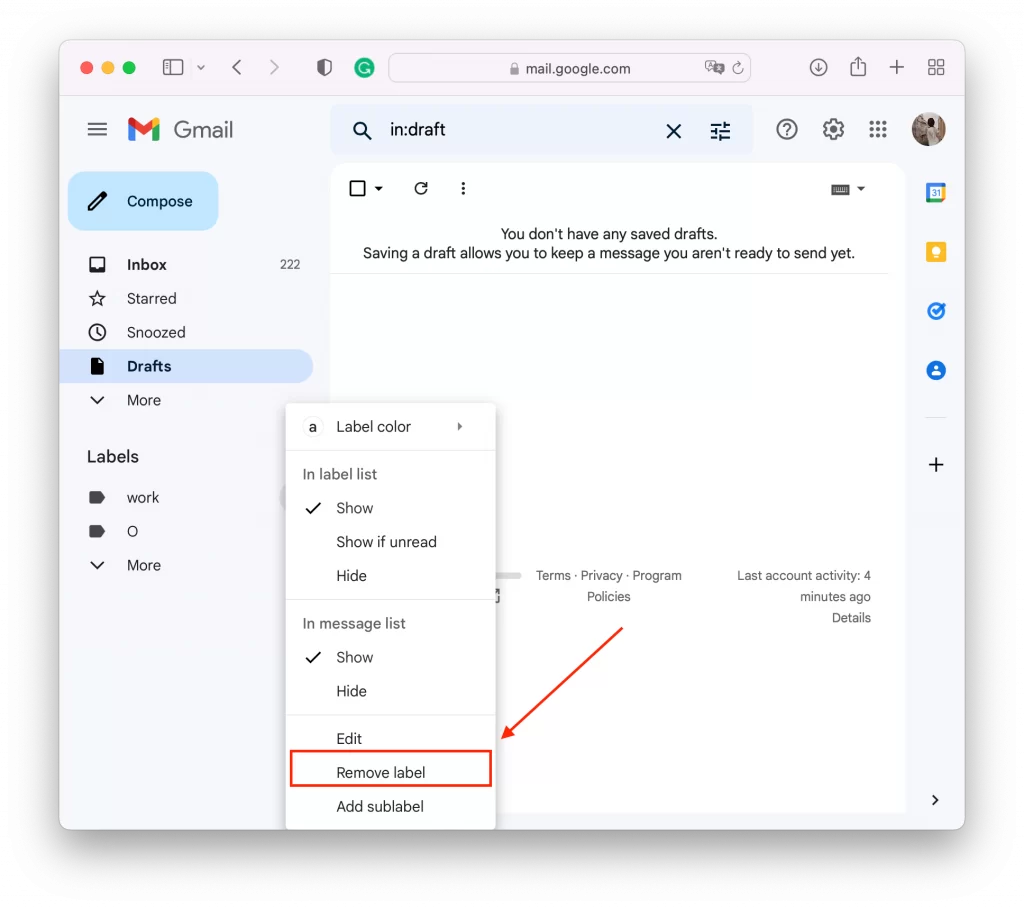
- Next, confirm your actions.
In this window, you can manage your labels. Hide them, add color, and add sublabels. Also in this window, you can manage your labels in a list or a message list.
What to do to delete labels in Gmail using iPhone
Using your iPhone you can also manage your label settings. If you need to delete a label using your iPhone, follow these steps:
- Open the app Gmail on your iPhone.
- Then click on the 3 lines in the upper left corner to open the menu.
- Next, select ‘Settings’.
- Then scroll to the ‘Labels’ section and select ‘Label settings’.
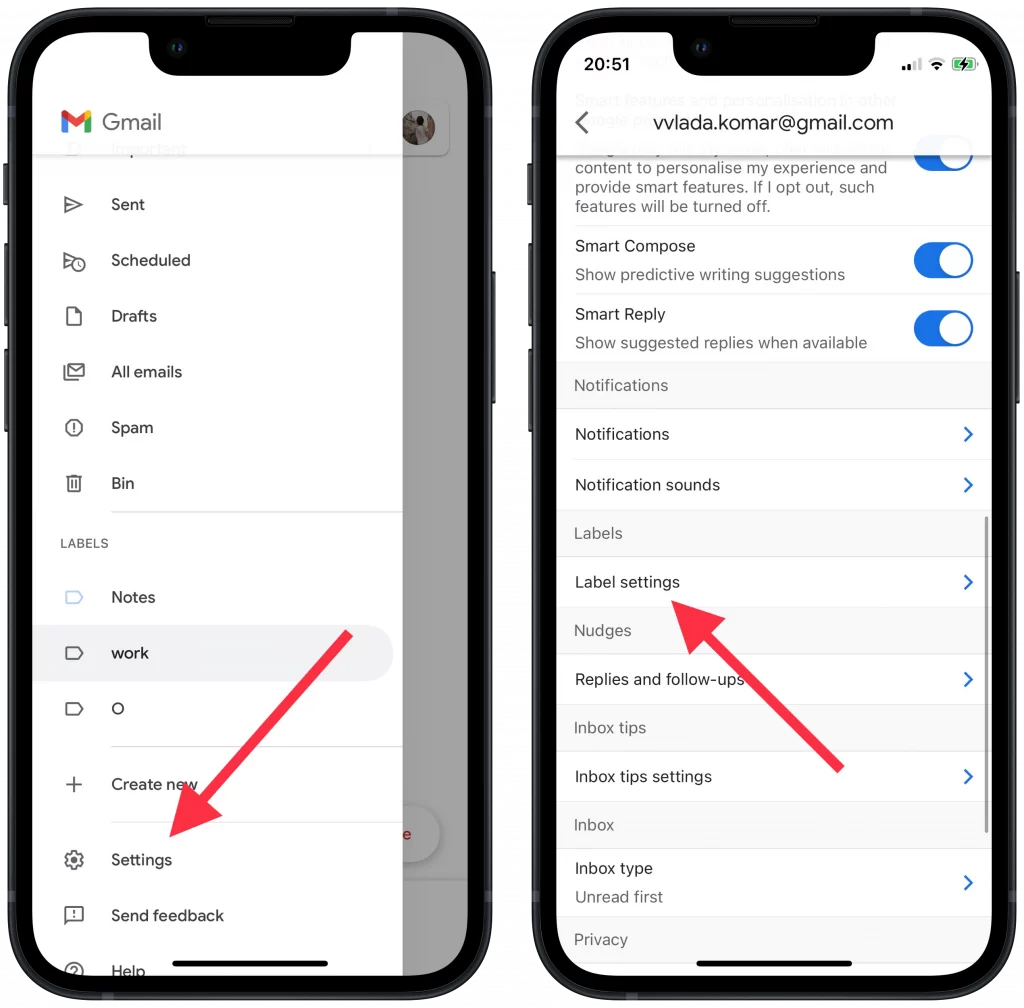
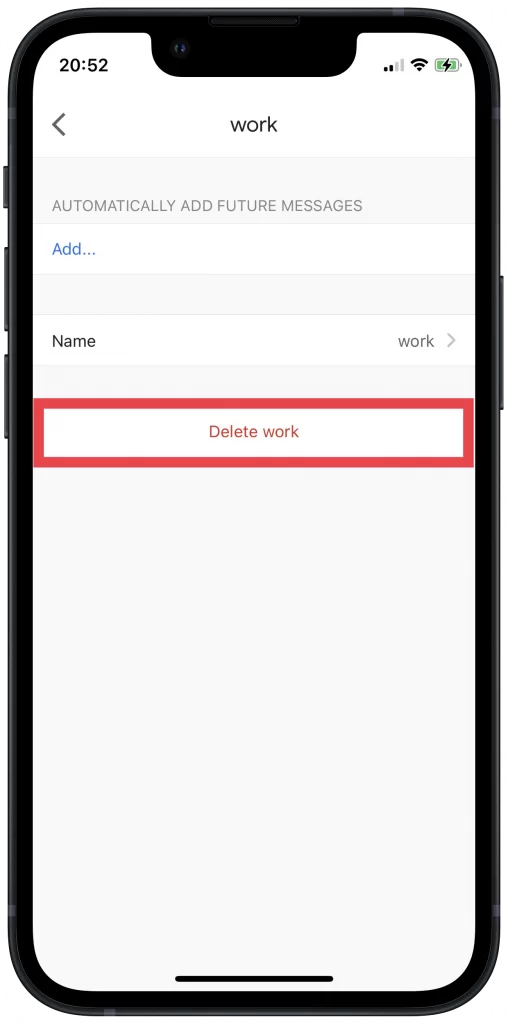
- Select the desired label and click on ‘Delete’.
The Gmail app on Android is very different from the web browser or iOS version of the app. Since most actions on Android are limited. Therefore, it’s best to use your browser to manage labels.


