Windows 11 was advertised as the perfect system for gaming. Quite a few interesting features for your system to optimize it for gaming and even video editing. In fact, users have noted that these features work quite well and really boost performance in certain games and programs. In particular, one of the most interesting features that can help you is hardware-accelerated GPU scheduling.
Regardless of your video card, it can be AMD or Nvidia. However, there are still some things you should be aware of before you enable this feature. Although it’s quite easy to do, you can enable it right from the settings, but you should check your graphics card’s driver update first.
What is hardware-accelerated GPU scheduling?
Hardware-accelerated GPU scheduling is one of the basic features in your Windows 11 just like DirectStorage, it will be built into your system immediately after installation. It will be quite useful. However, first, you need to understand exactly how it works.
Usually, it’s your computer’s CPU that offloads some visual or graphical data to the GPU. That is, this data is first processed on the CPU and then transferred to the graphics card, unpacked there, and continues to be processed until it’s displayed on the user’s screen.
With hardware-accelerated GPU scheduling enabled, this data goes directly to the graphics card and is processed using the GPU processor and VRAM memory. This frees up the CPU and provides some performance gains for games and graphics apps on your PC.
Enabling this feature is actually quite easy. You can do it right from the settings on your PC. No additional software is needed for this. All you need is a suitable graphics card and Windows 11 on your PC.
Read also:
- How to fix PUBG is lagging on Windows 10
- How to create a guest account in Windows 11
- How to fix PC game is lagging
What are system requirements for hardware-accelerated GPU scheduling
When it comes to the specific system requirements for your system to support this feature, there is no clear combination of CPU and GPU where Hardware-Accelerated GPU Scheduling would have the best results, but the developers recommend enabling it only on systems with NVIDIA (GTX 1000 and above) or AMD (5600 series and above) graphics cards.
In addition, you need the latest drivers. However, everything will work if you have at least driver version 451.48 and above for Nvidia graphics cards or driver version 27.20.100.8190 or above if you have an AMD card.
As you can see the system requirements are really not very high and even an average computer can meet them. Another issue is that Hardware-Accelerated GPU Scheduling doesn’t always show a significant performance gain. If this doesn’t change anything then maybe you should just disable it and continue using your computer in standard mode.
What to do to enable hardware-accelerated GPU scheduling in Windows 11
If you decide that you should run Hardware-Accelerated GPU Scheduling, it’s pretty easy to do. I would advise you to upgrade your Windows beforehand to maximize the productivity of your system. After that you will need to:
- Go to your PC’s Settings with the Win + I key combination.
- Then you need to select the Display.
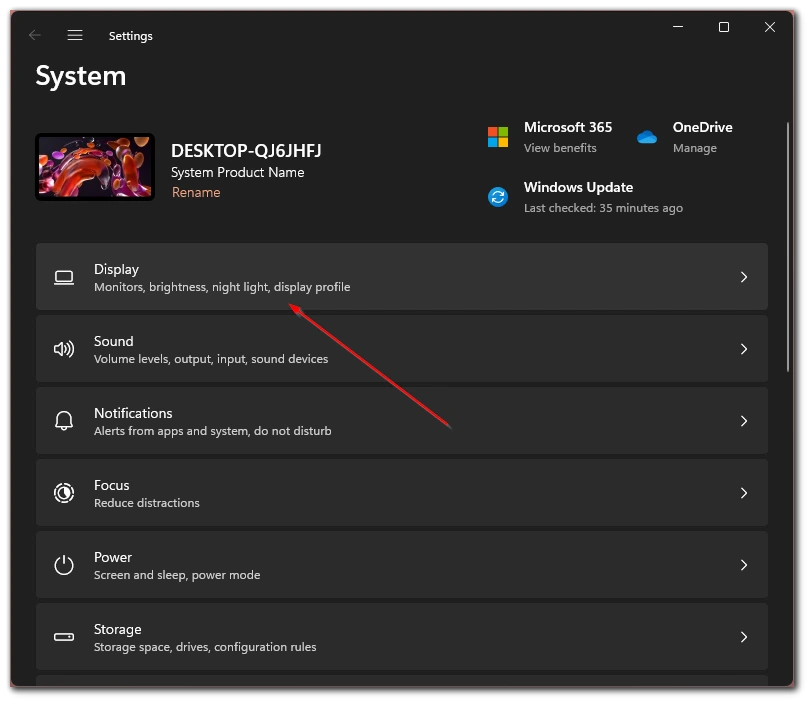
- Here you have to scroll down and select Graphics.
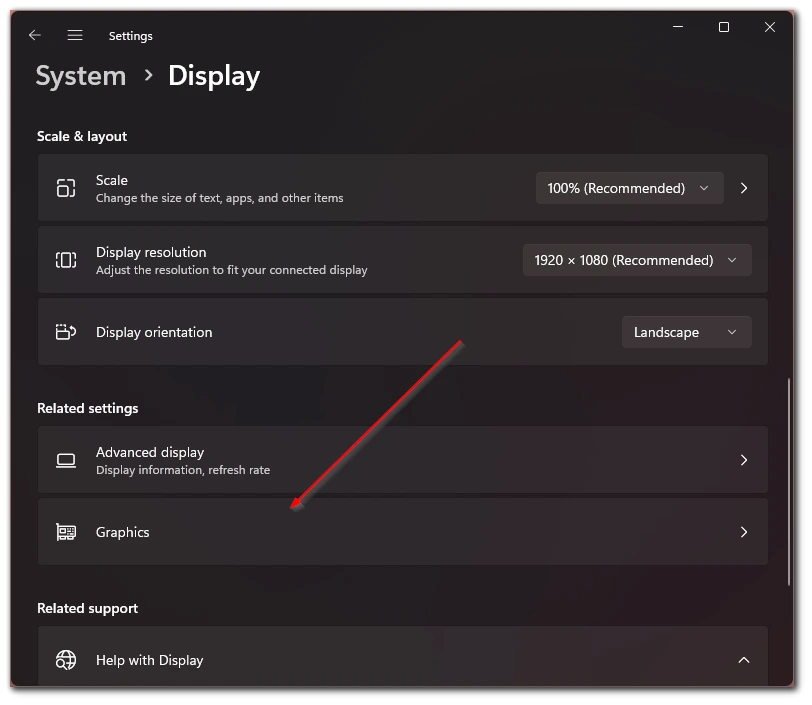
- In the next menu, you have to click on the Change default graphics settings button.
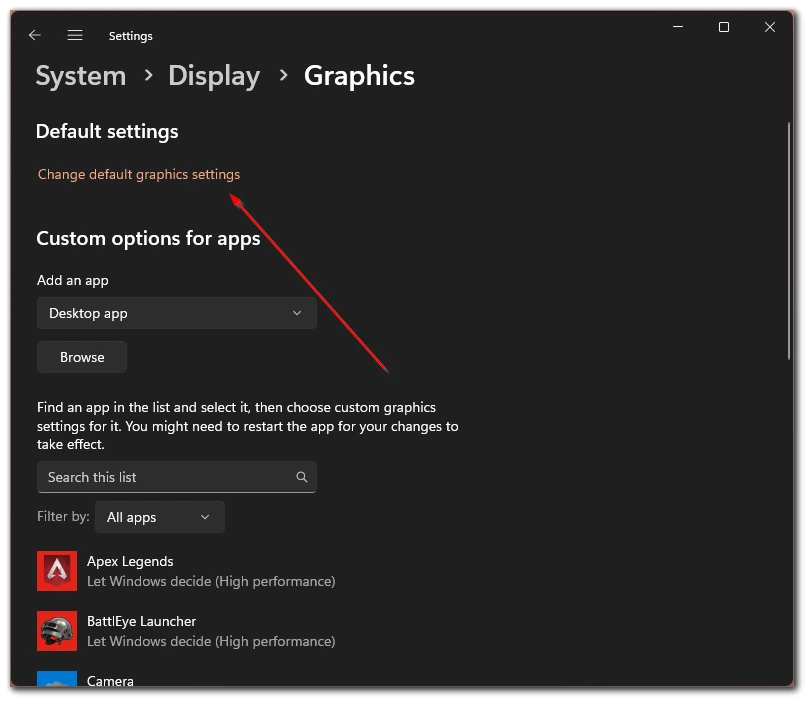
- In the end, you just need to turn on the Hardware-Accelerated GPU Scheduling option and reboot your PC.
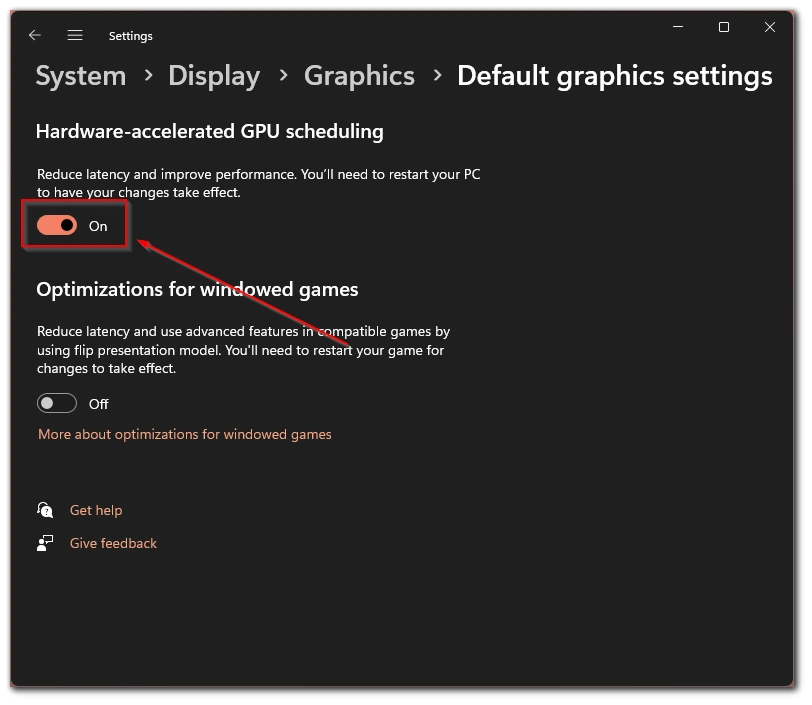
It’s worth realizing that although this feature appeared back in Windows 10, it isn’t enabled by default until now. So if you have never enabled it, you will need to go in and manually activate this feature. Another way to increase the performance of your PC is to overclock your graphics card. Of course, this can be dangerous, but if you do everything carefully and carefully, you can increase your performance significantly.
How to update the Nvidia Graphic Card driver
One of the main requirements for running Hardware-Accelerated GPU Scheduling is to have the most current version of your graphics card driver. If you have an Nvidia graphics card, this is as simple as possible. For this purpose, Nvidia has a special utility called GeForce Experience. After you have opened and run the program you need:
Go to the Driver tab.
Next, you need to click on Check for Updates.
At the end just click on the Download button.
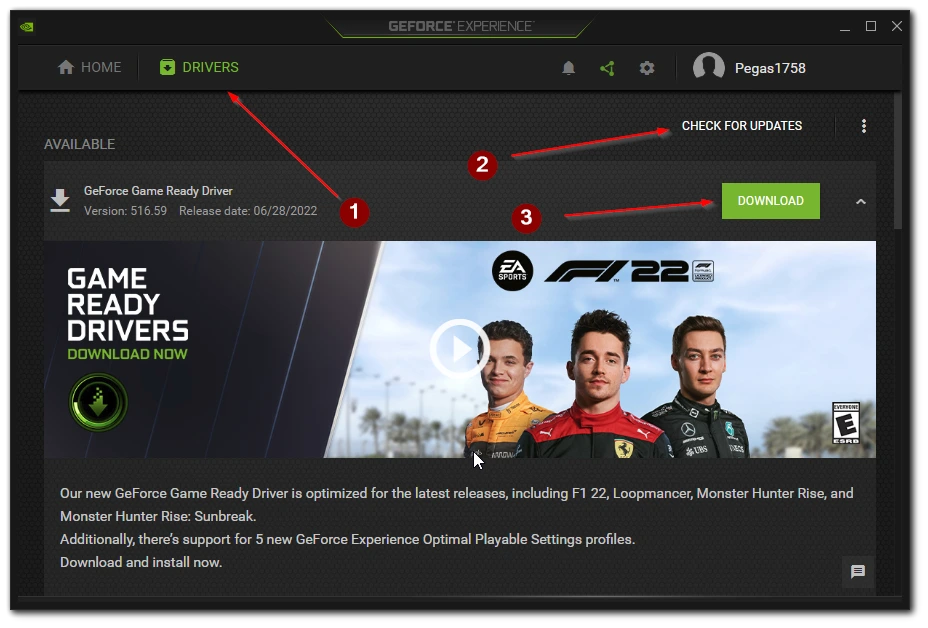
When the driver is downloaded you need to click on Express Installation.
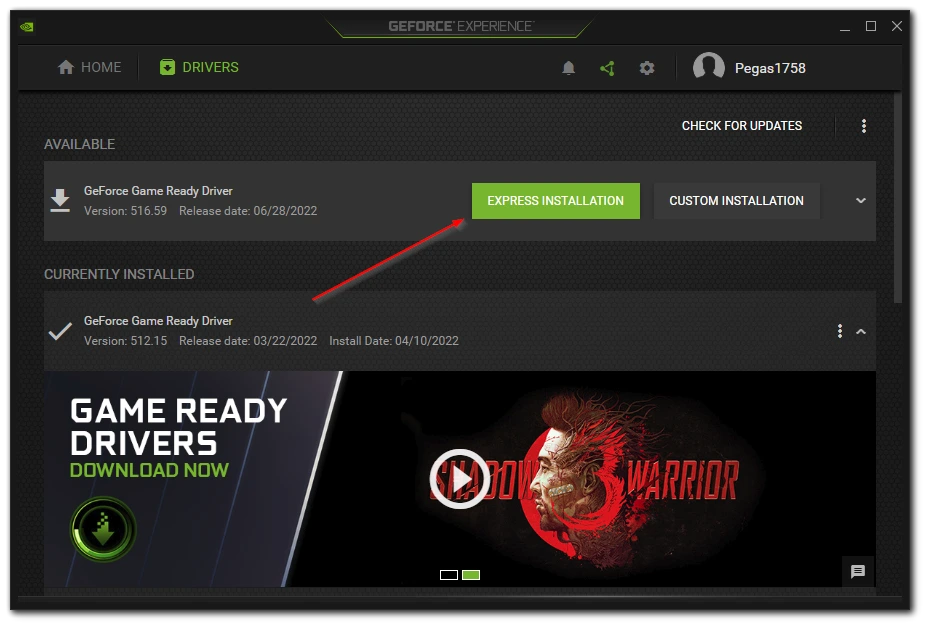
The driver will automatically install. After that, you should restart your PC. Besides, if you know the model of your video card and want to tell some specific driver then you can always find it on the manufacturer’s website.
Read also:
- How to fix ntoskrnl.exe high RAM, CPU, and Disk Usage on Windows 10
- How to take screenshots on Windows 11
- Does it worth using more than one graphic card on your PC?
How to update the AMD Graphic Card driver
In the case of AMD graphics cards, you can update the graphics card driver using the Windows Update function in the system settings of Windows 11. Also, AMD graphics chips have their own app to update the graphics card drivers. It’s called AMD Radeon Settings, after installing it you need to open it and follow the instructions:
- Click on the Update button at the bottom left of the screen.
- After that, you will see your installed driver, also if you see the inscription New Radeon Software updates are available it means that a new version of the video driver is available for your video card.
- To install the new driver you need to click on the down arrow next to the New button. In the pop-up menu, you will need to click on Update Now.
- Next, a pop-up menu will prompt you to go from the AMD Radeon Settings app and go to the Installer. Click on Proceed.
- In the installer, you need to click on the Upgrade button. In the next pop-up window, don’t change anything and just click Install.
- Next, you need to click Upgrade again. You will see a menu of items to install the driver. Select the default and click install.
After that, the installation will start. You can restart your computer after the installation is complete. As you can see this is a little more complicated than with Nvidia, but you still won’t need more than 10 minutes to do it.


