
Windows 11 is the newest and one of the most advanced operating systems. It has a lot of features that have been in previous systems, but it also has a few features of its own. One of the old features that have moved to Windows 11 and even improved is the screenshot feature.
You may need a screenshot for many different tasks, it can be a cut shot of your favorite movie, a nice view of your favorite game, or just a screenshot to explain how to do something. You may also need a screenshot to write a guide or blog post, for example. In Windows 11, this is the default function of the Snipping Tool.
What is screenshot
A screenshot is a basic function of any system. You can take screenshots on your phones, tablets, or computers. It’s essentially a picture that captures your screen or part of it. Of course, the screenshot feature is available in Windows 11 and it exists as a built-in feature there are many other applications you can install if you need additional features.
With the appearance of such a feature as screenshots, users started to actively use it. This is quite handy, especially in cases where you can’t download a picture from somewhere, you can just screenshot it, for example, it works with posts on Instagram. It’s also a way to capture correspondence with another user and if he deletes a message later, you will have proof of his words. However, there are some apps that don’t allow users to take screenshots, for example, there is such a problem in Android applications, but there are ways to bypass this.
In the case of Windows 11, there is a Snipping Tool function in the system. You can use it to capture part of the screen, or you can capture a window or even the whole screen. Also after capturing, you have some image processing functionality available, which is quite handy.
Read also:
- How to find out if someone screenshots FaceTime
- How to make a full page screenshot in Google Chrome
- How to screenshot without home button on your iPhone or iPad
How to take screenshots with build in Windows 11 features
Screenshot tools have been around since the early versions of Windows. Earlier screenshot capturing software was called Scissors. Now the developers have renamed it, Snipping Tool. In essence, its functionality remains the same. When you click on the application icon or by pressing the shortcut on your keyboard, a window for taking a screenshot appears immediately. You can select the area you want to capture. In order to do this you need to:
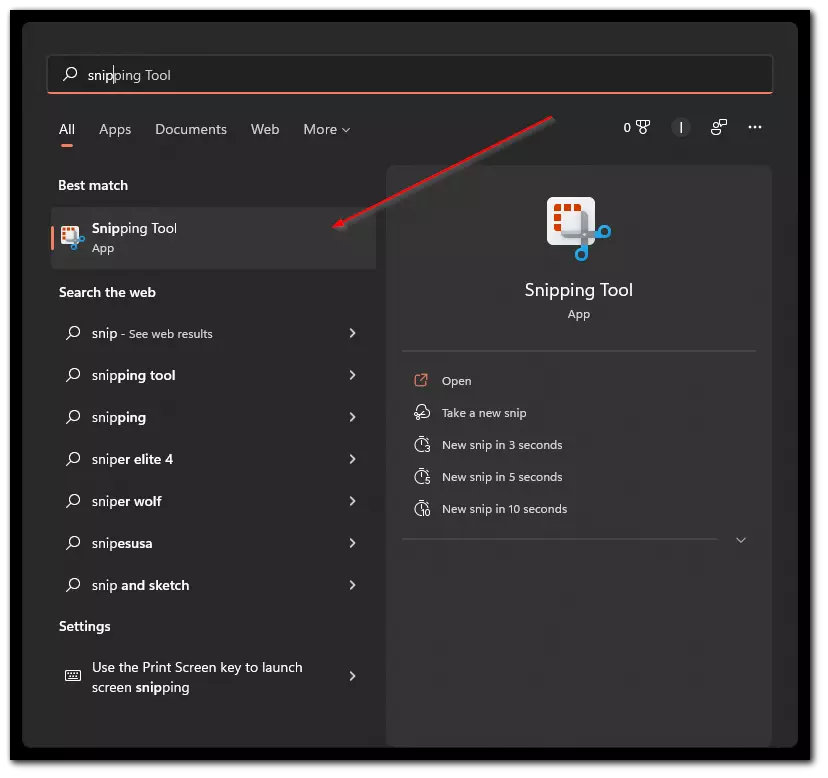
- Go to the Start menu and in the search box type Snipping Tool then select the desired item from the search results. After that, click + in the popup window. You can also do it simply by using the key combination Win + Shift + S.
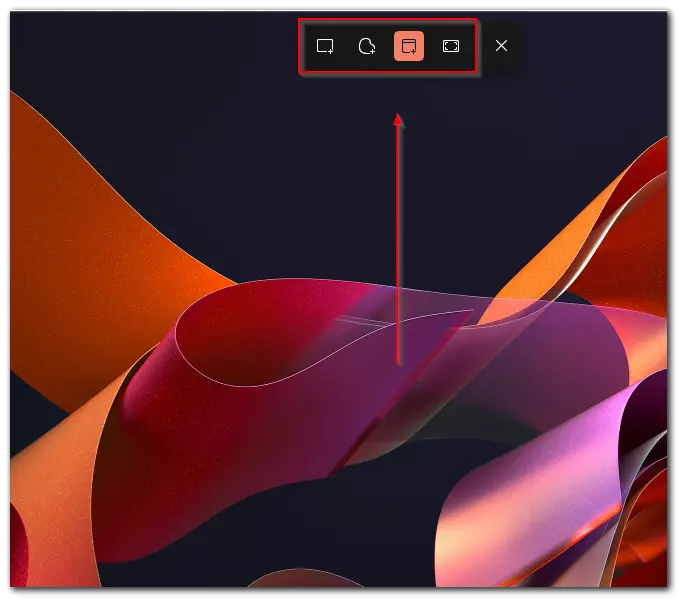
- Then you will see a screen capture box and at the top, you can find some icons where you can select the mode in which you want to take a screenshot. There are 4 modes:
- Rectangular Snip is a mode where you can select the field to capture the screen. In this mode, the field will always be rectangular and you can use the mouse to select any part of the screen.
- Freeform Snip in this mode, you can also choose the field to capture the screen, but here you can draw any shape to capture the screenshot.
- Window Snip in this mode you choose one of the open windows which will be completely captured.
- Fullscreen Snip is a mode for capturing the full screen.
- After selecting the desired mode you need to click on the screen and select fields for the screenshot, then the screenshot will be automatically saved and added to your copy buffer.
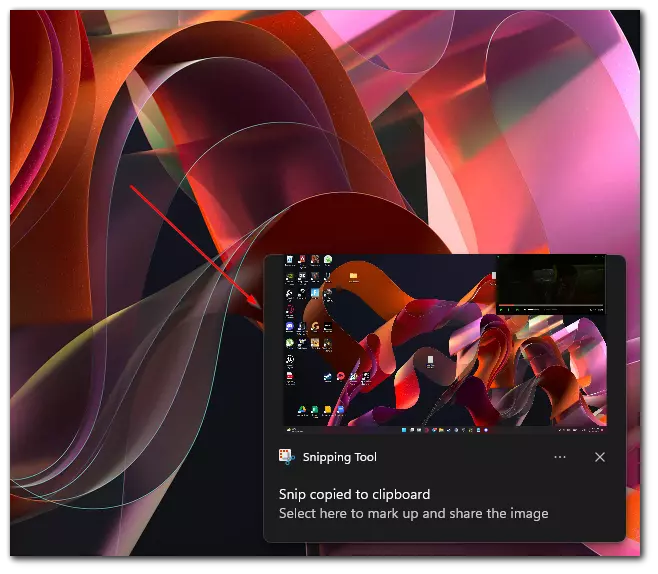
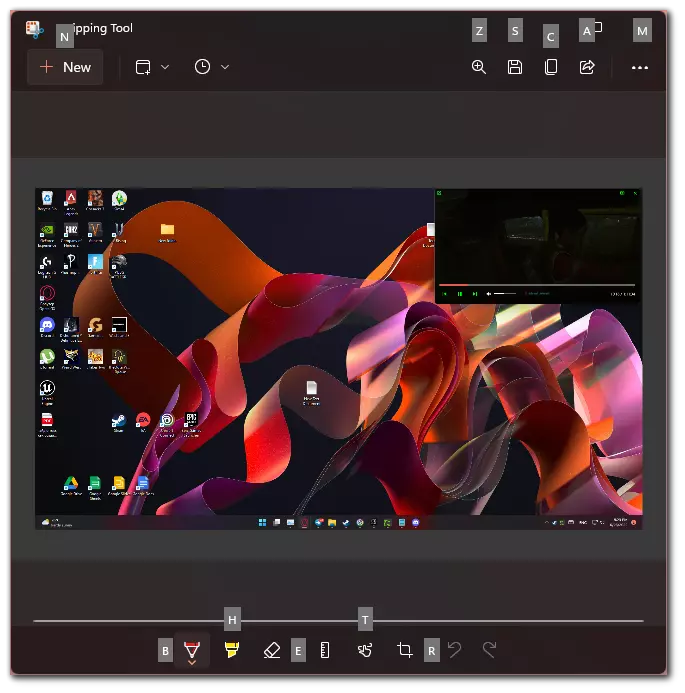
- Besides, a system message will appear at the bottom right of the screen, if you click on it, the screenshot editing menu will open. Here you can apply different drawings or customize your screenshot somehow.
With these steps, you can take a screenshot on your Windows 11. Of course, there aren’t many editing options, but if you just need to take a screenshot quickly, this is a working method for which you don’t need to install any additional apps. A similar function is also available on Mac computers.
How to take screenshots with external software
However, if you want to customize your screenshots with more features, such as delay before screenshot, blur on unnecessary areas, adding different fields or arrows, and uploading screenshots to cloud services so they can be sent as a link instead of a file, then I can recommend you Greenshot. All screenshots for this guide were made in Greenshot.
It’s pretty easy to use. After installing the app you can select multiple shortcuts for different functions such as area capture or window capture. Then you automatically take a screenshot by clicking on the button you want to use and then you can choose to enter the screenshot editor.
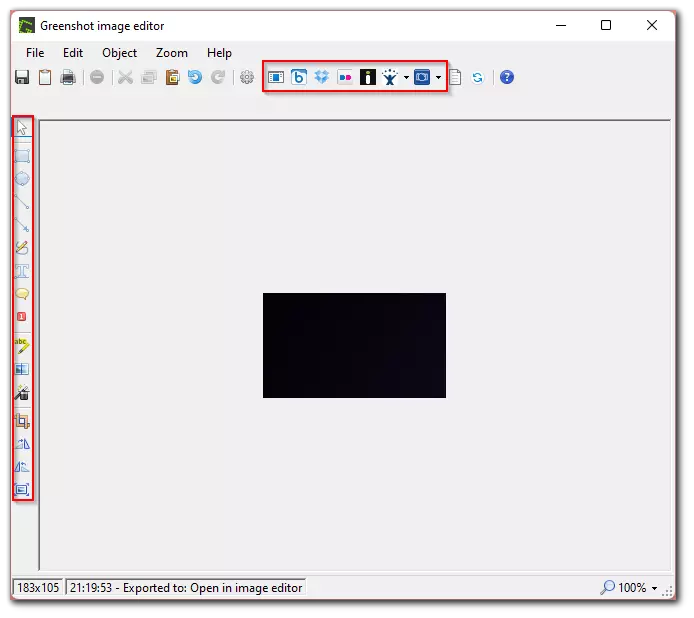
There are quite a few different functions available to you, such as adding shadows, image resizing, uploading to different clouds, and so on. In fact, the functionality of Greenshot is quite large and handy.
How to record screen video on Windows 11
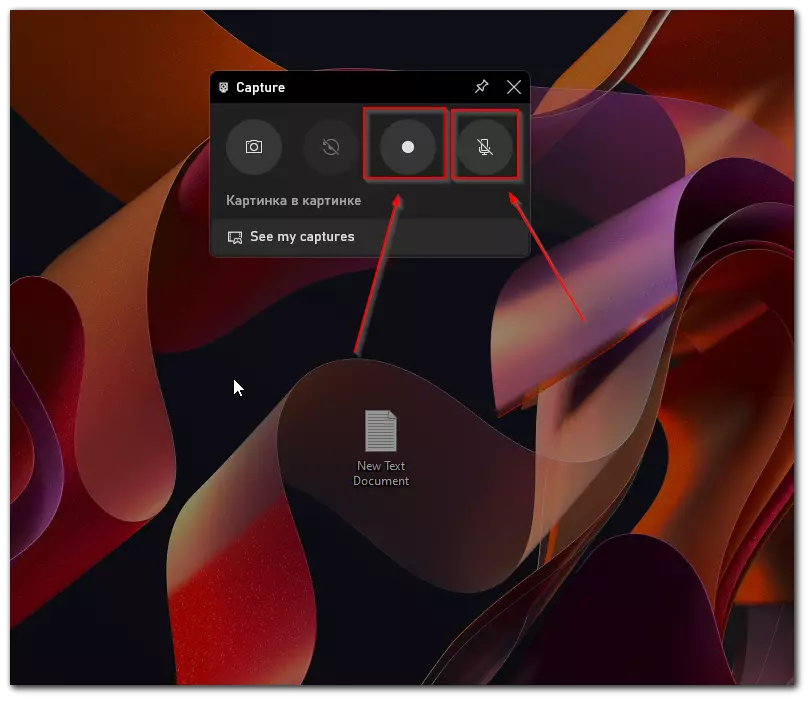
In addition, you can also record your screen on Windows 11. For this will be quite handy to use the Xbox Game Bar. This is usually used to record games, but you can run it at any time and record any activity on your screen. In order to use this feature you need to:
- Press the Win + G key combination.
- Then in the upper left corner, you need to click on the button with a circle to start recording, also here you can choose to turn the microphone on or off.
- After this you can do whatever you want, to stop the recording you can use the combination Win + Alt + R. Or you can click on the red square in the popup window. You don’t have to worry about that popup window not getting into the recording.
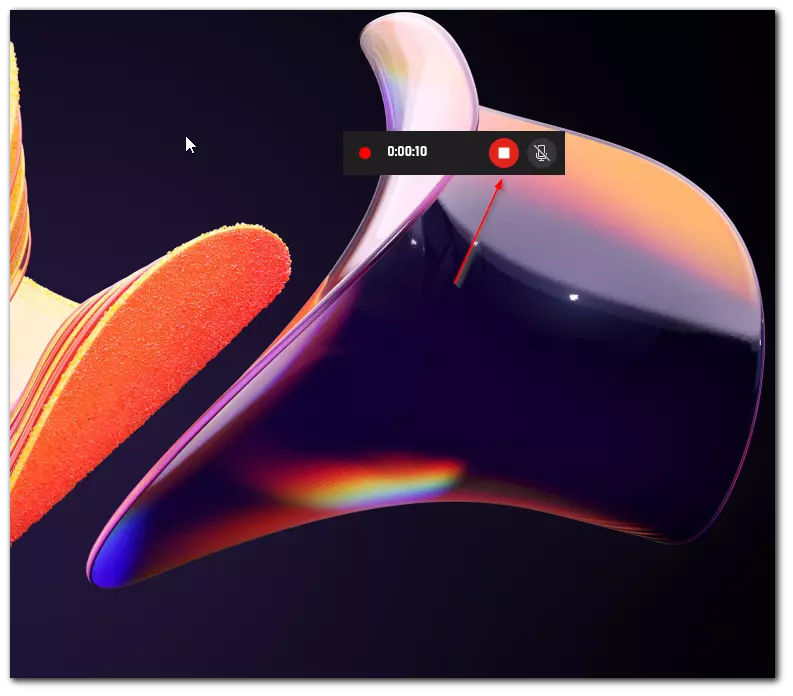
The video will be saved in the Xbox Game Bar to access it you need to shortcut Win + G to enter the Xbox Game Bar. As you can see making a recording in Windows 11 is pretty easy. Also if you’re using an Nvidia graphics card you can also use NVIDIA ShadowPlay, although sometimes there are problems with recording with this program.
Read also:
- How to screen record on iPhone with audio
- How to stop screen recording on Mac
- How to screenshot on Samsung tablet
How to show someone your screen on Windows 11
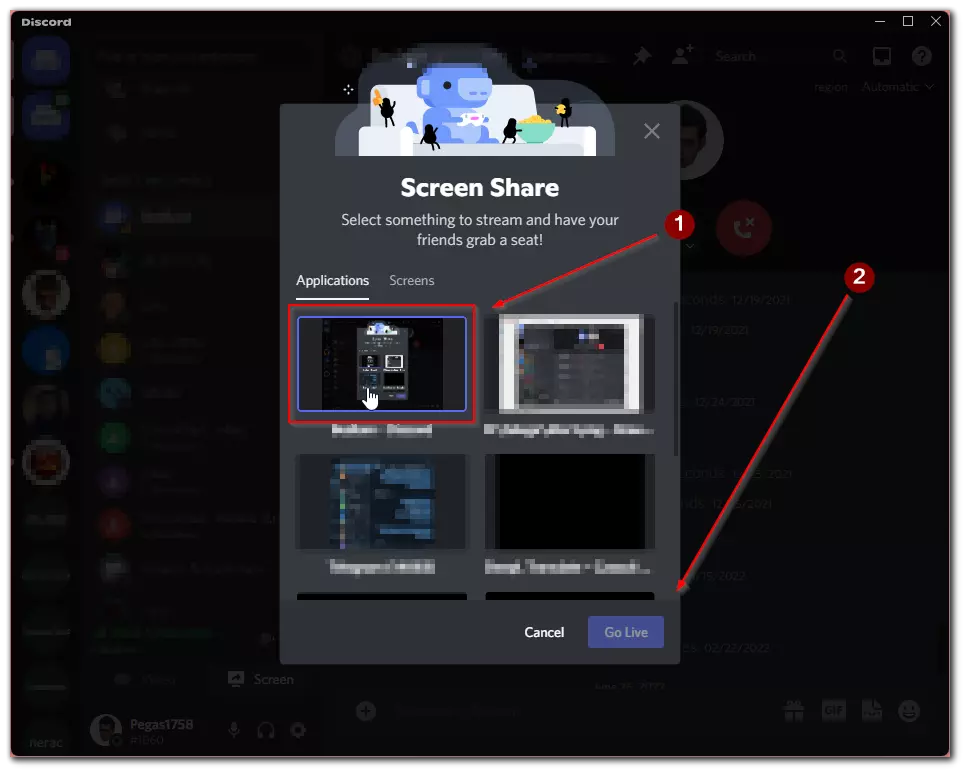
If in an attempt to explain or demonstrate something screenshots or video isn’t enough, then you can of course run the stream and show another person your screen. Discord is ideal for this. Here you can demo your screen right during a voice or video call. To do this, you need:
- During the call, press the screen button to start the stream.
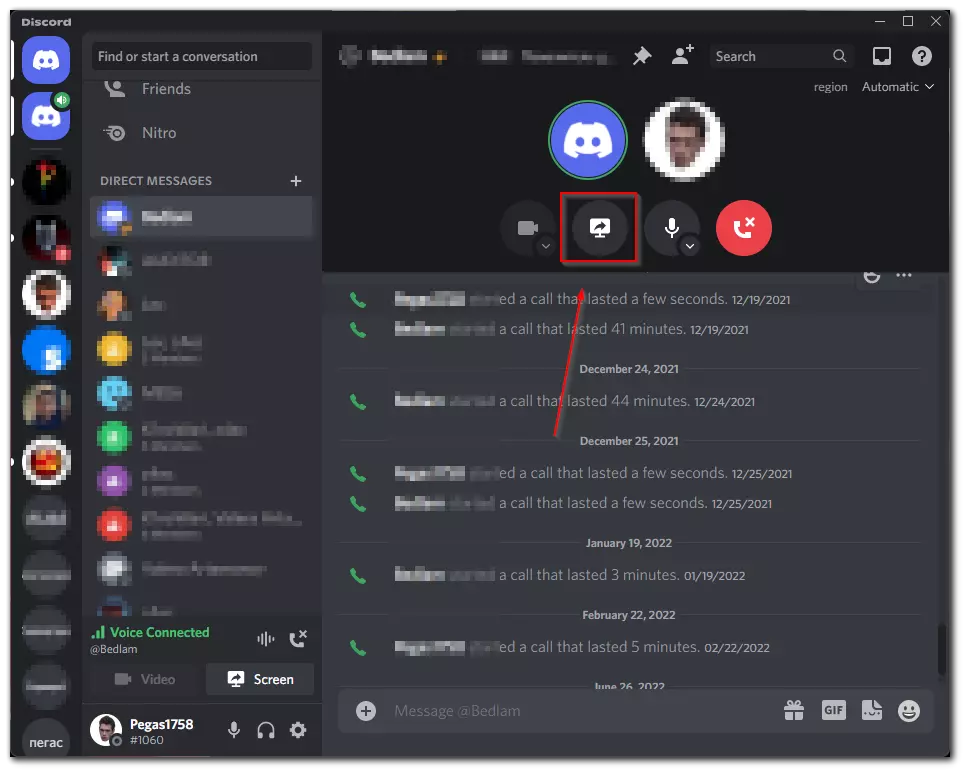
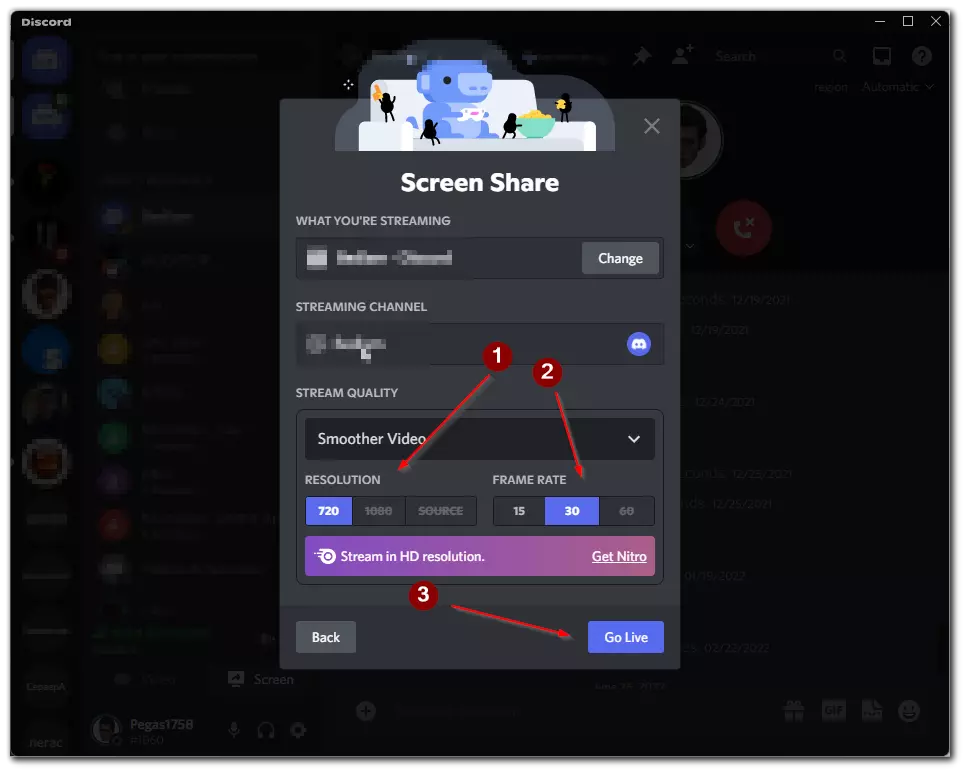
- After that, in the popup menu, you need to select the window you want to stream or select the screen and press Go Live.
- Then you need to specify the quality of the stream and its frame rate.
- After that, your stream will start. To turn it off, you need to click on the white button with the screen to stop streaming.
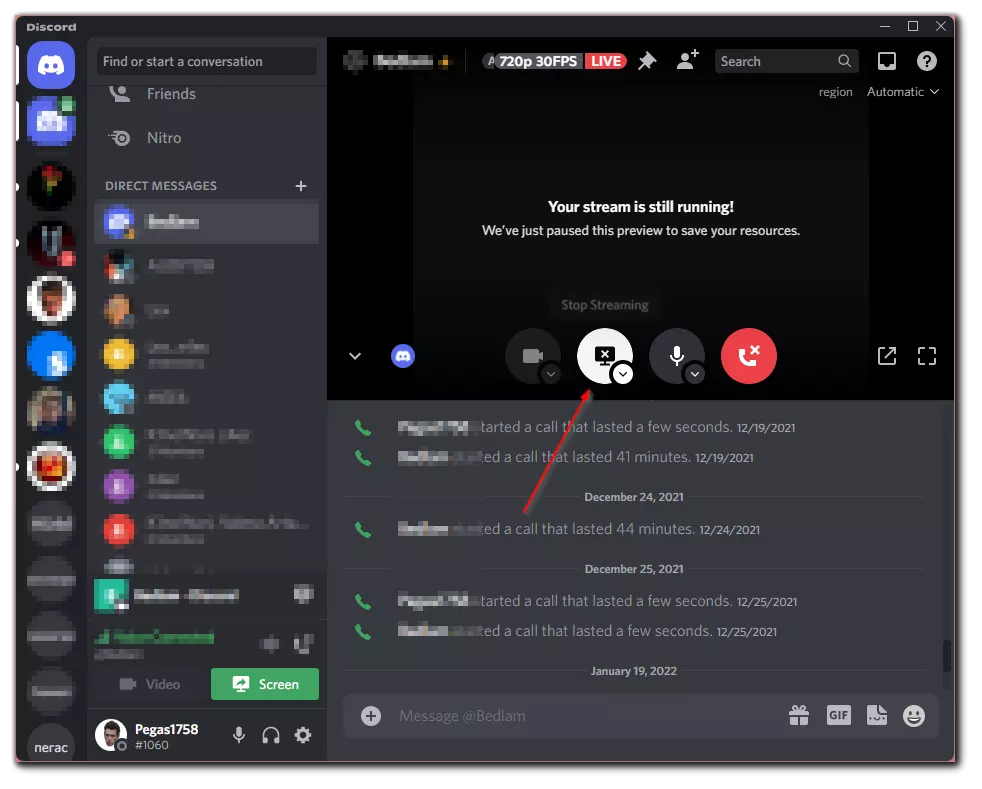
As you can see, streaming via Discord is pretty easy. Besides, of course, you can start streaming with Nvidia Shadowplay for example directly on YouTube or Twitch. However, in this case, the streaming will be a bit delayed and you need more resources for streaming. If you just want to show the screen to your friend, a simple Discord will be enough.


