")
If you need to invert a photo, you can easily do it using the built-in tool on your iPhone. Sometimes it’s necessary if you take a picture in the mirror and some inscriptions are distorted. The built-in photo editor on your iPhone includes a lot of functions so that you can improve any image without the use of third-party apps.
Along with this, the iPhone has a function of inverting the screen. You can invert your screen using two modes. This is a necessary feature for users with color blindness or problems with reading bright screens.
What to do to invert the image using the built-in tool on iPhone?
The built-in settings on your iPhone include many different functions. Among them is image inverting, for which you need to follow these steps:
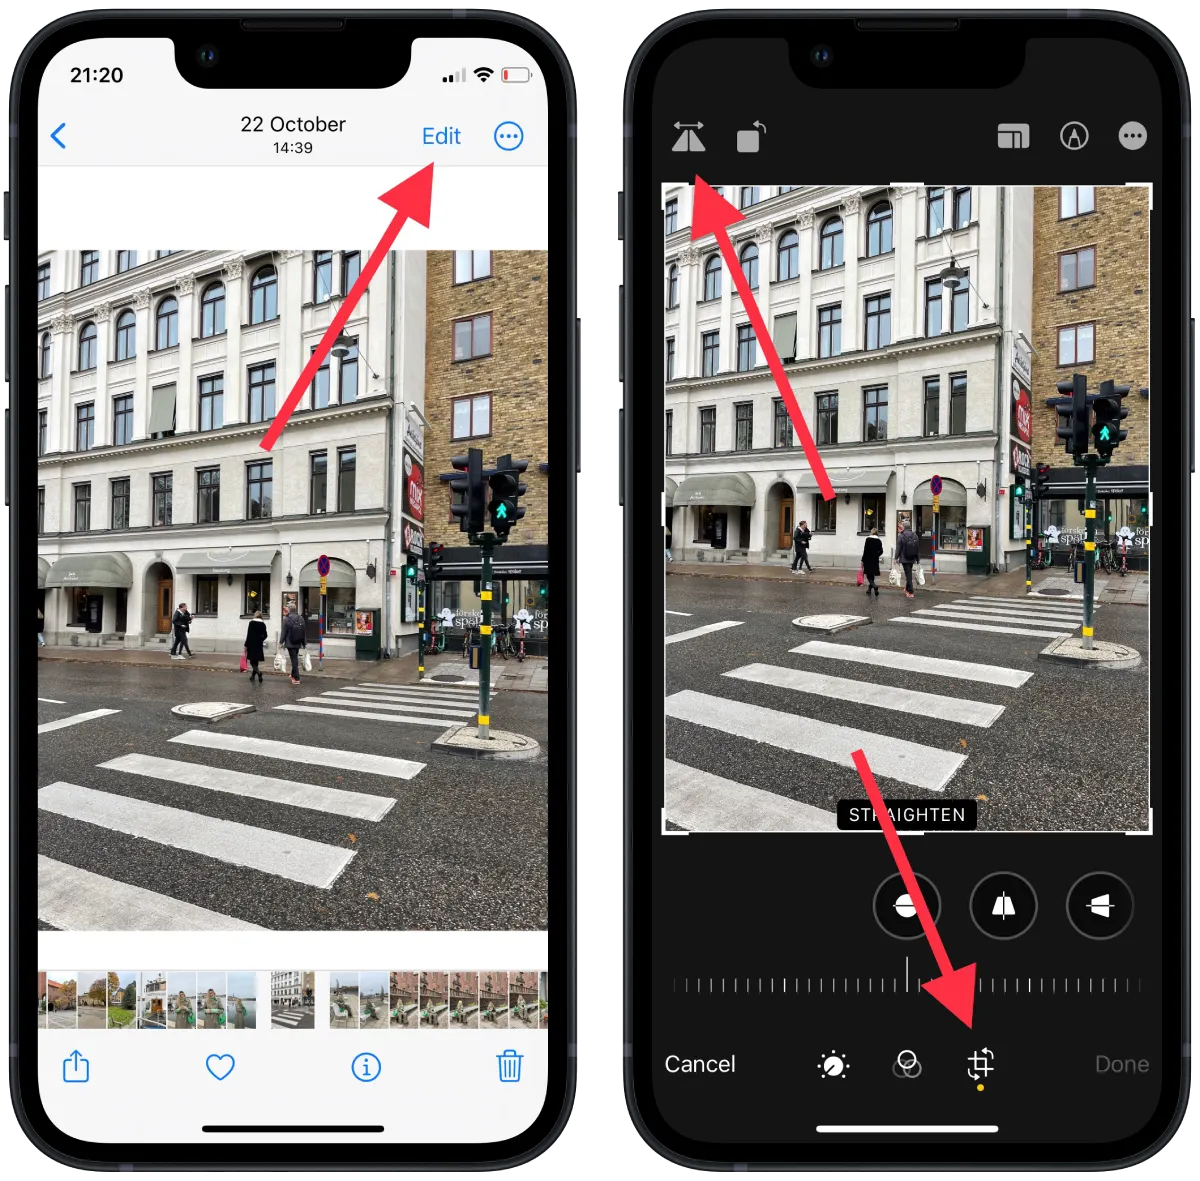
- The first step is to open the Photo app on your iPhone and select the desired photo.
- Then select Edit in the upper right corner.
- After that, you will open a window of settings. You need to click on the icon in the right corner to change.
- Then click on the invert icon in the left corner.
After these steps, you only need to click on Done to have your inverted picture saved on your iPhone. In addition, you can apply a filter, change the warmth, saturation, sharpness, and many other photo adjustments. All in all, for basic editing, these settings are enough for many users.
If you need something more, you should use editors like Snapseed, Lightroom, and others.
What to do to revert the image using the built-in tool on iPhone?
In case you clicked Done and, for some reason, you need to cancel the photo settings, you need to follow these steps:
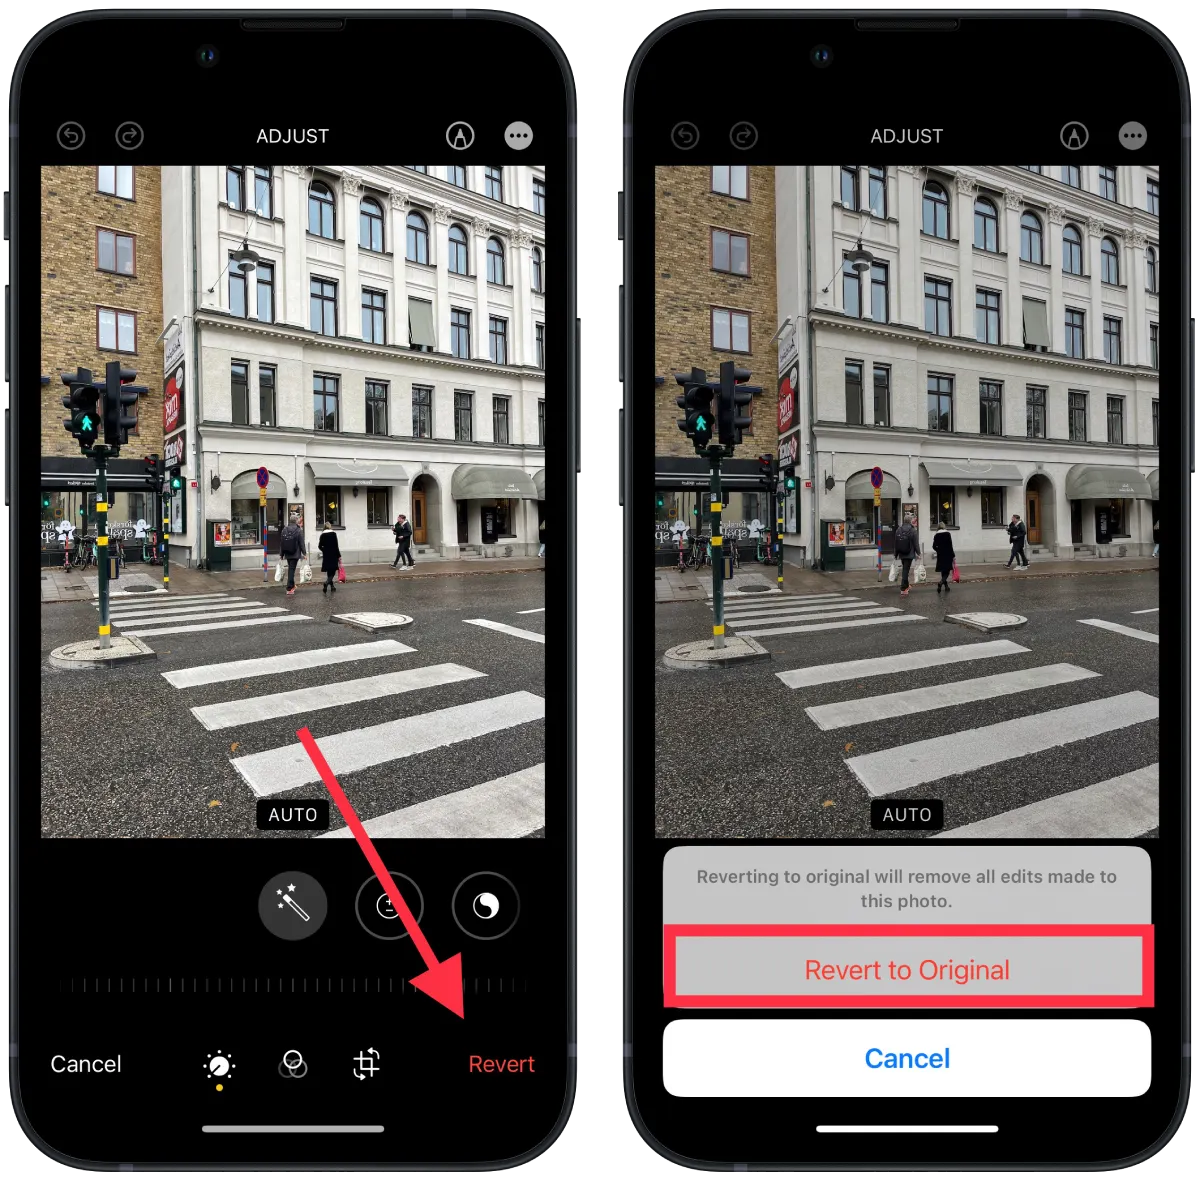
- The first step is to open the Photo app on your iPhone and select the desired photo.
- Then select Edit in the upper right corner.
- After that, in the lower right corner, click on Revert.
- Then confirm your action by clicking on Revert to original.
After these steps, your image will be original as you made it. In such cases, if you want to experiment with the photo or keep both, you should create a take of the photo. To do this, click on the three dots in the upper right corner, next to the Edit button, and from the list, select Duplicate. This will create a copy of your photo, and the two pics will exist separately.
What to do to invert picture colors on iPhone?
Even though the iPhone has a lot of built-in photo processing functions, the color inversion function is precisely what it’s not. You can’t perform these actions in the iPhone’s settings.
You can install a third-party app. Lightroom or Photoshop is generally able to cope with this function. Most photo editors don’t invert colors because it’s a complicated function. Because color inversion reverses the color scheme of a photo, creating a new style of image.
What to do to invert display colors on iPhone?
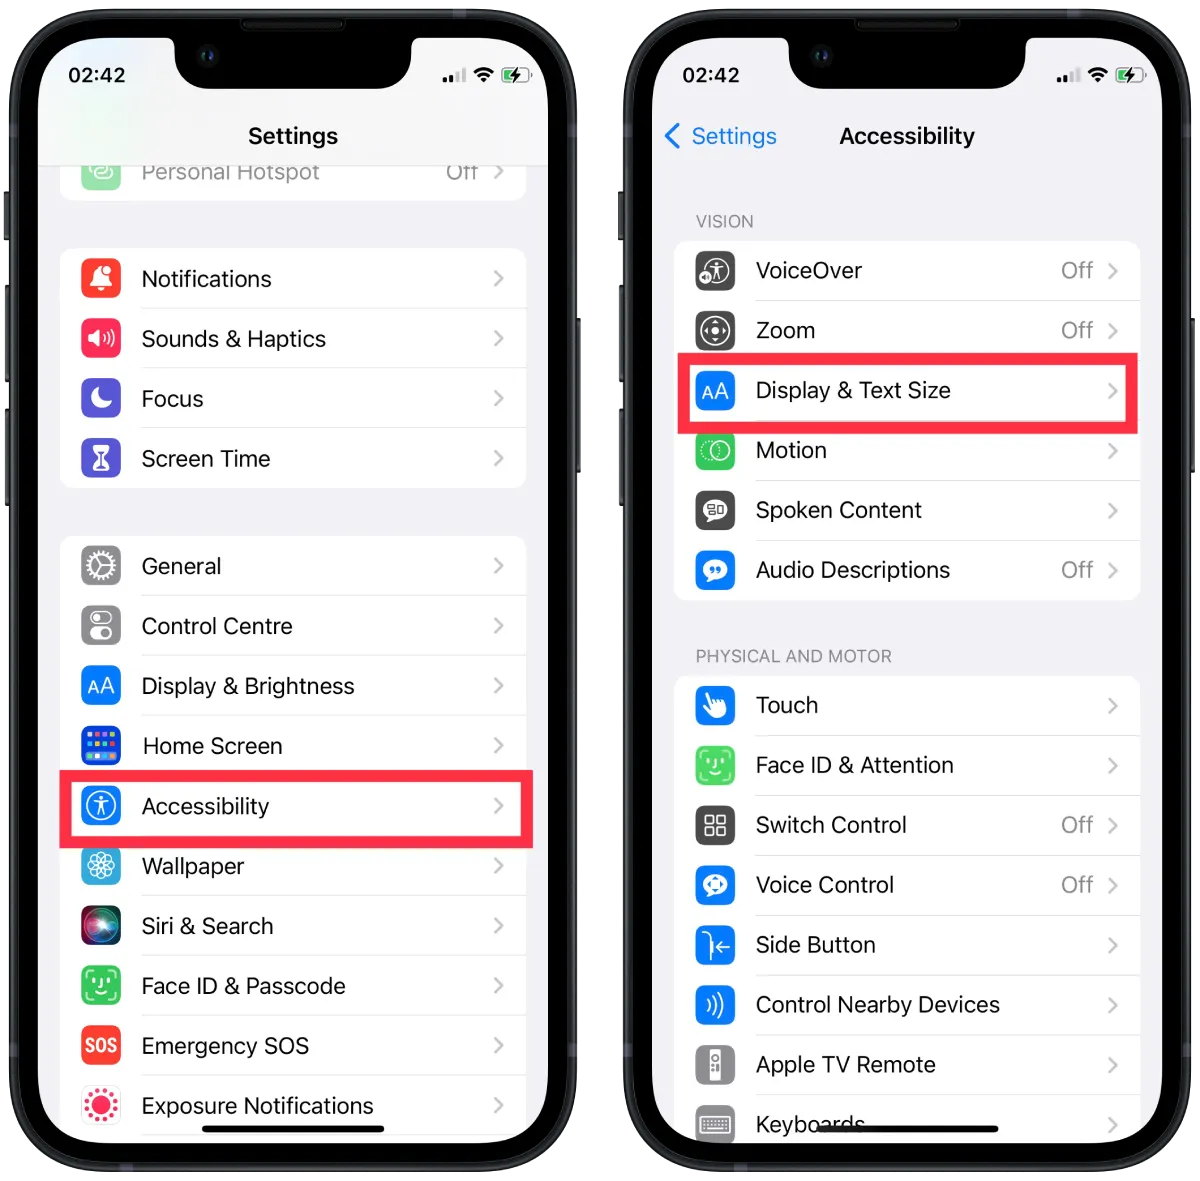
The display inversion feature on your iPhone is one of the Accessibility features. For people with various color blindness and other visual impairments, Apple has provided the option to invert colors, lower the white balance, or enable only grayscale display using color filters. To help one of these modes, follow these steps:
- The first step is to open the settings on your iPhone.
- After that, you need to select the Accessibility section.
- Next, you will open a new window, where you need to choose the Display & Text Size section.
- Then scroll down and drag the slider under Smart Invert or Classic Invert.
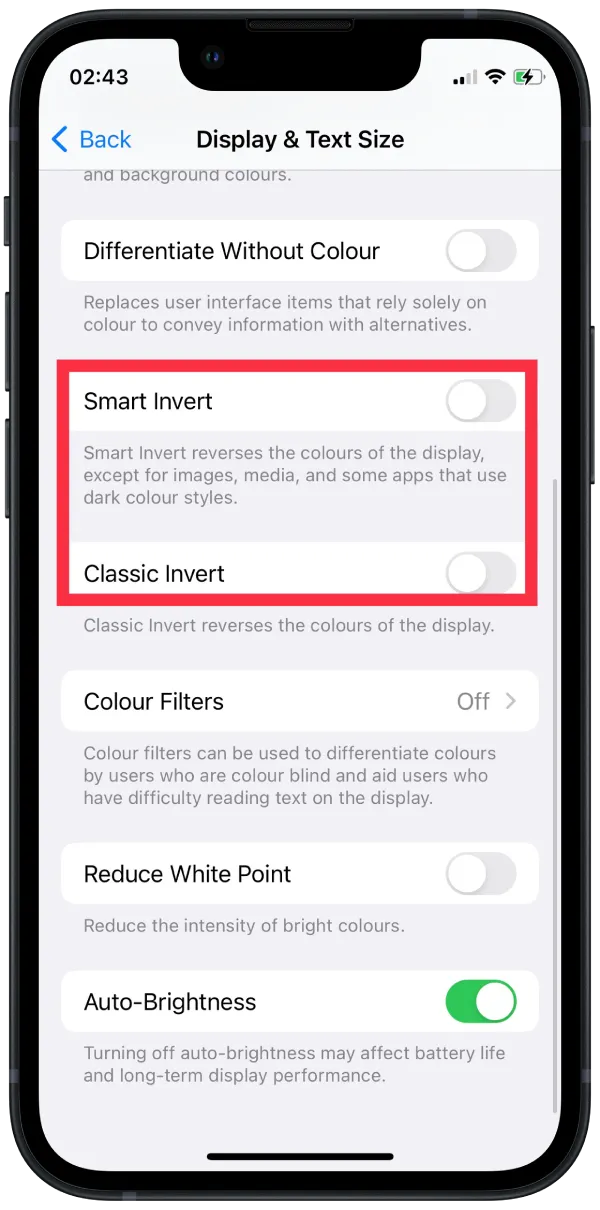
After these steps, you need to select the color you want. There are two ways to invert your iPhone’s colors: Smart Invert or Classic Invert.


