The Microsoft Excel spreadsheet processor is very handy for working with all kinds of data. However, some seemingly simple things in it are quite difficult to do – the user simply doesn’t know how to do it. In particular, this applies to column alignment.
It is necessary to do this to fit there all the necessary information. But due to such changes, the appearance of the spreadsheet is significantly spoiled. To solve this situation, you need to make each column the same size as the others. You can easily do it using the special options in Microsoft Excel.
How to make all columns equal in Microsoft Excel
In order to use Microsoft Excel effectively, you need to continually improve your skills and knowledge of how to perform certain operations. So, if you want to make all columns to be the same size in your Excel document, you can follow these steps:
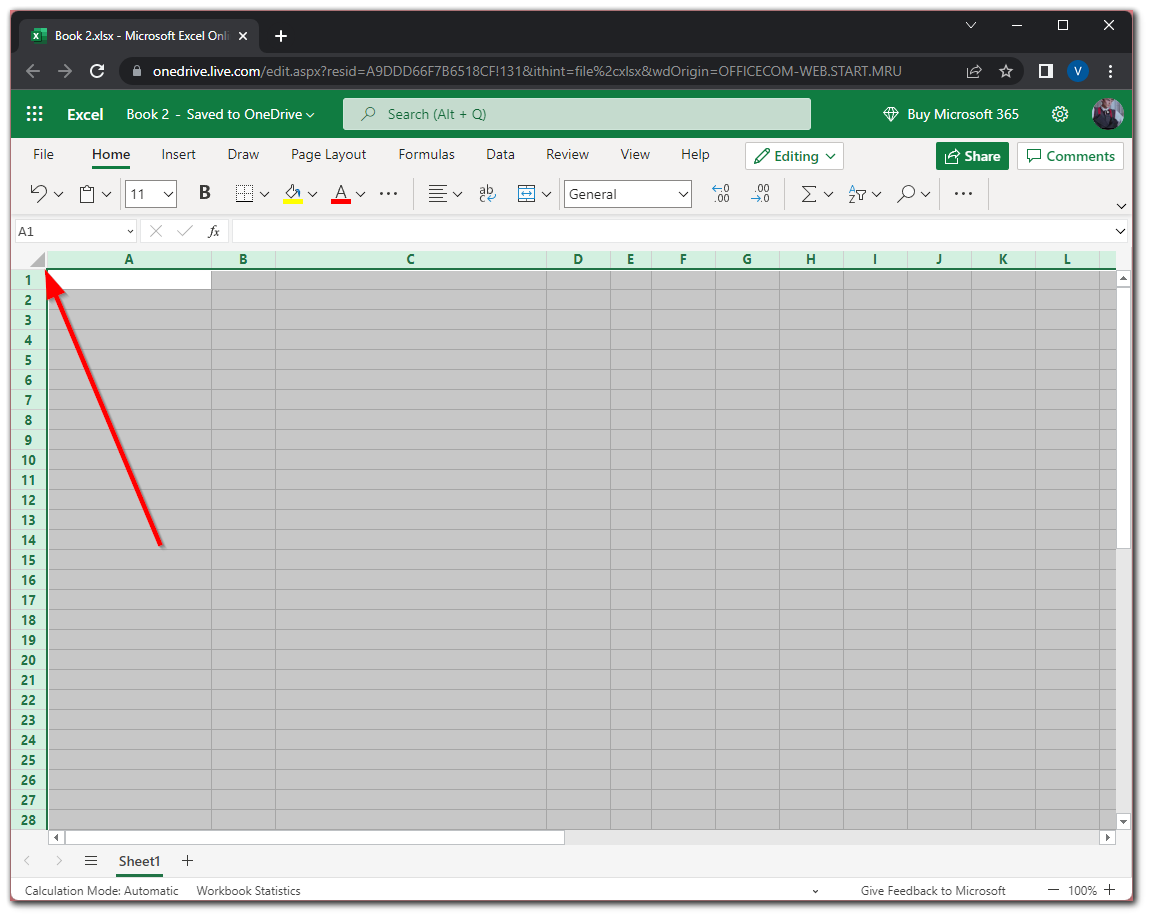
- First of all, open your spreadsheet and click on the arrow at the top left corner to select all columns.
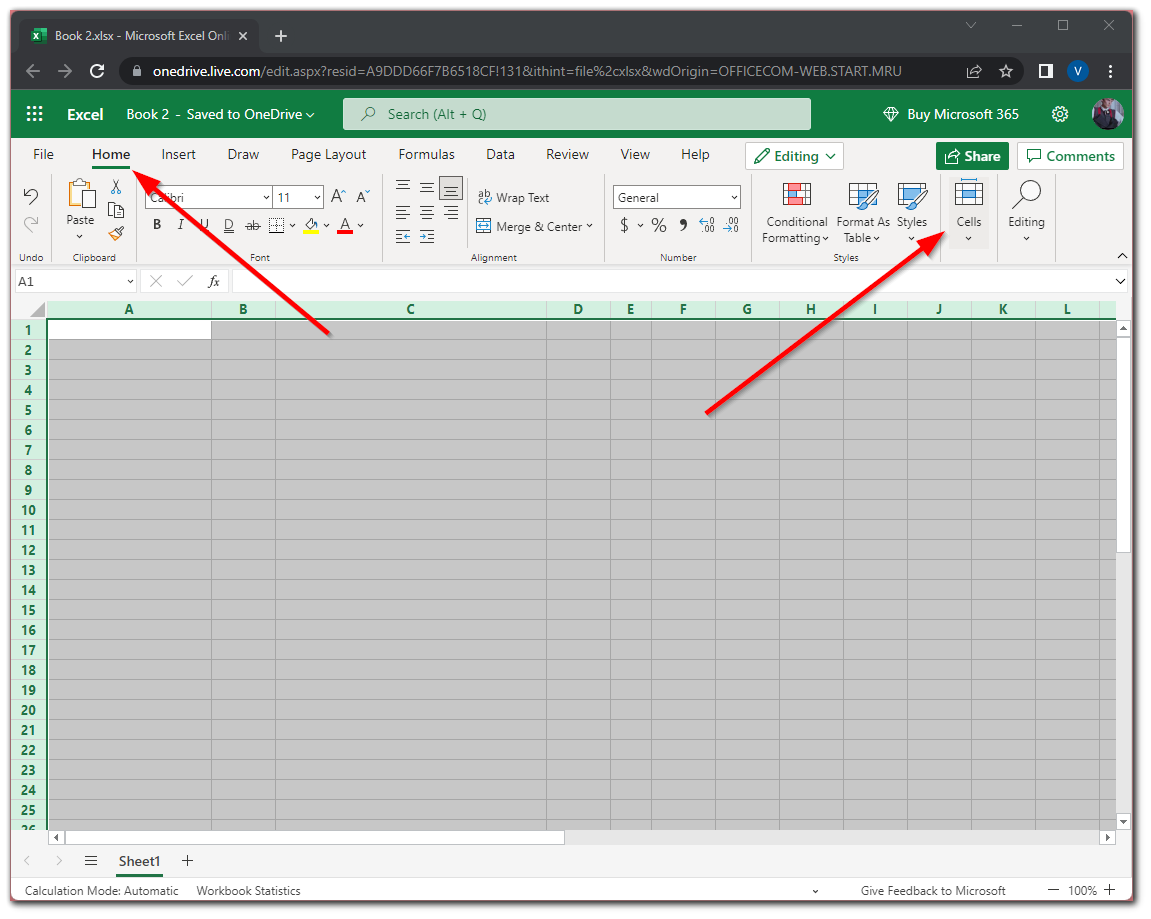
- After that, click on the Home tab and go to the “Cells” option.
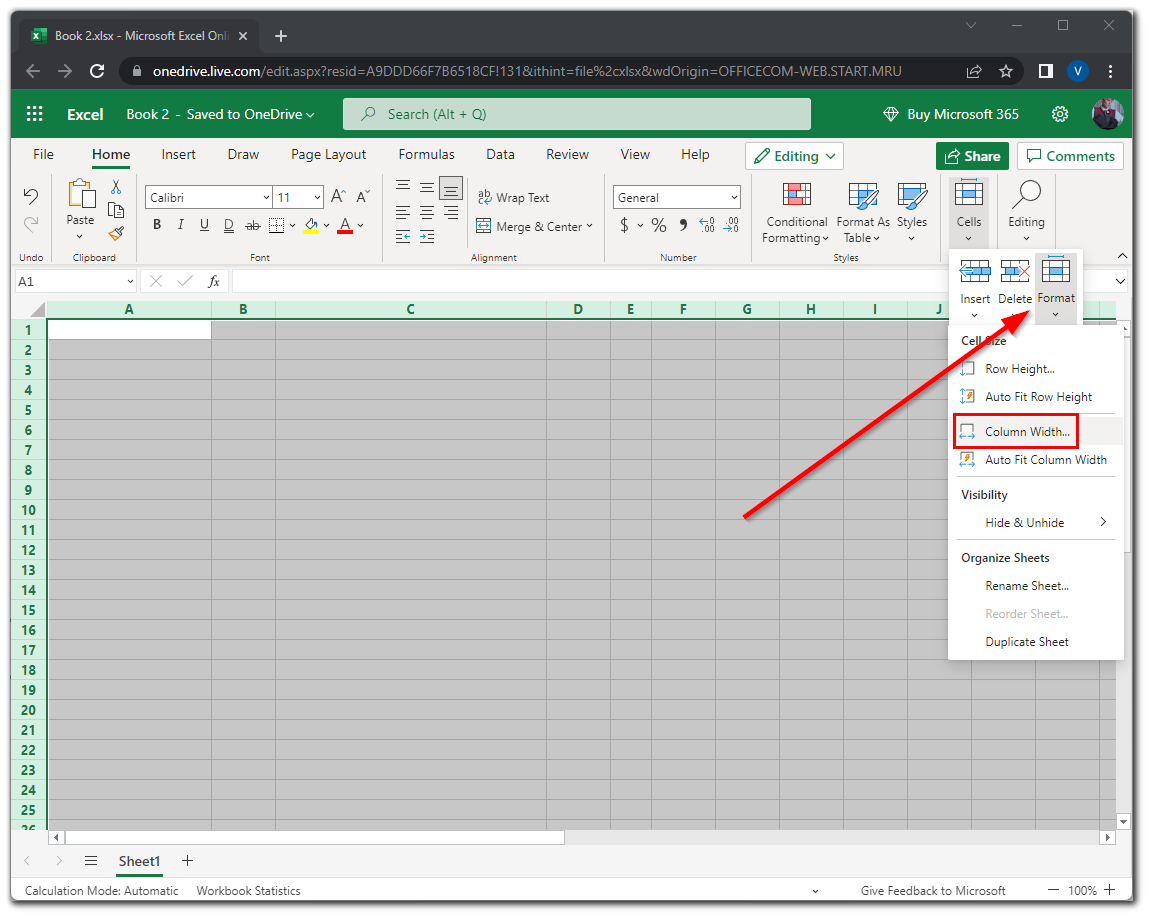
- Then click “Format” and select “Column width”.
- Now, in the appeared dialog box, enter the width you want and click “OK”.
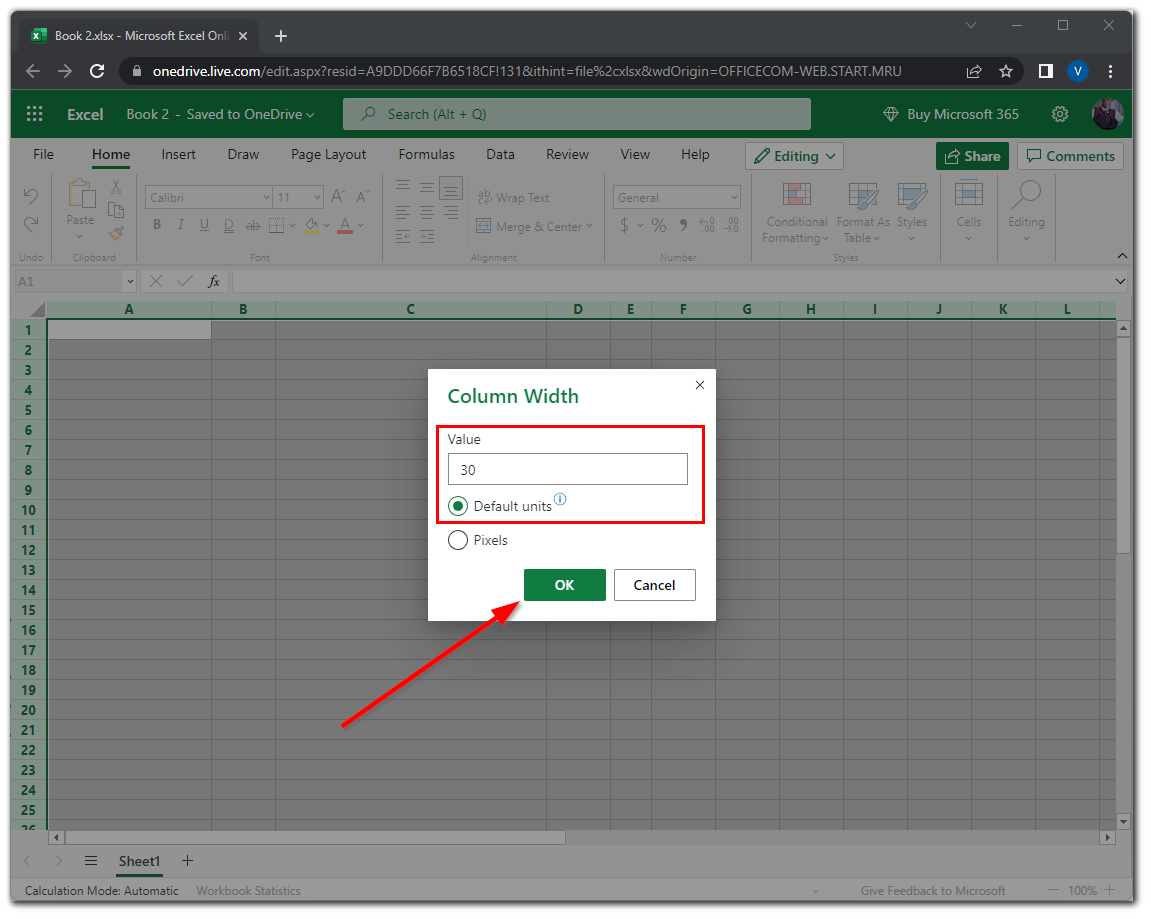
Once you have completed these steps, you will make all columns the same size in your Microsoft Excel spreadsheet.
How to make certain columns the same size in Microsoft Excel
If you want to make only certain columns to be the same size in your Excel document – follow these steps:
- Open your Excel spreadsheet and choose columns you want to make the same size by clicking on them with holding Ctrl.
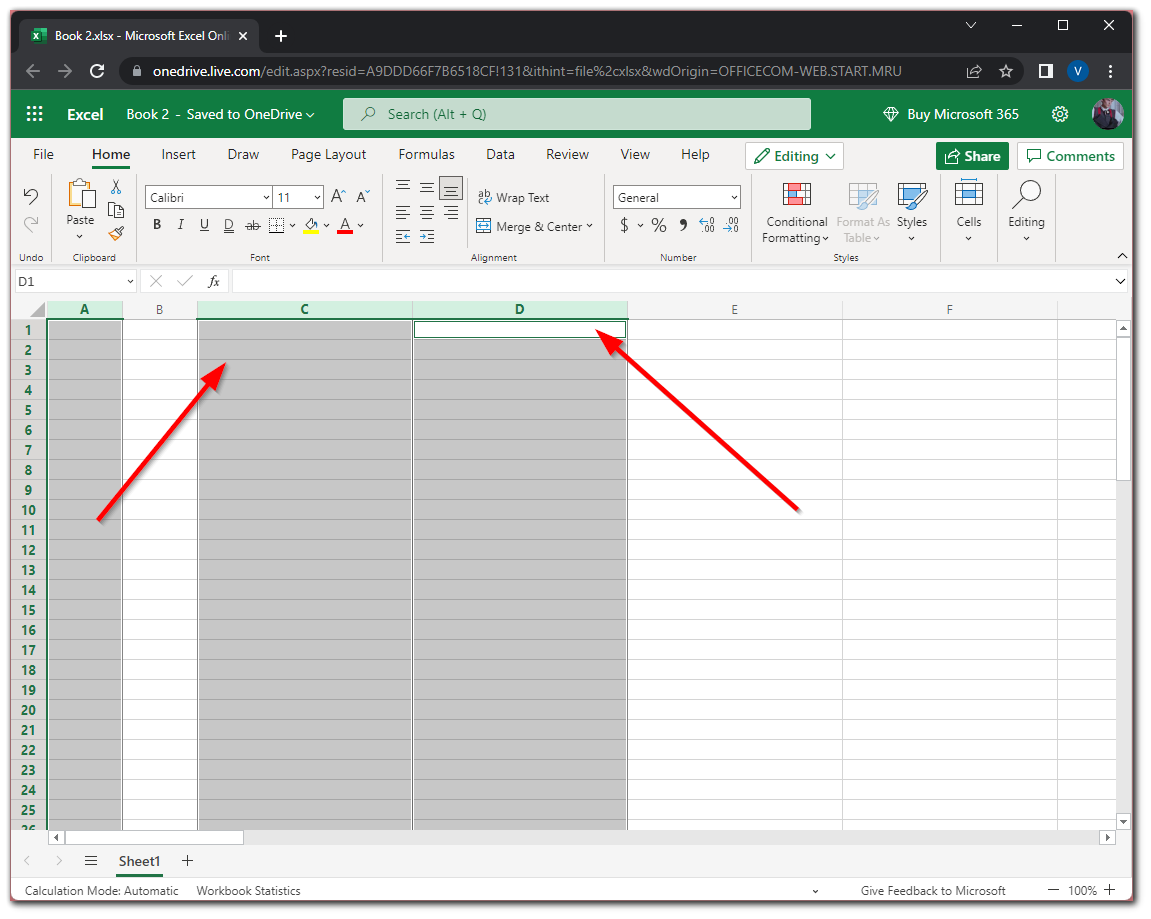
- Then click on the Home tab and go to the “Cells” option.
- After that, click “Format” and select “Column width”.
- Now, in the appeared dialog box, enter the width you want and click “OK”.
Once you have completed these steps, you will make certain columns the same size in your Microsoft Excel spreadsheet.
Moreover, you can also use only your mouse to change the size of the columns. Just click on it and drag. You will see the width of the column changing when you move the cursor.
How to use Autofit option to fix column width in Microsoft Excel
This is the best option that can definitely help you. It will save you time since you don’t have to click twice each time for all columns or rows. To do so, follow these instructions:
- Open your spreadsheet and click on the arrow at the top left corner to select all columns.
- Then click on the Home tab and go to the “Cells” option.
- Finally, click “Format” and select “Auto Fit Column Width”.
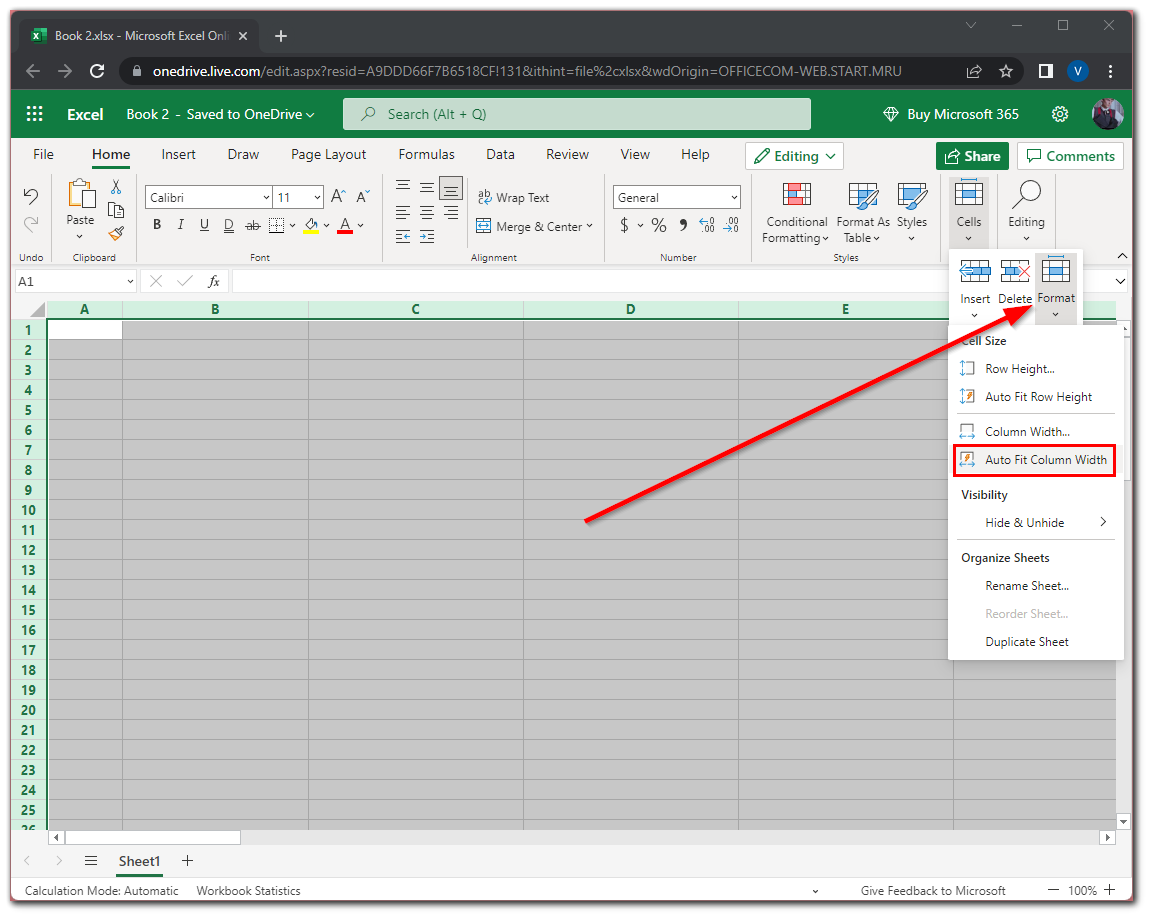
After that, you will see that the columns are aligned to the contents in their cells.
Read Also:
- How to build a bubble chart in Microsoft Excel
- How you can combine two columns in Microsoft Excel
- How to add months to a date in Microsoft Excel
How to use VBA codes to make all cells the same size in Microsoft Excel
If you want to choose code to change column widths and row heights, VBScript (Visual Basic Scripting) is the way to go. If you want to go this way, you can follow these steps:
- First, hover the mouse cursor over Home and right-click.
- Then select the “Customize the Ribbon…” command.
- Under the “Customize the Ribbon” tab on the right, select “Main Tabs”.
- After that, check the “Developer” box and press “OK”.
- You can now find the Developer tab at the top.
- Click on this tab and select the “Visual Basic” option.
- In the Visual Basic window click “Insert” and select “Module”.
So, finally, you have turned on the coding module, where you will enter your codes and run the program. You can use this code to change your column and row sizes:
Sub resize ()
Selection.ColumnWidth = 20
Selection.RowHeight = 20
End Sub
You can change the value for ColumnWidth as well as RowHeight, allowing you to visualize and resize the cells according to your input criteria. Then press F5 to run this code and go to your spreadsheet. You might see the change you have made using this code.


