")
In today’s world, almost everyone has a profile on some social networking site. Regardless of age, everyone likes to spend their free time this way. One of the most popular social networks is Facebook. There’re many reasons why you should make your photos private on Facebook. By doing so, you’ll keep your data safe from fraud. Fortunately, editing the Facebook app and making your photos private on Facebook is quite easy.
What to do to make your photos private on Facebook
Facebook is a unique Internet platform, and one of the largest social networks in the world. With the help of this social network, users have the opportunity to interact instantly with people from different parts of the world. The number of users of the social network Facebook is only increasing every day, and the trend continues to grow and develop. This is due to the fact that today Facebook isn’t only used to communicate with friends. More business owners are moving to social media and creating a new Facebook profiles for themselves.
It’s also quite difficult to imagine any startup without a Facebook profile. Since many have shown by example that it’s possible to earn quite well with the help of this social network. Each user can effectively use it as a tool, it’s necessary to form a clear plan and strategy for promotion. Think in advance about positioning, your personal part of the role of the organization or company. So today if you go to a personal profile of any person, you can literally in a couple of minutes understand a lot about his life.
It’s possible to find out by geolocation where he lives and works. Just look at the profiles of people close to him, those who are marked in the photo. It’s also possible to find out what hobbies a user has and where he likes to have dinner. A couple of years ago, the advent of Stories opened up even more opportunities for fraudsters.
Since some users were filming their every move. So if Facebook is more of an entertainment platform for you than a tool to promote your business, it makes sense to make your photos private on Facebook.
What steps to take to make your photos private on Facebook
If you decide to protect yourself by blocking other users from accessing your photos, you can easily do so. In the settings, you’ll have a choice of who is allowed to view your media files. You can specify that your photos be available to anyone, your friends on Facebook, or don’t show them to some friends. You can also choose to only show it to some friends and only me. So to do this you will need to follow these steps:
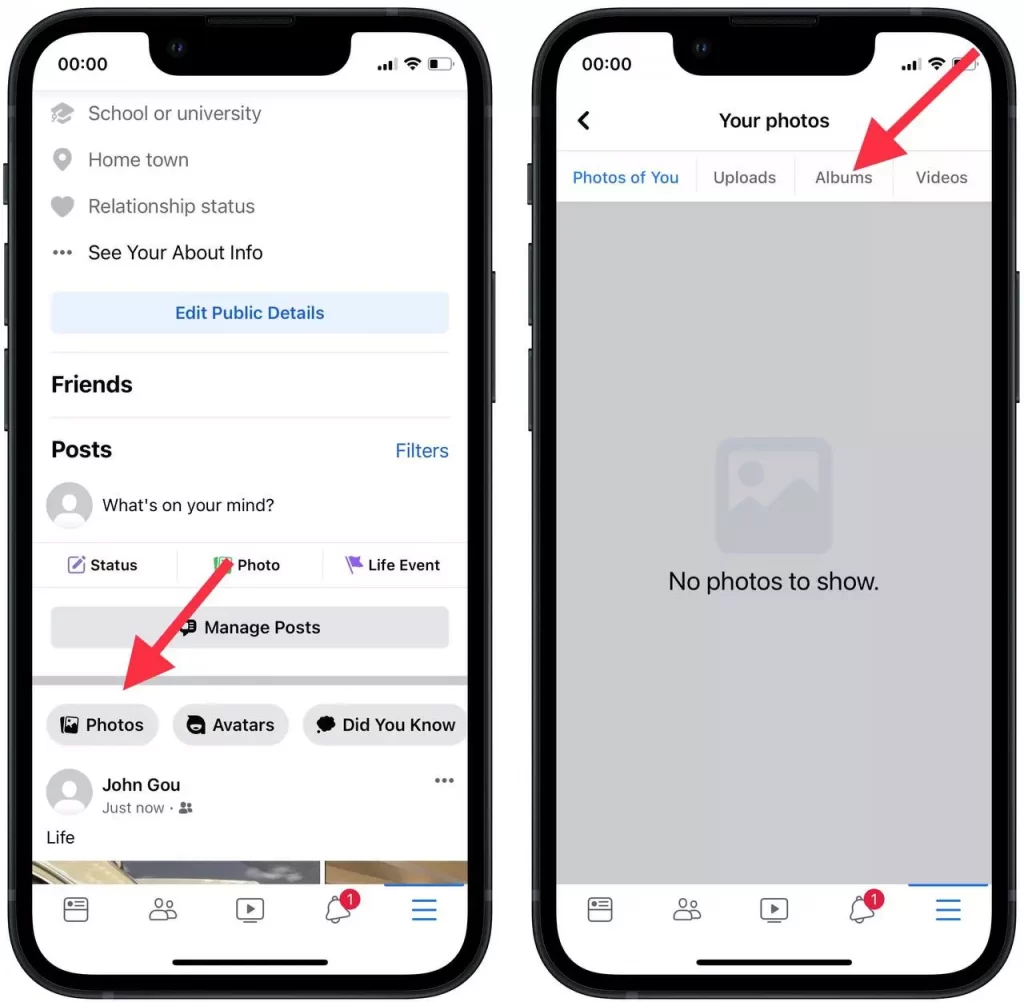
- The first step is to open the Facebook app.
- Then on your page, under the ‘Posts’ section, click on ‘Photos’.
- After that you’ll open all your photos, you need to click on ‘Albums’.
- Then select the album you want to restrict access to.
- When an album is in front of you, you need to click on the icon with three dots in the upper right corner.
- Then you’ll see an action that you have to agree with and click on ‘Edit album’.
- Under the line with the name of the album, you need to select who can see this post. Select the item that works for you.

- Confirm your action by clicking on ‘Done’ in the upper right corner.

What steps to take to make a new album private on Facebook
If you plan to add new photos to a Facebook album, you can specify right away which users can see these photos. To do this, you need to:
- Open Facebook.
- Click on ‘Photos’ on your page.
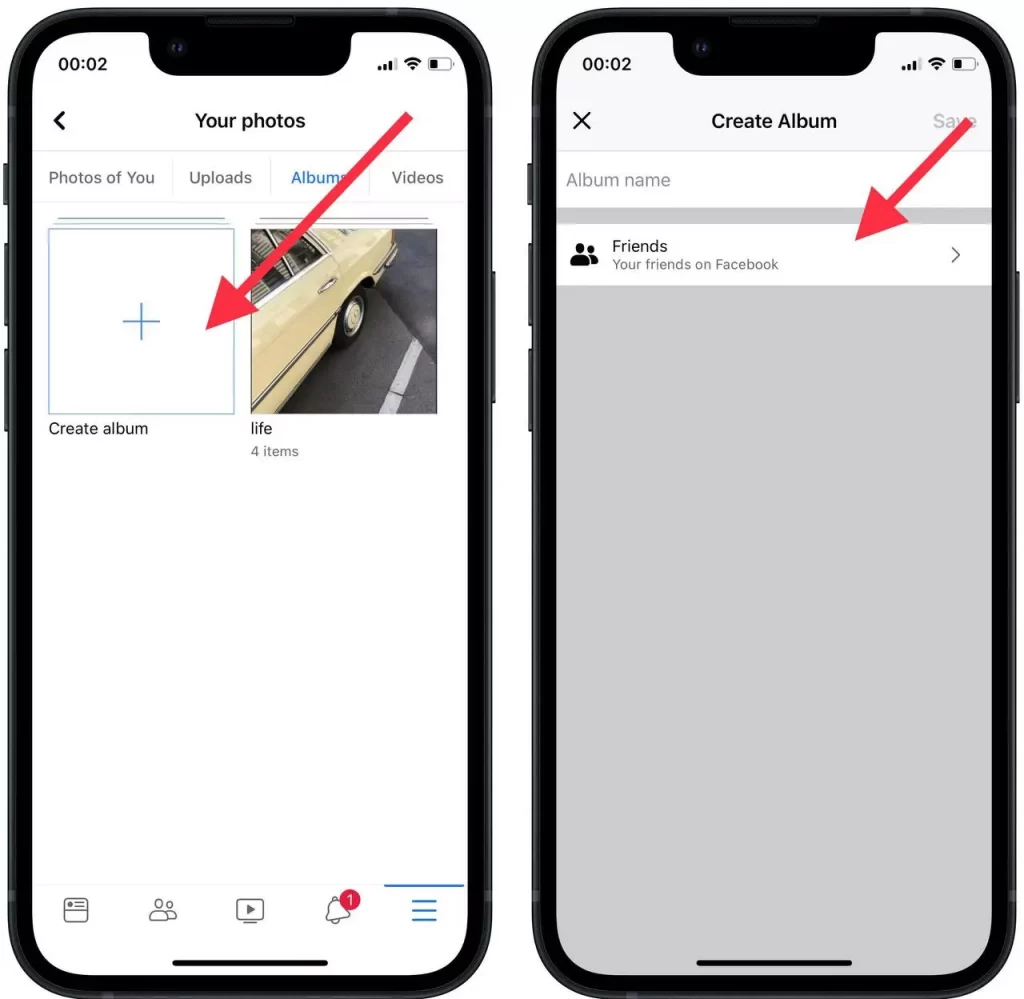
- In the ‘Your photos’ section, click ‘Create album’.
- After that, give the album a name.
- In the next item select who can see the photos from the album.
These actions will allow you to ensure your privacy. It’s good practice to review your social media accounts and make changes to who can see your photos to protect your privacy and that of your loved ones.


