
Often if we want to draw someone’s attention to anything on a screenshot, we use arrows or frames. But it doesn’t always look pretty. Instead, you can put a magnifier over your screenshot. This works so that you magnify a particular area on a screenshot without having to crop it.
What’s also handy about this feature is that you can enlarge the magnified area and change the zoom level. All this helps to make your screenshot as pleasing to the eye as possible.
Well, here’s how it works on an iPhone.
How to magnify screenshots on an iPhone
What you have to do first is to take a screenshot.
- So go to the thing you want to screenshot and press the lock and volume up buttons simultaneously.
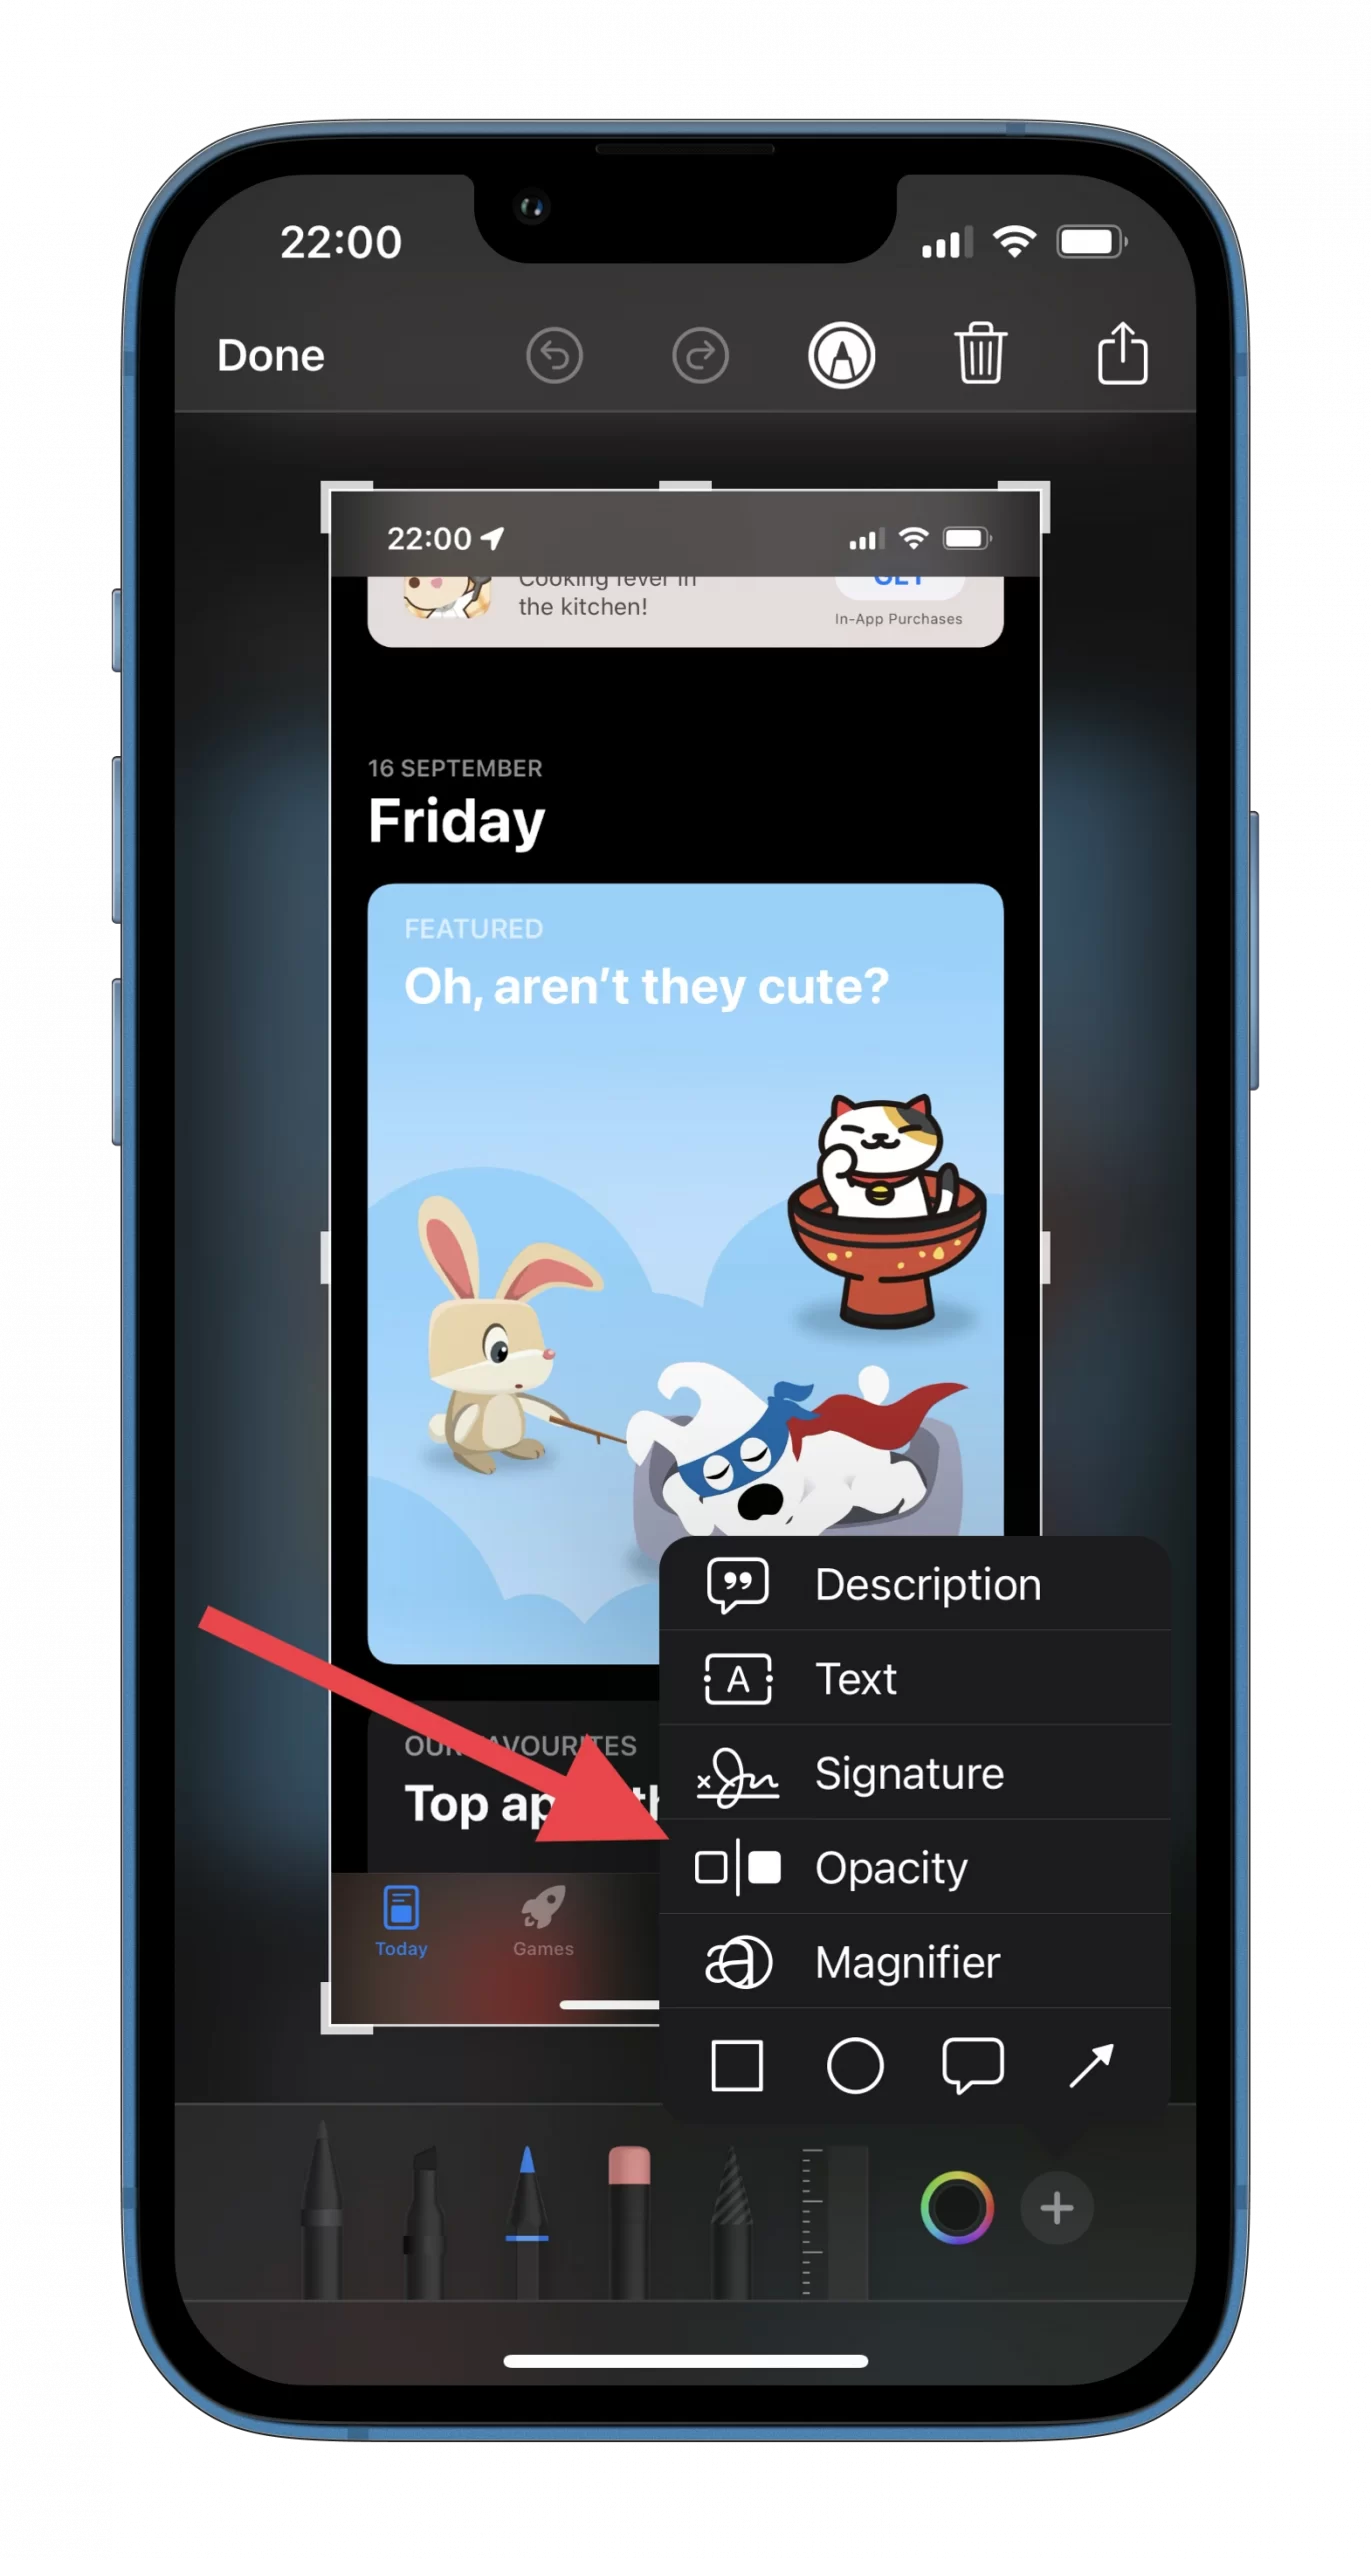
- After that, a screenshot editing tool appears.
- Here tap on the + icon and select Magnifier.
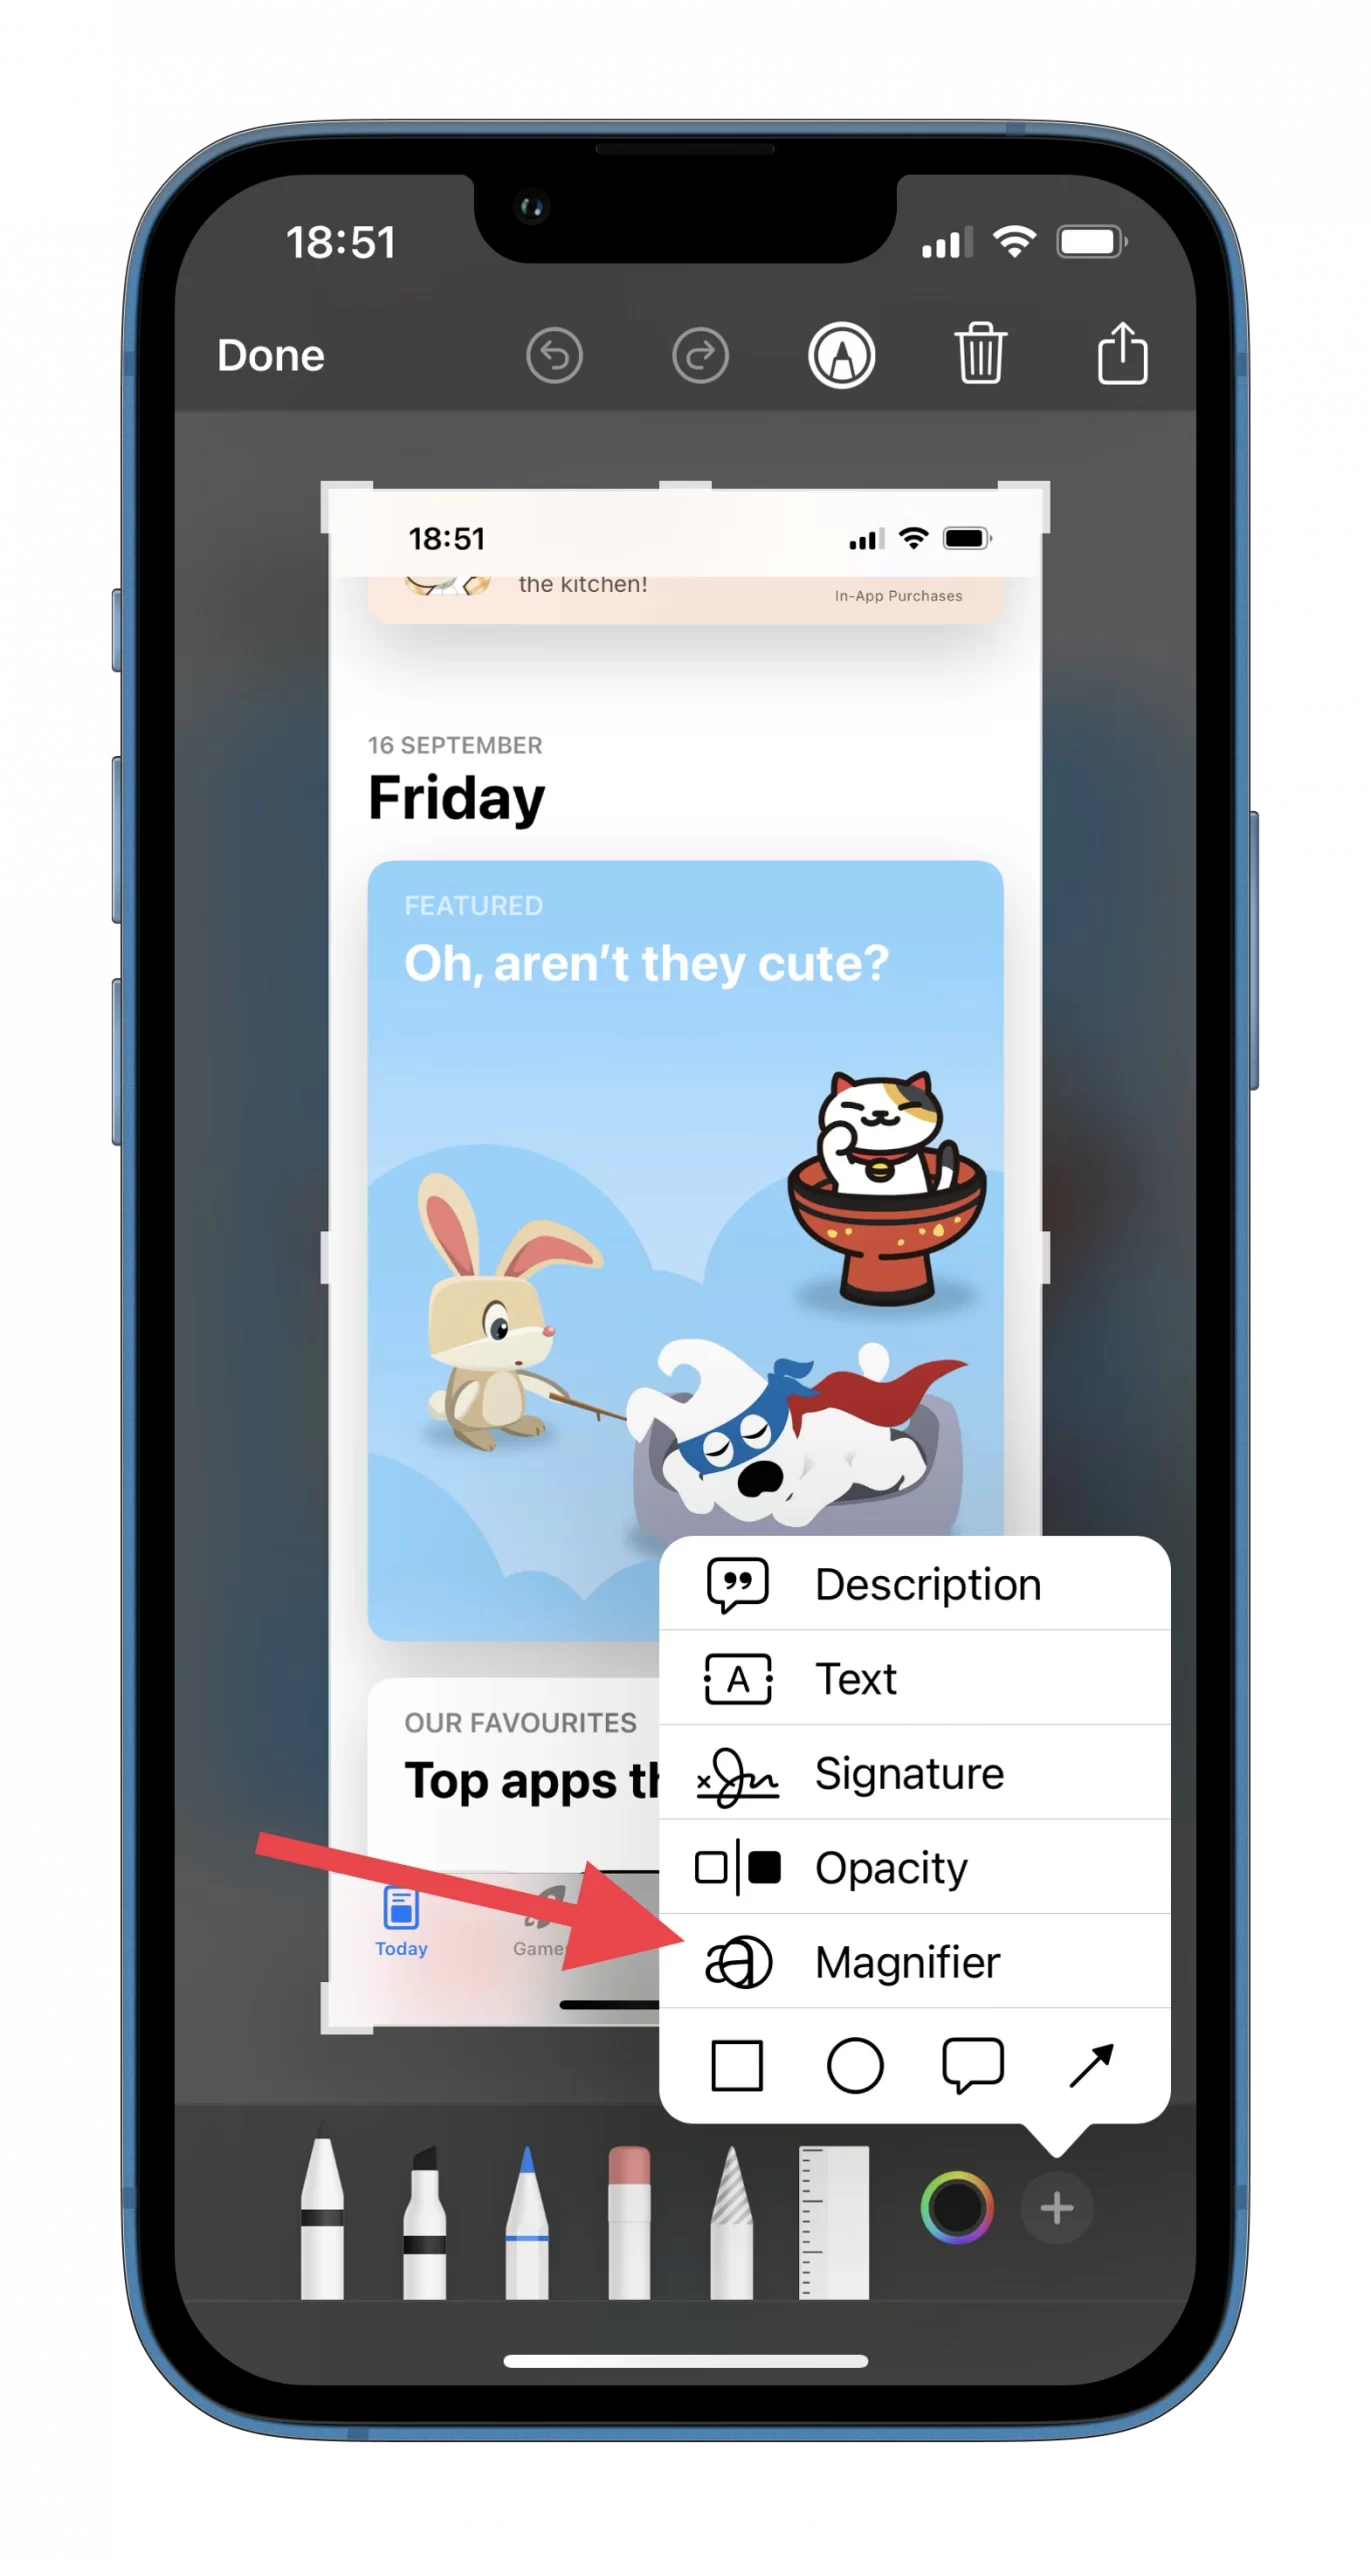
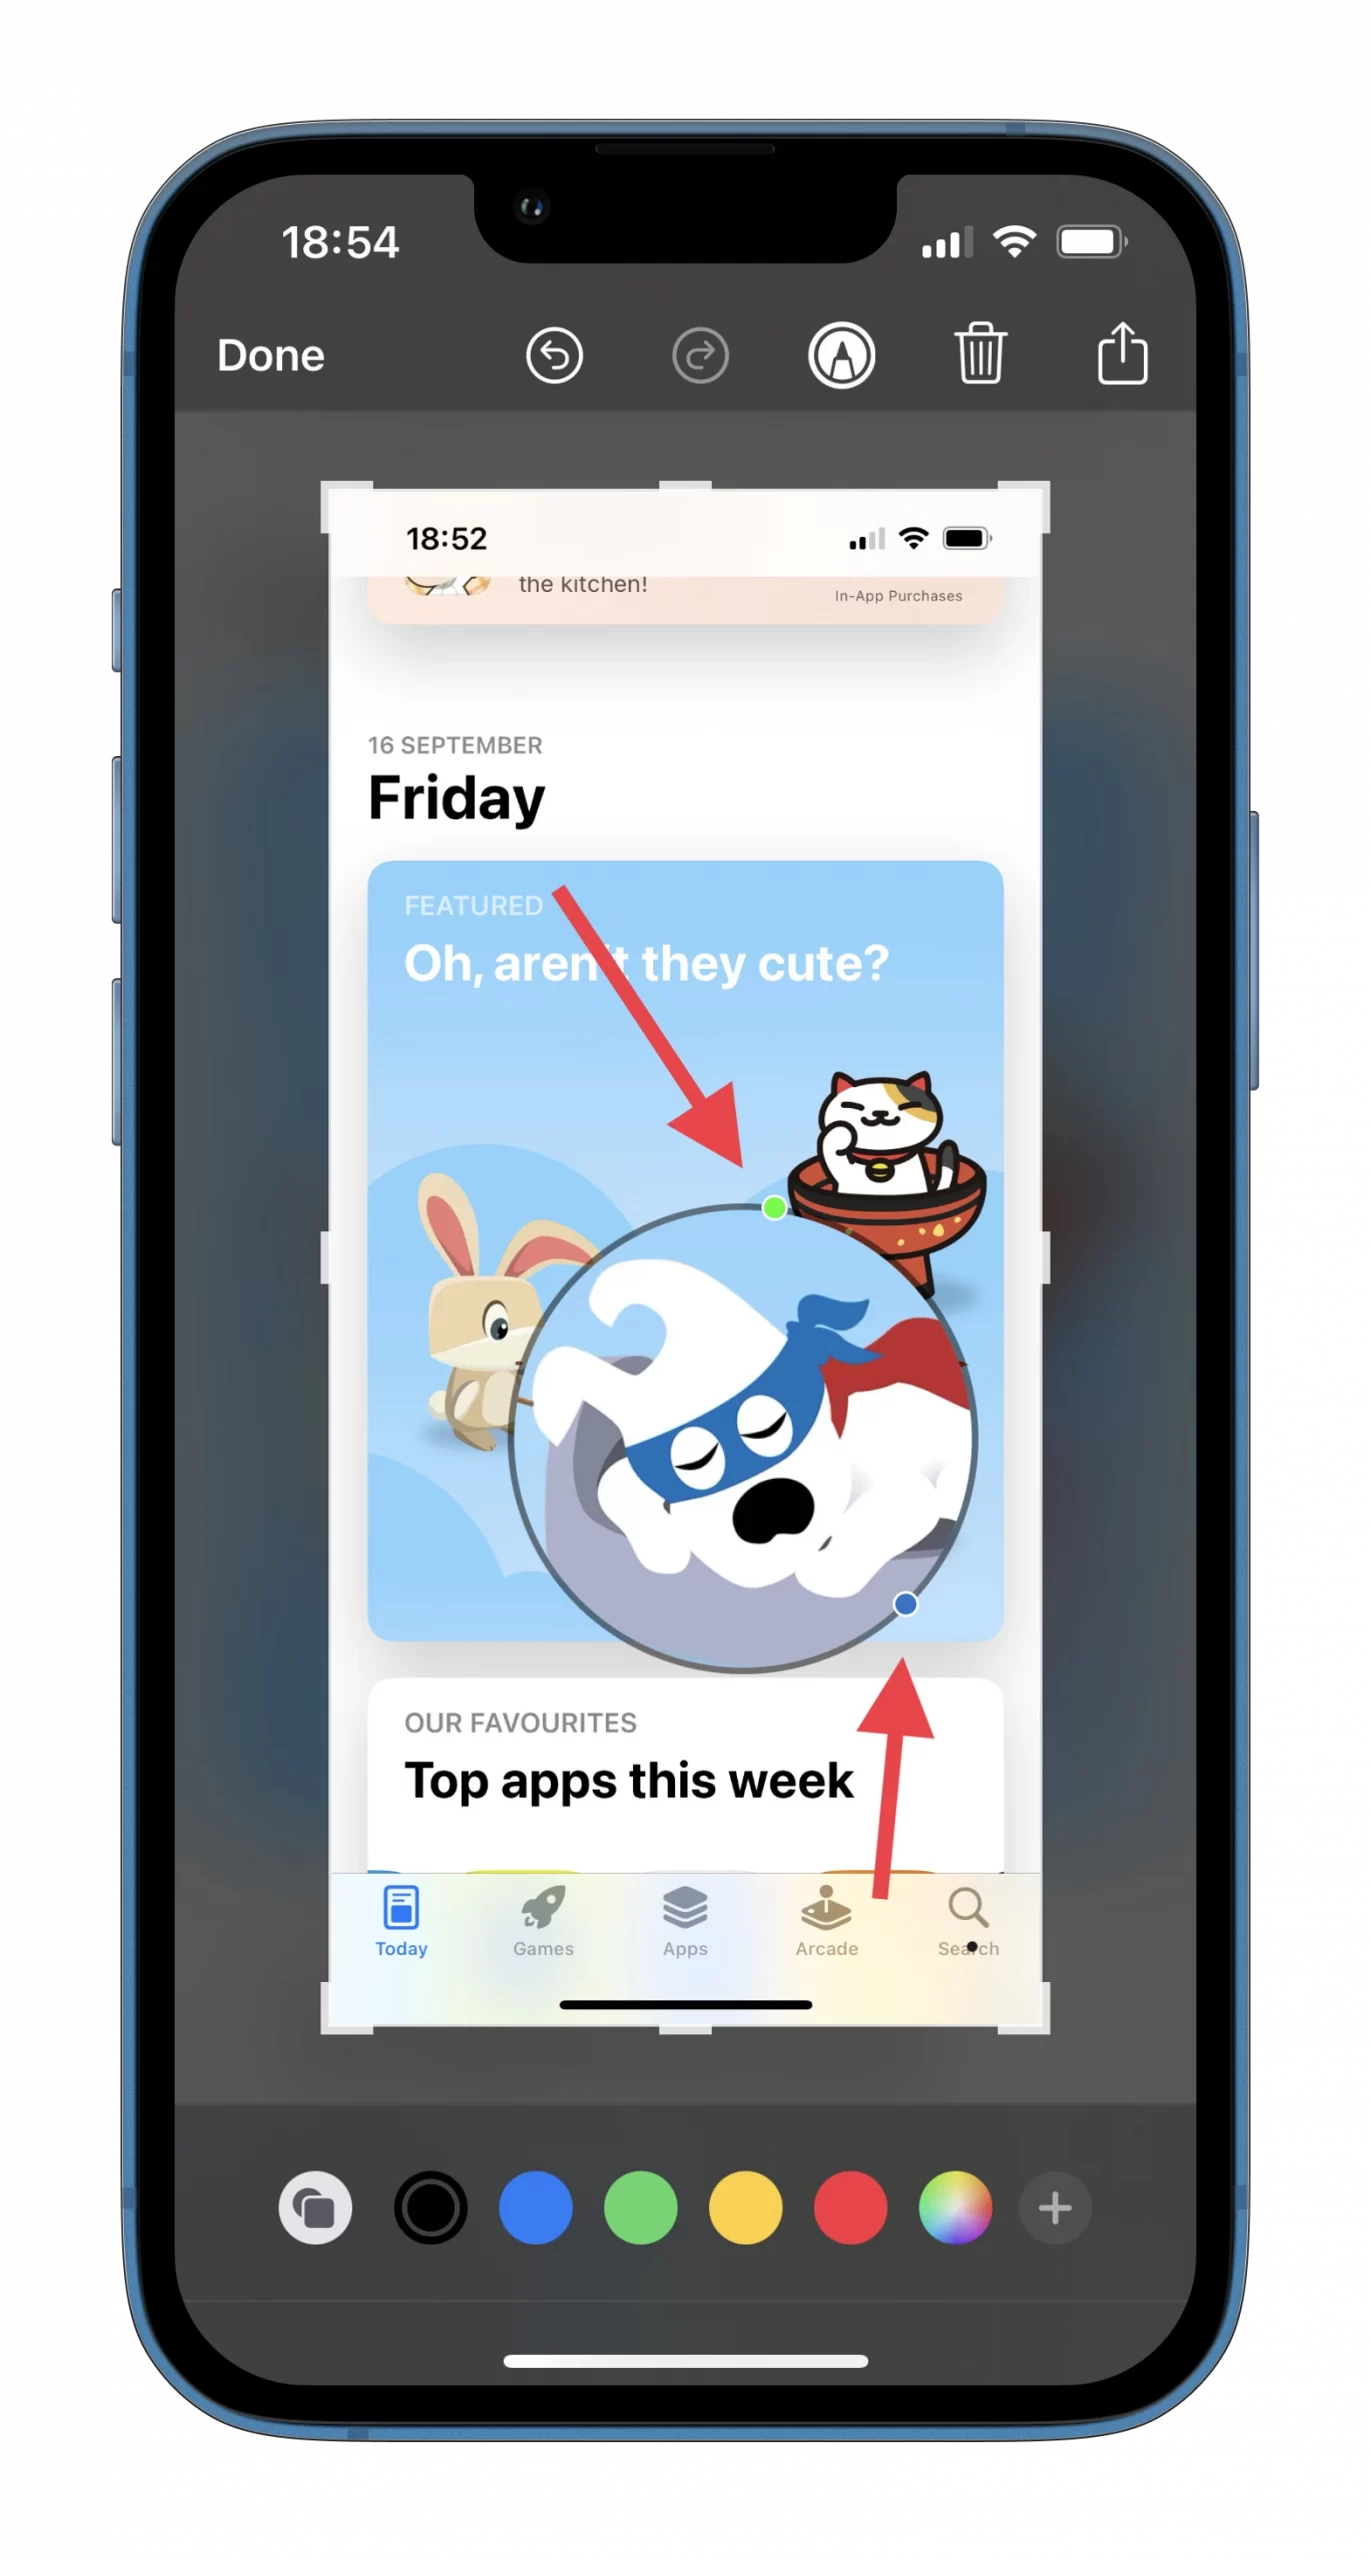
- Now you can move it around the screen to magnify different areas.
- Use green and blue dots on the magnifier circle to change the zoom level and size respectively.
- Finally, just tap Done and save your screenshot.
By default, the zoom level is set to a minimum, but as you move the green dot, it increases and reaches a maximum at the last position. What’s more, moving the magnifier is quite easy. Just tap on it, and then drag and place it anywhere on the screen.
As you can see there’s nothing complicated about putting a magnifier over your screenshot on an iPhone. Moreover, you can use multiple magnifiers on a single image.
How to add text or signature on a screenshot on iPhone
Besides the magnifier option, you write text over your screenshot and even add a signature. Furthermore, there’s an ability to change the font style and color of the text. Here’s how you can do this:
- Take a screenshot and tap on the preview window that appears in the lower left corner.
- Then tap on the + icon and select Text or Signature.

- After that, tap on the aA icon at the bottom left corner to change the font style and size.
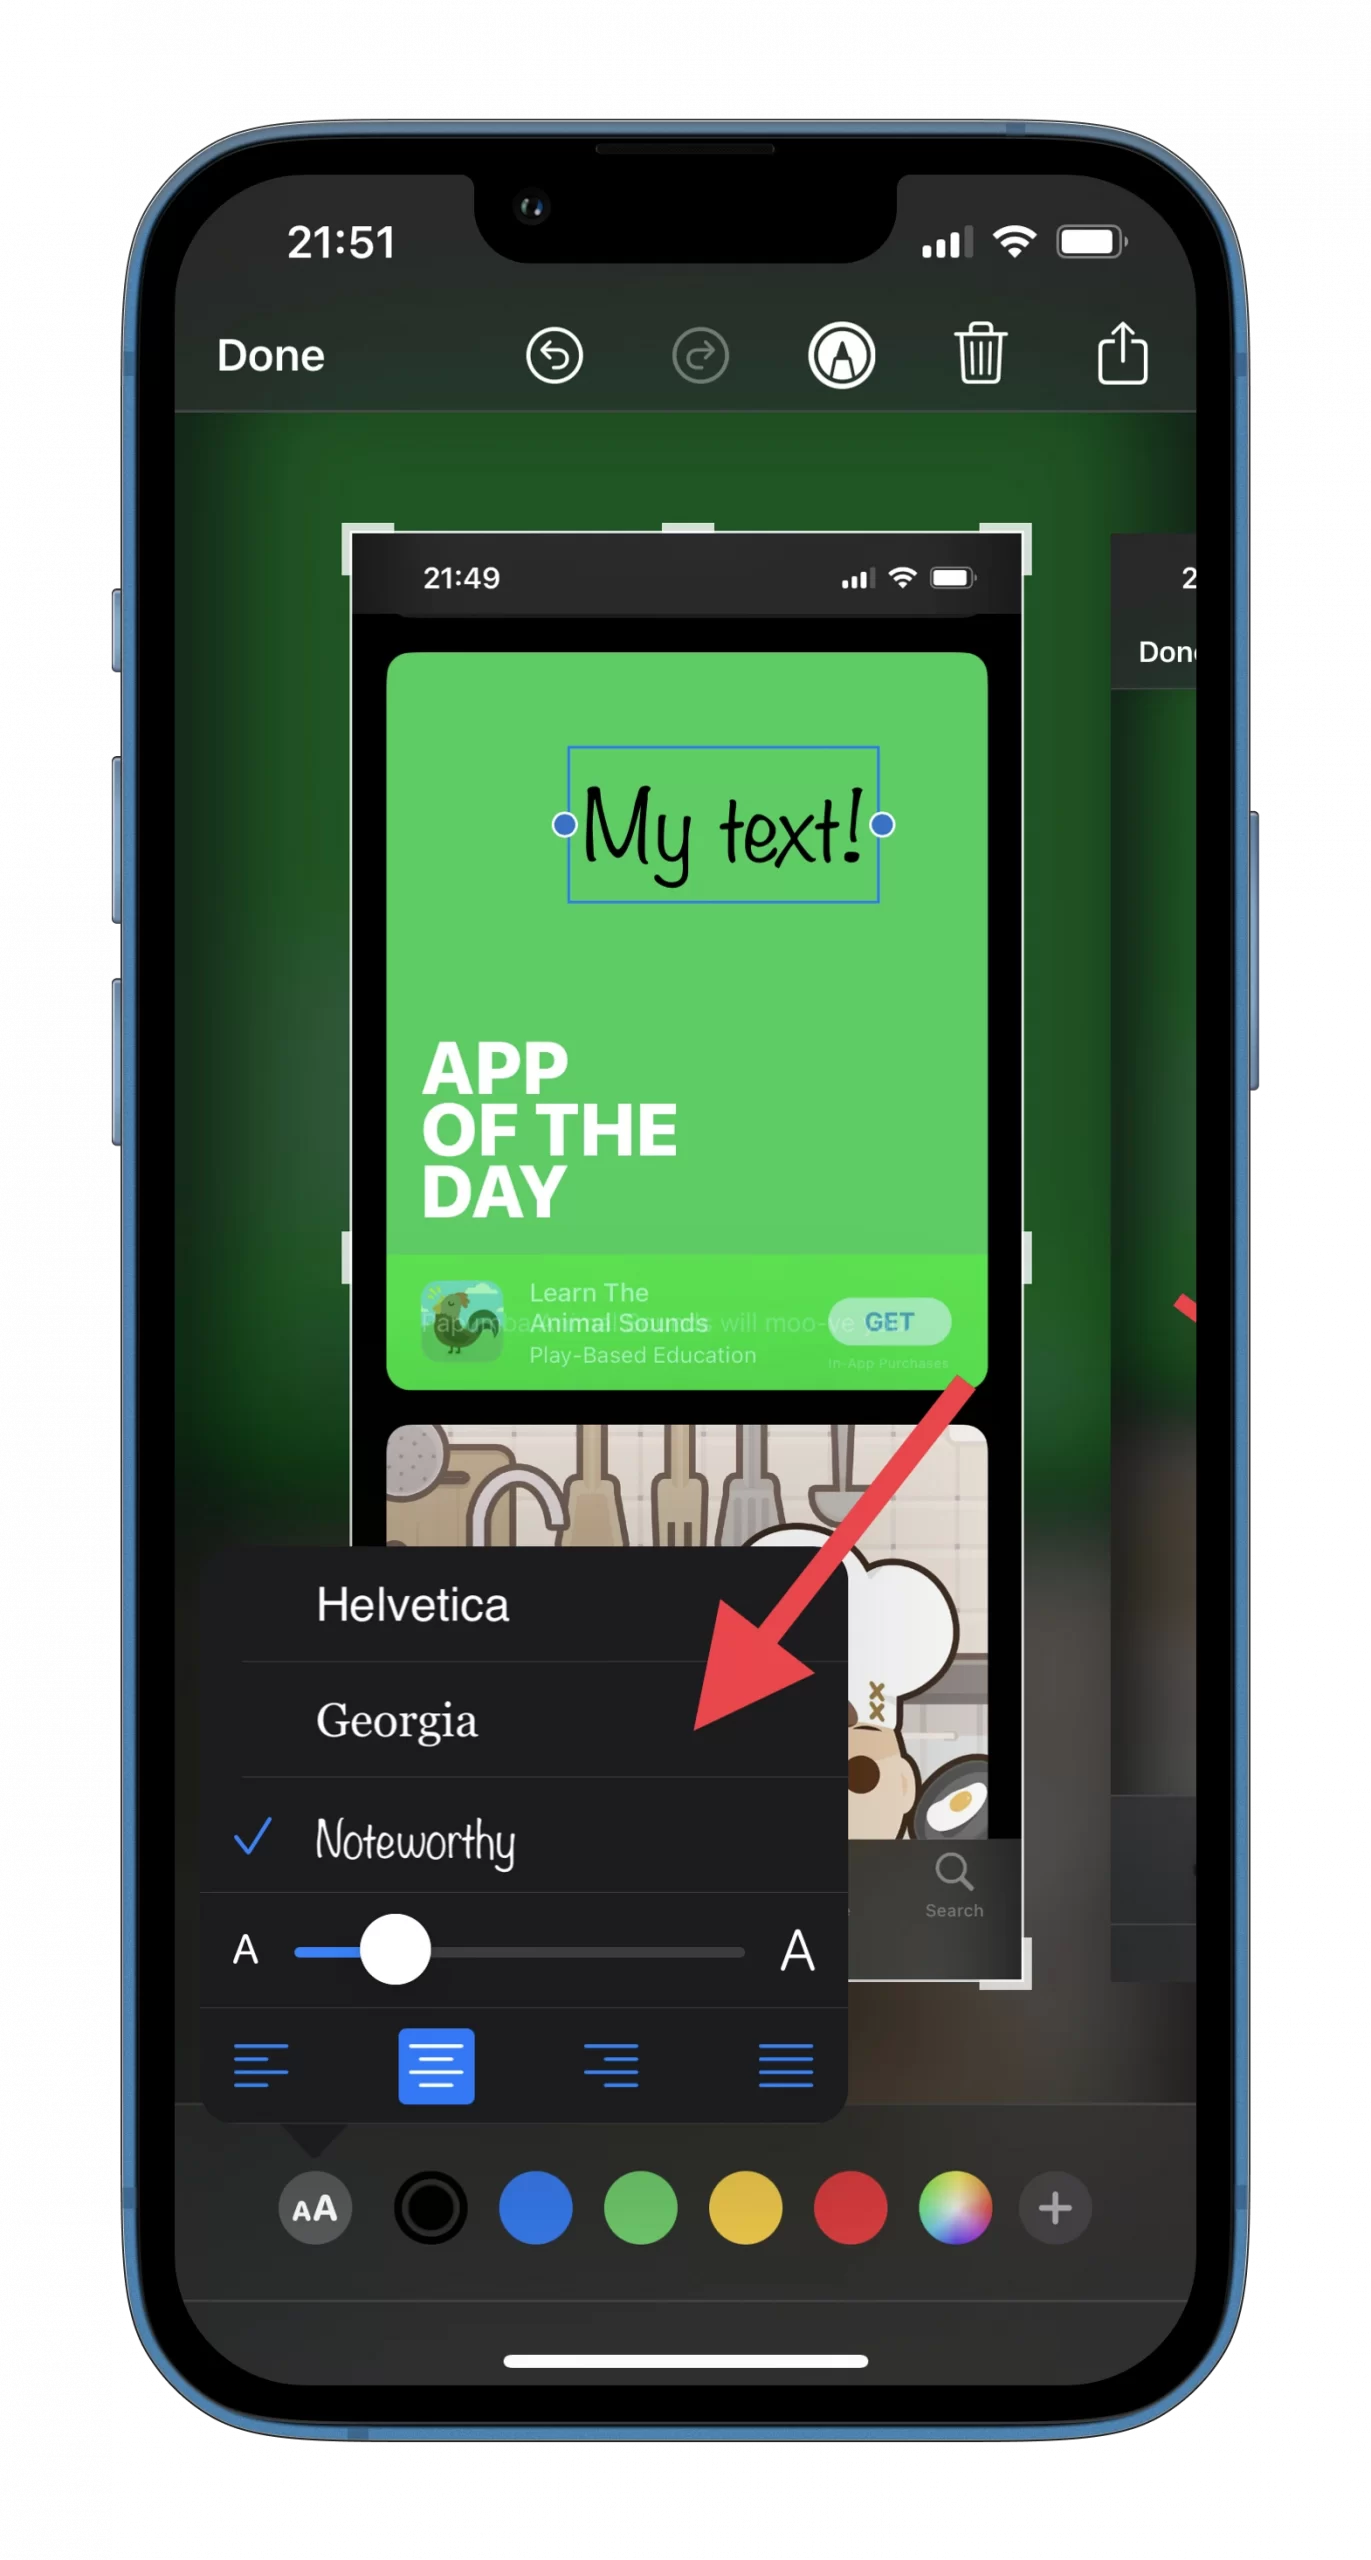
- Finally, choose a color and tap Done to save your screenshot.
Once you have completed these steps, you will find the screenshot in your iPhone’s gallery.
Read Also:
- How to take a full webpage screenshot on an iPhone
- How to unsend emails in iPhone’s Mail app
- How to edit and unsend text messages on iPhone
How to adjust the screenshot opacity on an iPhone
This is another no less useful trick you can use when editing your screenshot.
- So take a screenshot and tap on the preview window that appears in the lower left corner.
- Now tap on the + icon and select Opacity.
- Next, move the slider located at the bottom to adjust the opacity of your screenshot.
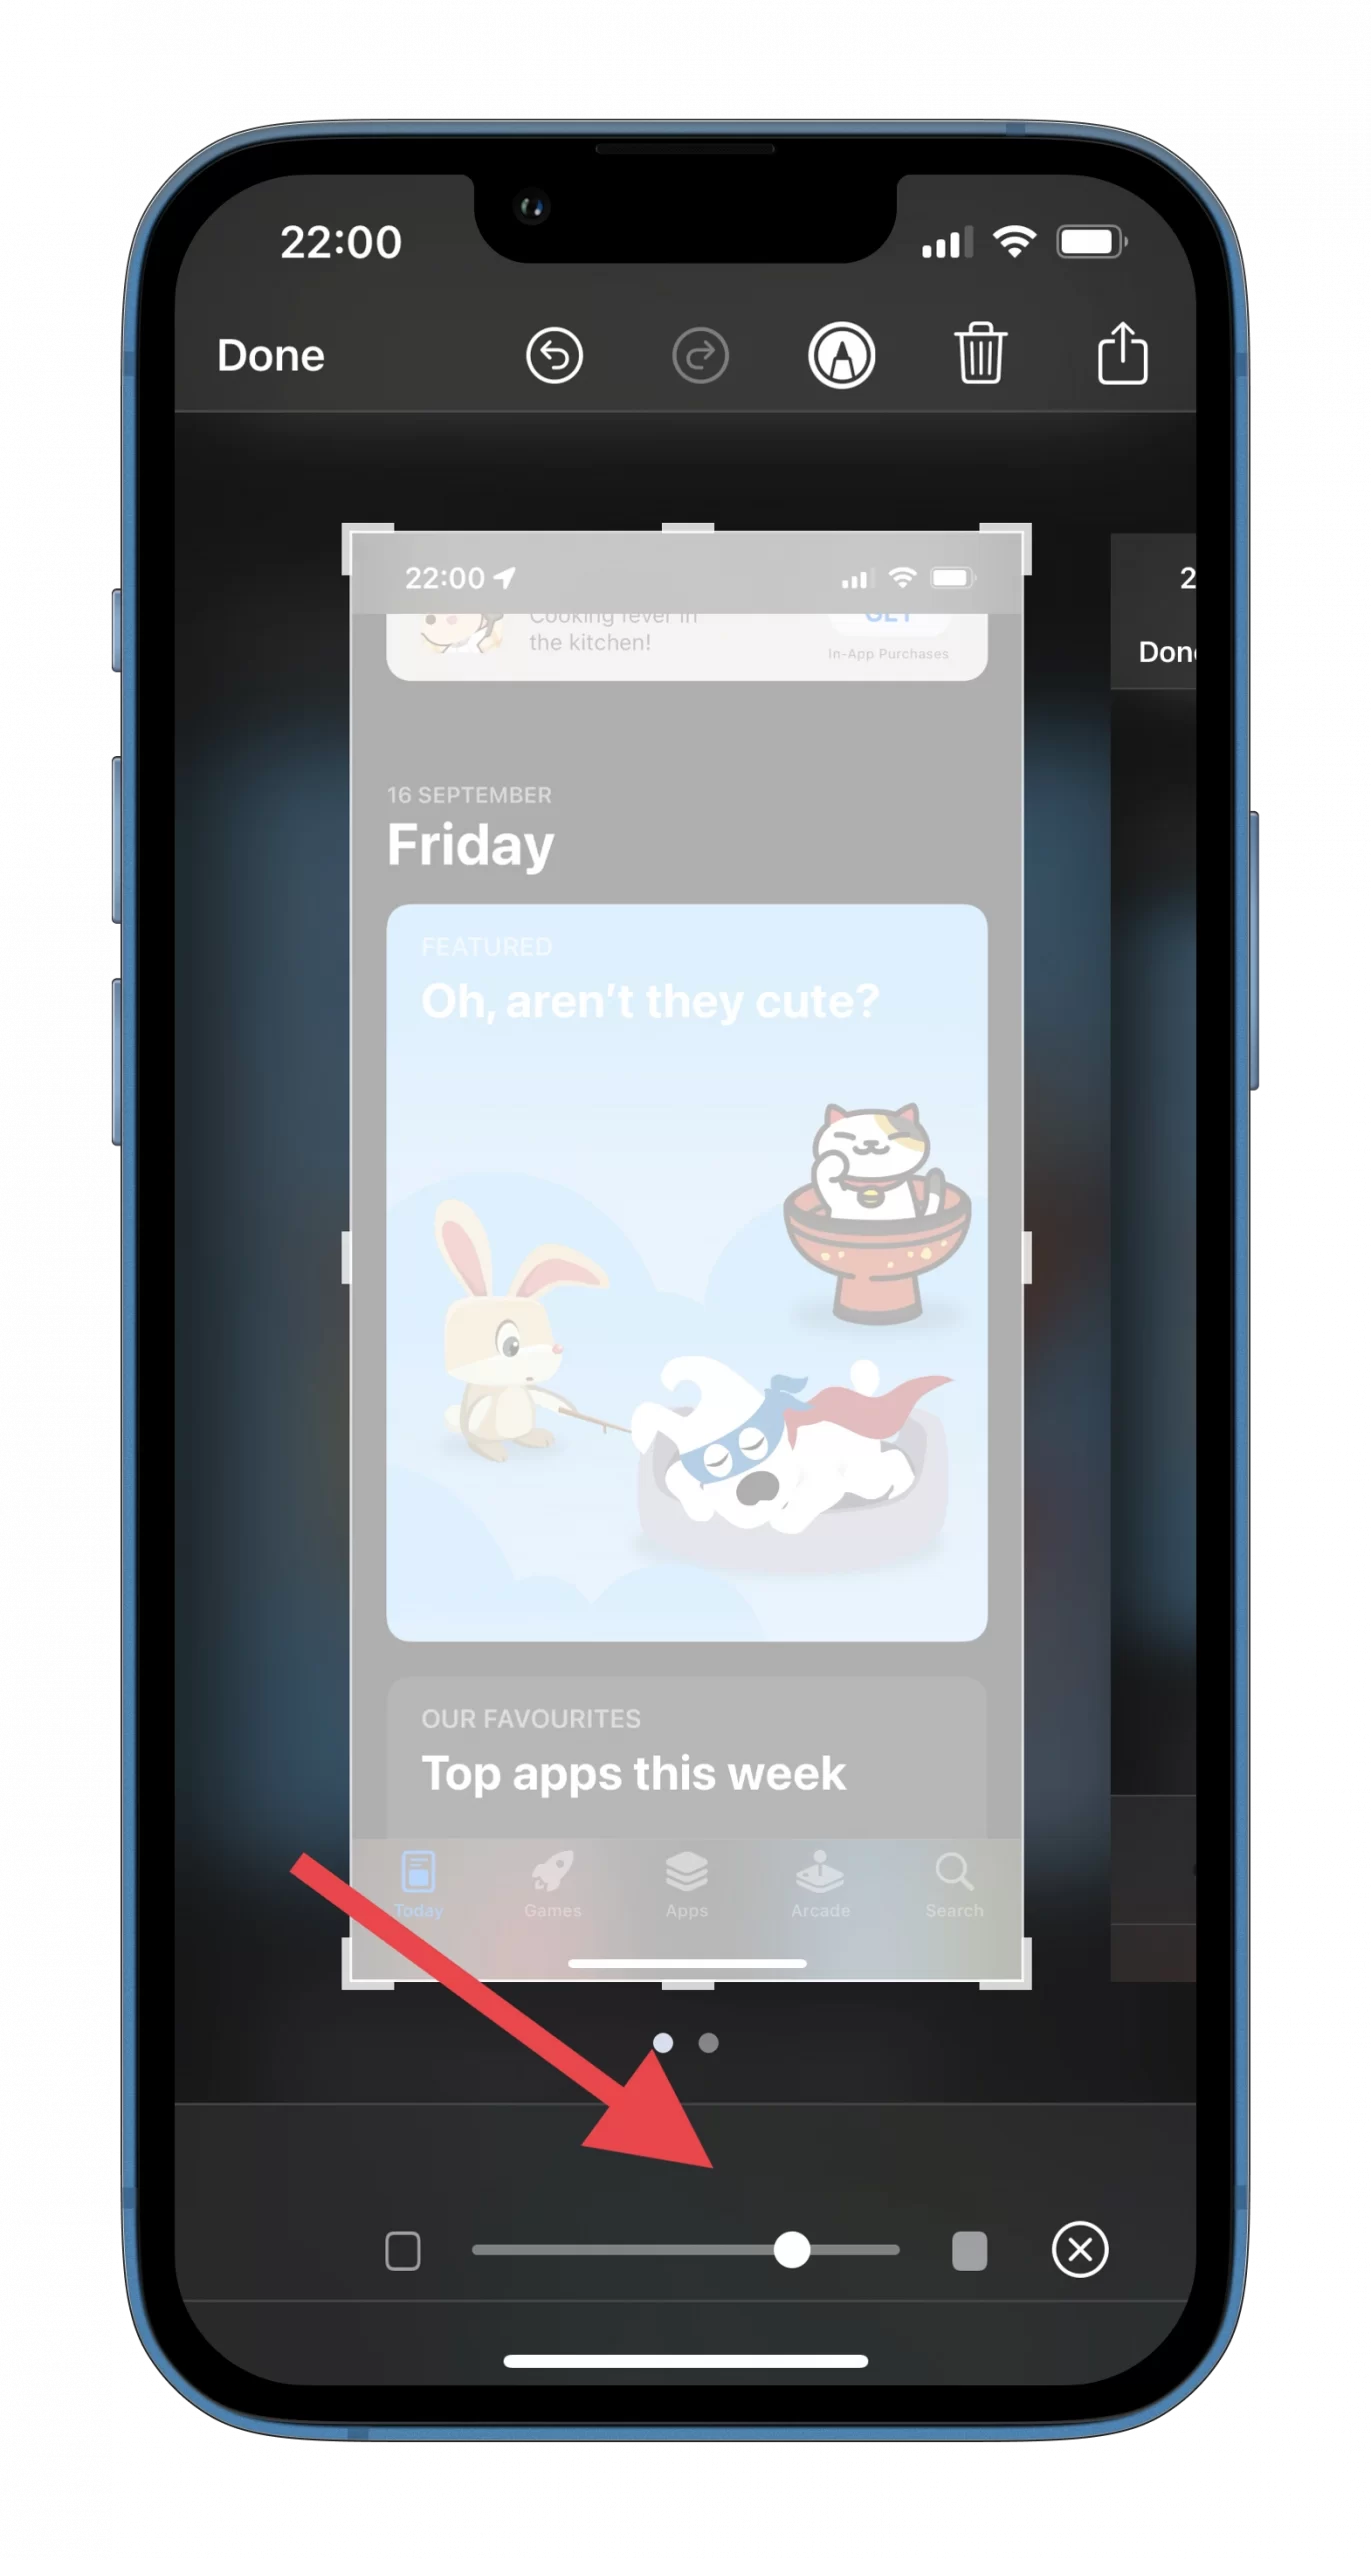
- Finally, tap Done and save it.
To be honest, I use the screenshot editing tool on my iPhone quite often. Although it’s not Photoshop, there are enough options to make your screenshot look great.


