
For many people, you may need Microsoft Word. By using it, you will have a lot of functions in front of you. Especially when you’re working or studying. After all, most Microsoft Word documents contain quite important information, and if you notice that this information doesn’t look right, there can be questions. Luckily, with this program, you can track who made the changes and what changes.
What to do to check who edited a Microsoft Word document
Microsoft Word is a fairly versatile program for working with documents. It has long earned its respect from people all over the world. More often than not, this program is used to prepare important documents, those documents that play an important role. That’s why there can be a lot of problems if someone makes edits to your document. However, by all that huge number of functions that help and simplify the work with documents.
Microsoft Office has one feature that is appreciated by many, the program can automatically track the changes made to the document, and save all versions. So if a situation happens and you notice changes in a document, you have the ability to check at what stage and who did it. After that, you can fix it if you need to.
In addition to situations where you need to undo changes if someone has made them by mistake, there can be other things. For example, the situation when you need to track your actions and changes in the document. With history, you can look at several versions at once and compare them, track the process of creating a document.
What steps to take to check who edited a Microsoft Word document
Previously, this program worked in such a way that there were no functions to view previous versions of your document. As soon as the ‘Track Changes’ function appeared, everyone who has a document has this possibility. Thus, knowing who edited the file and what changes makes it will help in collective work and prevent errors.
To be able to see who made changes and what changes to your document, you need to learn how to use the history of an Office document. There’s also an important point to pay attention to, concerning the ability to save all versions and view them. You will be able to do this only if you save the document in OneDrive. Make sure that your Office is connected to the cloud.
How to enable change tracking
To be able to see who made what changes to your document, you must first enable change tracking by following these steps:
- The first step to do this is to open Microsoft Word.
- After that, run your document, where you need to check if someone has edited it. Or open a blank document before you start.
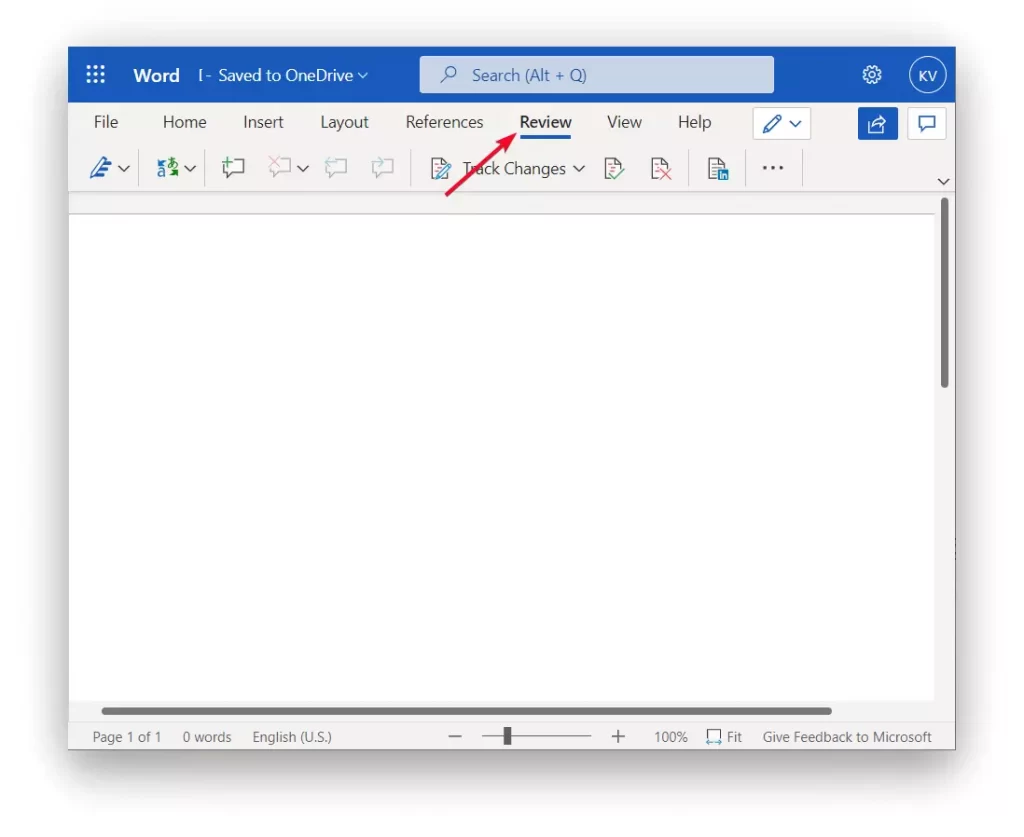
- The next step you need to find and click on ‘Review’ in the top panel.
- Then you need to click on ‘Track Changes’. By doing this you will open a panel in which you select one of 3 options. You will see options such as ‘Off’, ‘For Everyone’ or ‘Just Mine’. Select ‘For Everyone’.
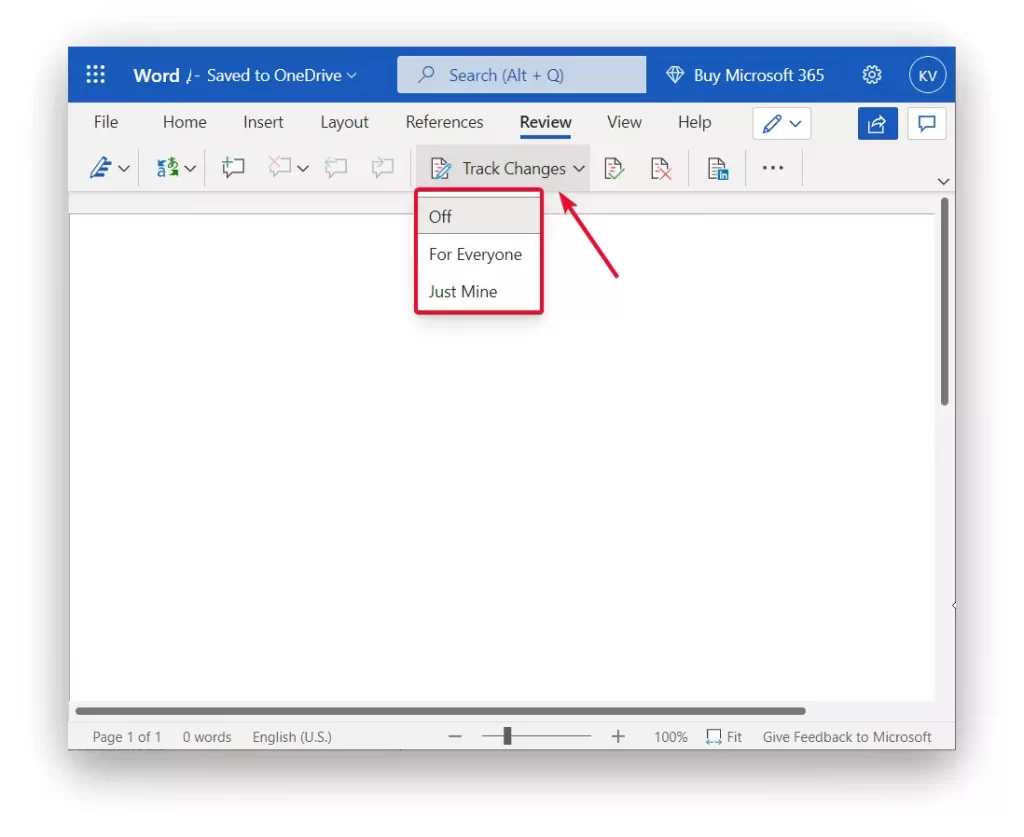
- After that, when someone makes any changes to your document you can hover over ‘Track Changes’ and see a list with dates.
There’s also another way if you need to trace specifically in the text of this document and see the exact time and by whom it was done. This works if you share access to your document with someone else. To do this you need to:
- Open the document in Microsoft Word.
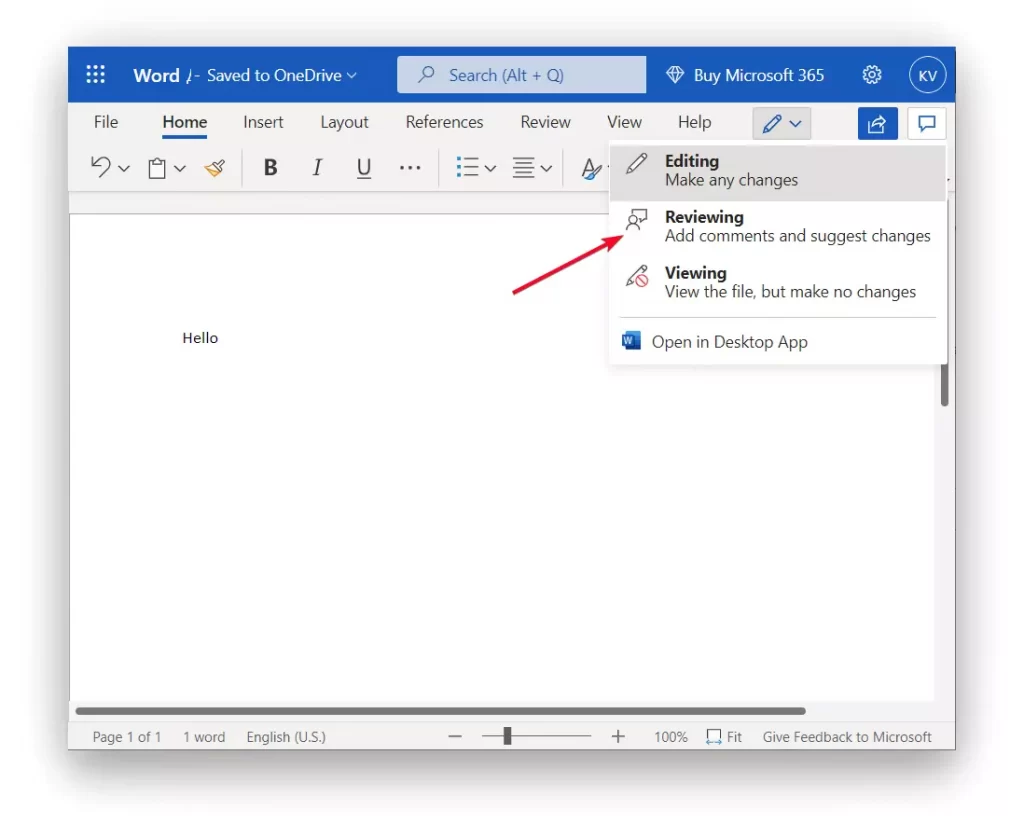
- Then in the top panel, click on the pencil icon in the upper right corner.

- After that, select ‘Reviewing’. Then on the right you can use the button to share your document. Eventually, when the person with whom you shared the document reviews it and makes edits, you will see them in the text.
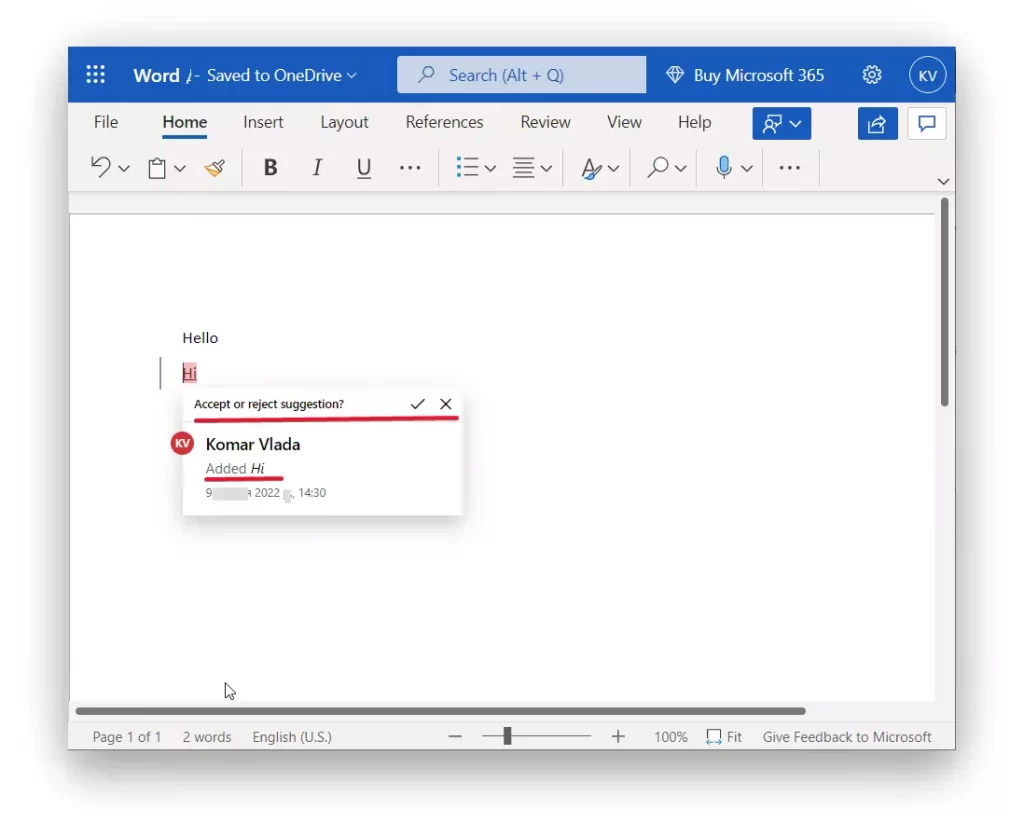
- Then you can click on the text which is displayed in red and see all the details. Such as the name of the person who added the addition, the text he added and the exact date.
The latter method would be more suitable for the author and the editor or the student and the instructor. That is, it will be useful if you need to clearly see all the corrections, as they’re displayed in red. It’s handy when both know this and also when both participants click on the pencil icon and set the type of view of the document. Such as ‘Editing’ or ‘Reviewing’ and don’t change them, but clearly follow their roles.


