
Spotlight search is a great feature that is provided by iPhone developers. It helps users to find Photos, Messages, Apps, Settings, and Documents, moreover, you can also use it for searching important information within a few seconds. Siri can also help you to access some rates, stock news, etc.
With the iOS updates, access to the Spotlight has been provided on the Home Screen of your iPhone instead of swiping down. However, some users get annoyed with this feature and want to disable it. Fortunately, there is a way to do that, moreover, you wouldn’t need to make much effort for that.
How to turn off the search button on the Home Screen of your iPhone
As was mentioned before, the access to the Spotlight Seach has been different before. Now, the developers have provided the users with a special search button that is placed on the Home Screen of your iPhone. However, while one user believes this accessibility feature is great, the other one tries to find a way to get rid of this annoying feature. Fortunately, the developers care about their users and give them a choice whether they need these features or not. So, the process of disabling the search button on the Home Screen of your iPhone is pretty simple. If you need to do that, you should follow the prompts which would be mentioned in the section below:
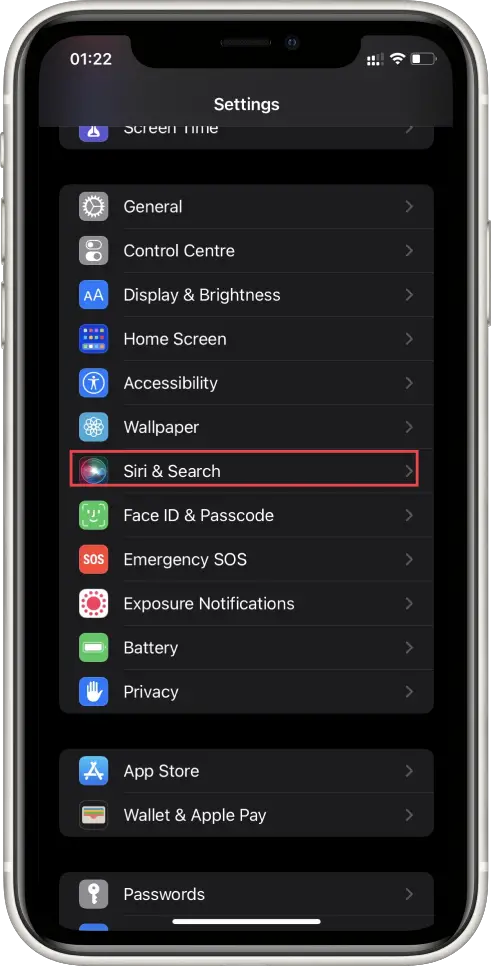
- First of all, you should open the Settings app either from the home screen or the app library of your device.
- After that, you should look through the available sections and click on the “Siri & Search” tab.
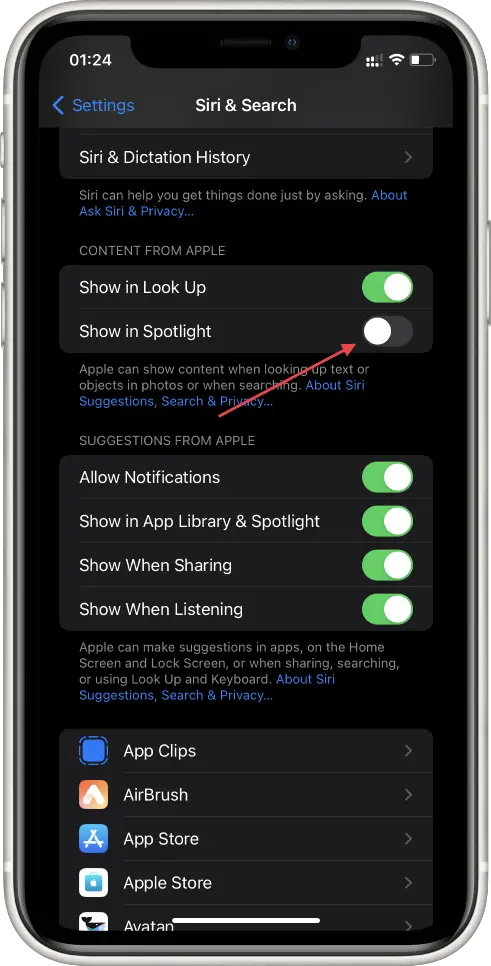
- Then, you should look through the available options in the tab and head to the “Content from Apple” section.
- To complete the process, you should see the “Show Spotlight” option and click on the toggle switch next to the option to change the “On” option to the “Off” one. The switch should be grey in the “Off” position.
Since then, the search button would never be displayed on the Home Screen anymore. You won’t be able to use it for searching for the apps, documents, files, settings, messages, etc. However, in case, you want to change everything back s it was, you can always do that by repeating the actions above and toggling the switch to the “on” position.
How to turn off auto-capitalization on any model of iPhone or iPad
Auto-capitalization is a set by default feature that can be useful and annoying at the same time. Some users find it very useful, as you do not need to think about capitalizing the words manually, while others prefer due to different reasons, editing their messages and texts manually. That’s why, some people prefer to get rid of this feature, and, fortunately, there’s is a way to do that. So, if you want to disable the auto-capitalization on any model of iPhone or iPad, you should follow the steps which would be mentioned in the section below:
- First of all, you should switch on your iPhone
- After that, you should head to the Home Screen and click on the “Settings” icon to open the settings menu.
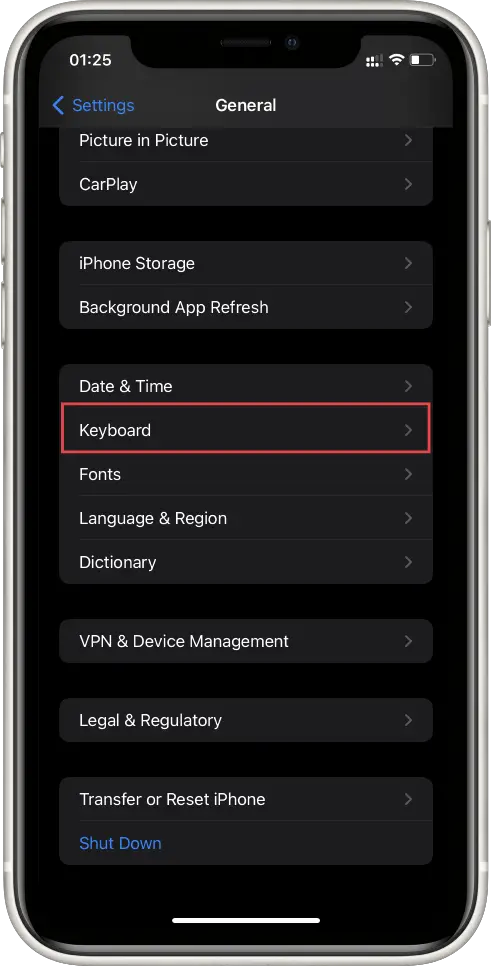
- Then, you should scroll down the menu and click on the “General” tab.
- Next, you should tap on the “Keyboard” tab.
- After that, you should see the list of options displayed. You should click on the “All Keyboards” tab.
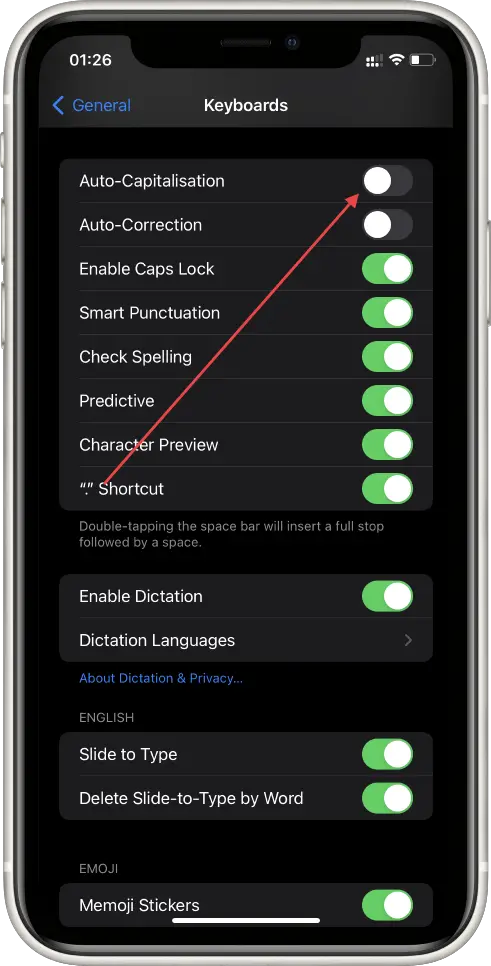
- Then, you should see the “Auto-Capitalization” option.
- To complete the process, you should click on the toggle next to the “Auto-Capitalization” option to turn it off. The switch should be displayed in a grey color.
Since then, the Auto-Capitalization feature would be switched off. You’d be able to manage your texts manually and make a decision whether to write the word with a capital letter or not. however, the auto-correct option would be still enabled after this method, and some words can be still corrected to be written with a capital letter.
How to change the name for connected Bluetooth devices
Bluetooth is one of the most important and commonly used features in your iPhone. It can help you to listen to music, watch movies, exchange files with users of other OS, etc. However, did you ever have a situation, when you need to connect your AirPods to another iPhone, but the name of the device while connecting it with YouTube is so commonly used that you can’t recognize yours? In this case, you can change the name of the device to a more unique one. So, if you need to do that, you should follow the steps which would be mentioned in the section below:
- First of all, you should connect the device to your iPhone via Bluetooth.
- After that, you should open the Settings menu.
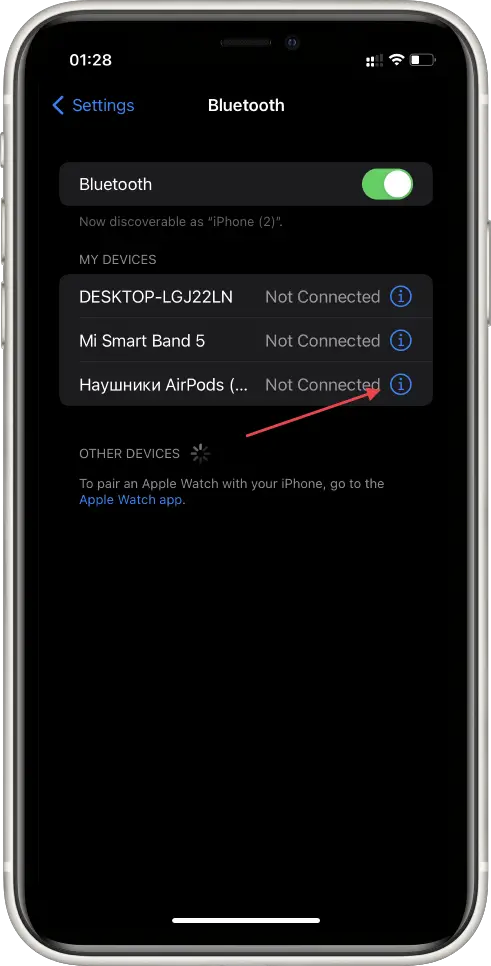
- Then, you should head to the “Bluetooth” tab.
- Next, you should find your device and tap on the “I” in the circle icon which is placed on the right side.
- After that, you’ll see the management menu displayed. At the top of the screen, you’ll see the name of your device, you should click on that section and fill in the new name.
- To complete the process, you should click on the “Done” option.
Since then, the name of your device would be changed. This would help you to find and be sure that you’ve chosen the right device among the others that have also Bluetooth switched on. So, with this method, you would definitely never be lost in the list of connected devices. Moreover, in case you’ve swiped, for example, your AirPods with your friend, you’d definitely be sure which one is yours.


