
Windows 11 is a rather complex operating system with many different services and applications that work in parallel and execute dozens of commands per second. It is not surprising that you might encounter bugs and errors in such a complex system. And often, it is not only about the software but also other components of your PC. For example, the external or internal devices in your PC may have compatibility issues, or you may have connection errors that will cause your Windows 11 computer to shut down. Users often encounter the “Whea Uncorrectable Error” before doing so.
However, the good news is that you don’t have to run out and immediately replace the faulty parts or take your PC to a repair shop. You can fix this error quite quickly on your own. You probably won’t have to get behind your PC to do it. Let’s break down a few fixes that you can use to fix the “Whea Uncorrectable Error” on your Windows 11.
What is Whea Uncorrectable Error on Windows 11
Let’s first find out what Whea Uncorrectable Error is and what causes it. This will help you understand what actions you should avoid to avoid it. If you want to find step-by-step fixes for this error, you can skip to the next section of this article. You will find detailed instructions with some simple fixes for “Whea Uncorrectable Error” on Windows 11.
First, it’s worth mentioning that when this error appears, it has the following form – WHEA_UNCORRECTABLE_ERROR. The first four letters are an abbreviation for Windows Hardware Error Architecture. This error is due to a hardware compatibility problem with your Windows 11 system. There can be a variety of reasons for a compatibility problem. Among the most common problems you can find:
- Malfunctioning hardware.
- Incompatible, outdated, or corrupted drivers
- Overclocking CPU
- Faulty hard drive
- Problems with the CPU installation
As you can see, most of the problems are caused by drivers or memory on your device. Sometimes users also face this error when overclocking their CPU. It occurs when you try to shut down your computer and may cause it to reboot to prevent the data from being corrupted. Even so, you risk losing or damaging some of your data. This can result from an abrupt disconnection of power from the components of your PC. Let’s take a look at what you can do to fix it.
How can you fix Whea Uncorrectable Error on Windows 11?
Now let’s move on to Fixes you can do in your Windows 11 to defeat Whea Uncorrectable Error. It usually occurs due to outdated software or damage to some parts of your PC. These are the reasons we are going to base the error on. I recommend you try all these fixes one by one until you find the one that helps your particular situation.
Check your hard drive for damage
Often Whea Uncorrectable Error is caused by damaged sectors on your hard drive. Windows 11 has a tool that allows you to scan your hard drive and repair any bad sectors you find. To do this, you need to:
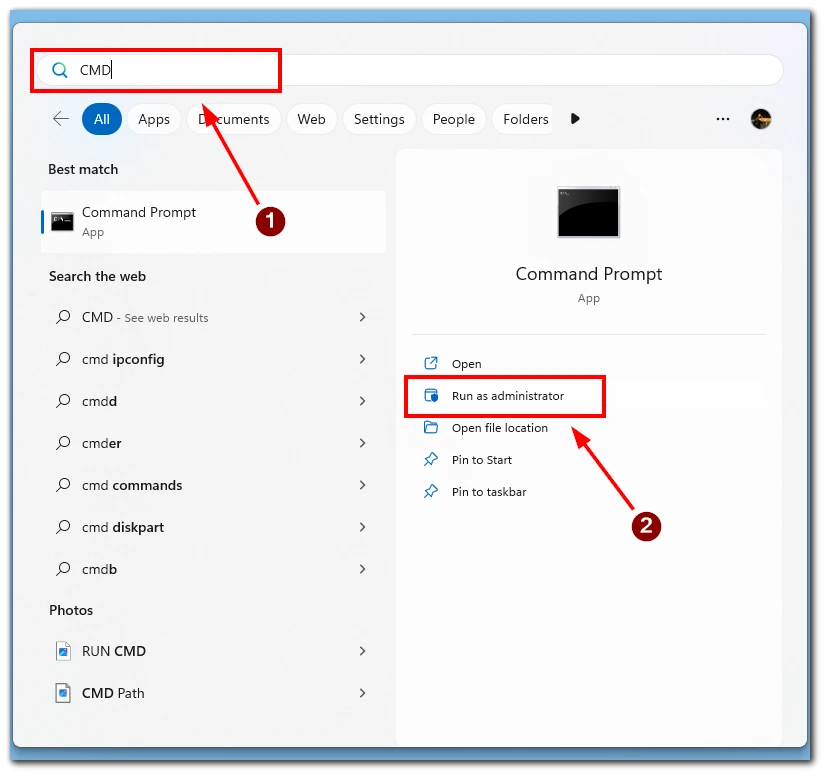
- Press Windows + S to open the search menu.
- Type CMD in the search box and select Run as administrator.
- After that, you need to type the following command into the console:
chkdsk C: /f /r /x - Press ENTER and wait while it scans your disk and fixes any errors.
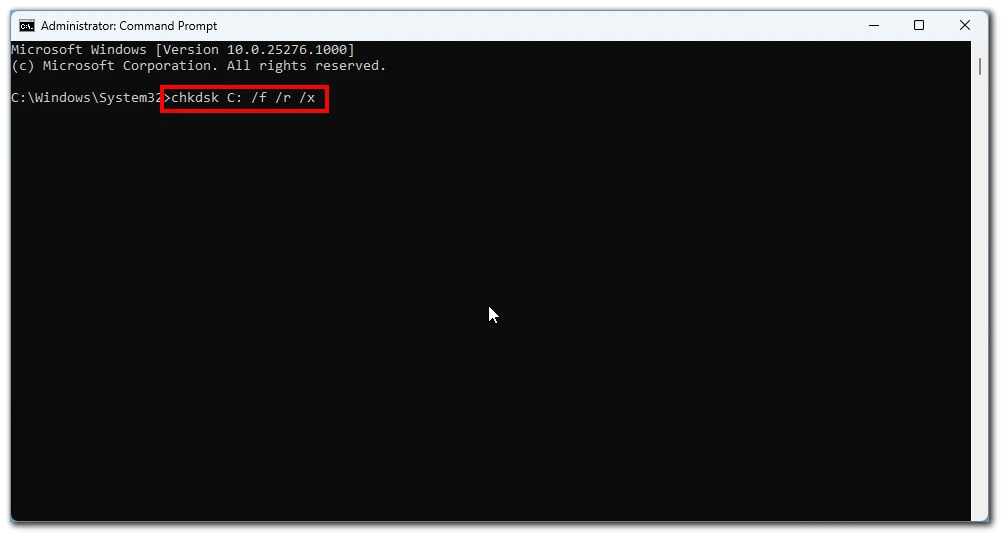
Note that you can also scan other disks and change the drive letter in the command. You can also use 3rd party software, which you can find on the internet.
Run Windows Memory Diagnostics
Another utility in Windows can find and fix any memory-related issues you have on your system. Note that this is a bit more in-depth; you should only run it if the first method didn’t help. To do this:
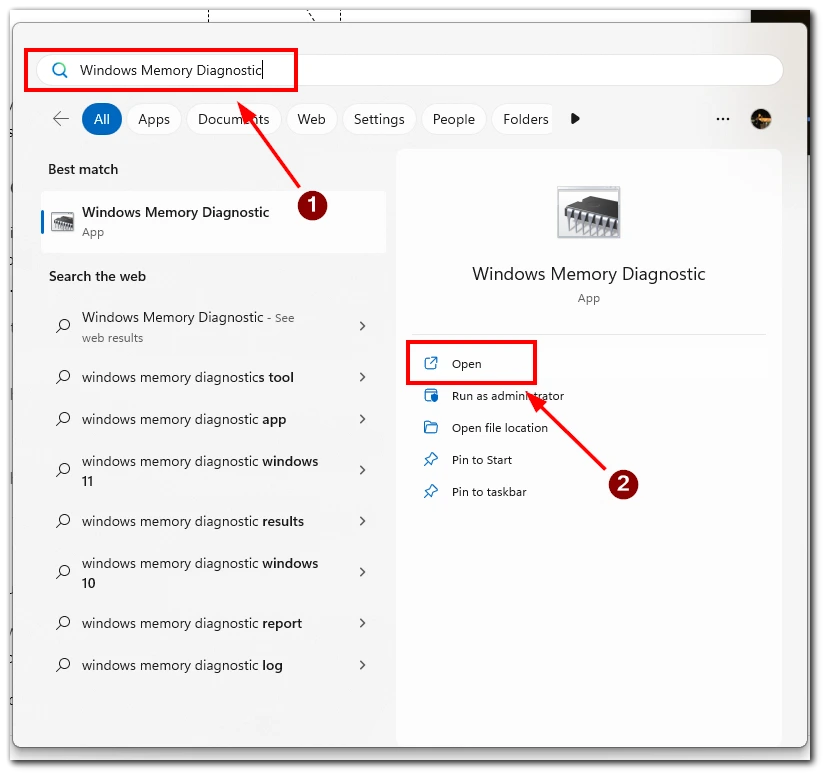
- From the start menu, type Windows Memory Diagnostic into the search box and launch the app.
- After that, select Restart now and check for problems in the window that appears.
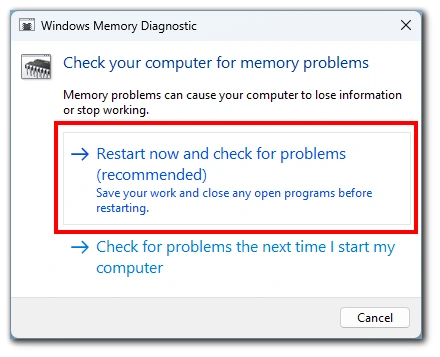
After that, your PC should restart, and the memory scan should be complete. If Utility does not fix the errors, you will get a message about it.
Update your device drivers
If you know exactly what device is causing the error, you should update the driver. This will help correct the incompatibility problems. To do this, you will need to:
- In the Windows search box, type Device Manager and open it.
- In the list, find the device you need and right-click on it.
- Then select Update Driver from the dropdown menu.
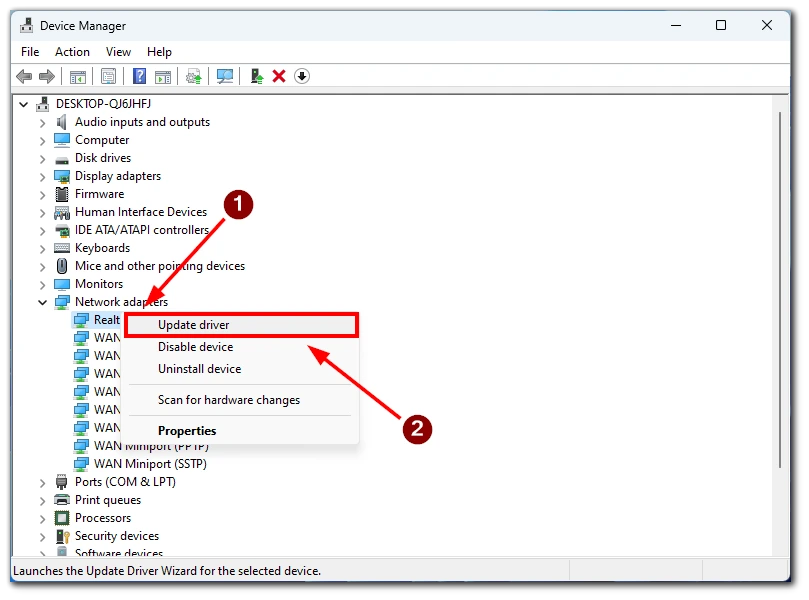
- Select automatic or manual update.
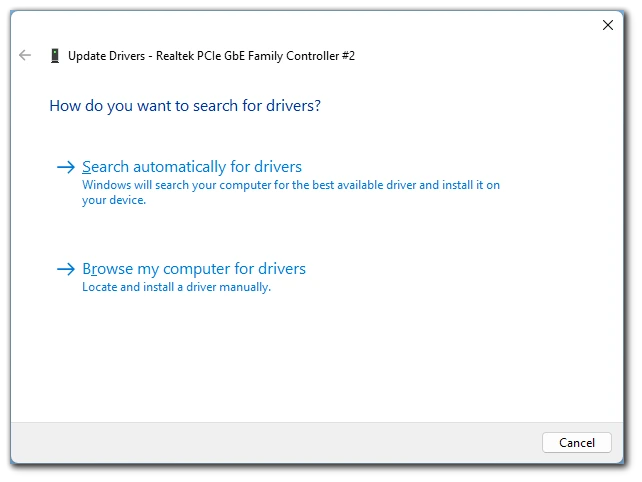
Not all driver updates can be found through the Windows 11 internal service. You should download the latest drivers from your device manufacturer’s official site.
Update your Windows 11
You may also need to update the system itself, as, in this case, you will have all the services updated, and the problem can be fixed. To do this, you need to:
- Press Windows + I to open Settings.
- Select Windows Update.
- Next, you need to click on the Check for updates button.
- If the system finds an update, click on Download & install.
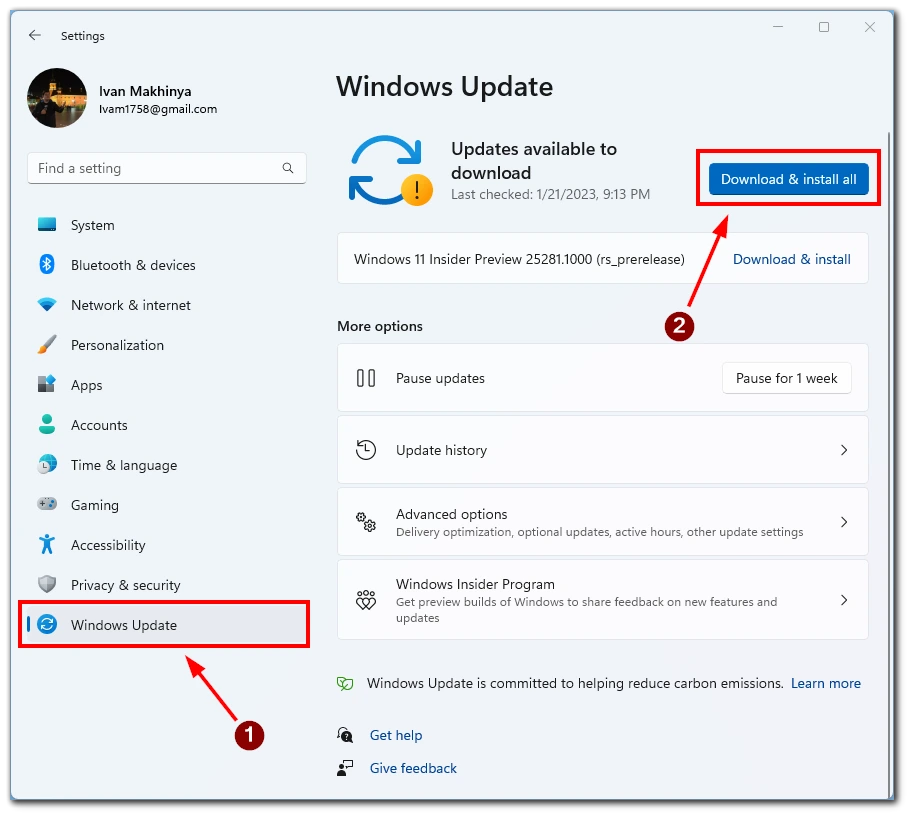
Please note that some updates may cause your Windows 11 PC to restart several times. This is a normal process, and you should not be scared.
Reset your CPU overclocking settings
If you overclocked your CPU manually or with a unique tool in the BIOS menu, you should reset these settings to default and see if that helps. It does not happen that often, but some users say that the overclocking of their CPU caused this error.


