")
After entering your password and successfully connecting to a Wi-Fi or hotspot, your Mac, iPhone, or iPad will reconnect. Each time you’re in proximity to the network, the device will default to this instead of mobile data.
More often than not, there is a need to forget the Wi-Fi network if there is any problem connecting to that network. Also, it prevents your Mac, iPhone, and iPad from automatically connecting to a particular wireless network.
What to do to forget the network on Mac?
Although the function to remember the network to which the device has been connected at least once is handy. However, when you’re in different places and connect to a new network all the time, the list of connections will be more than one screen. Also connecting to a public network can be dangerous. So to get the network on your Mac, you need to follow these steps:
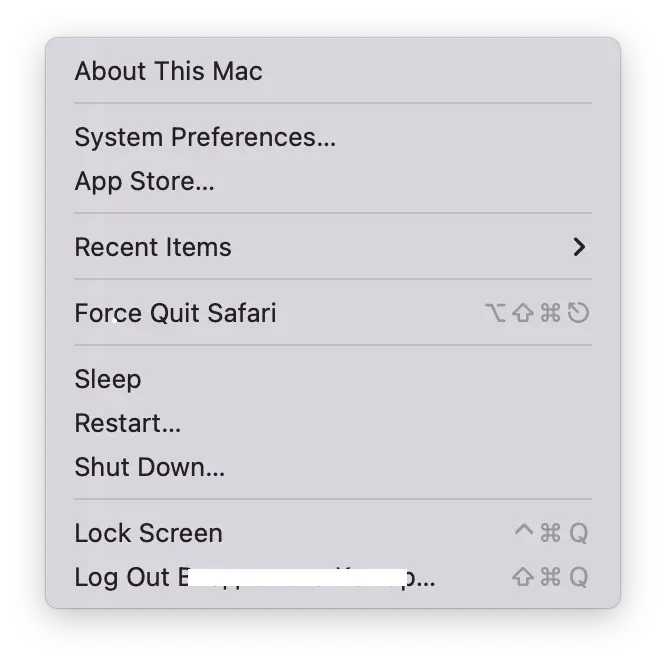
- The first step to forgetting the network on the Mac is to open ‘System Preferences’. To do this, click on the Apple icon in the top panel and select the second item ‘System Preferences‘.
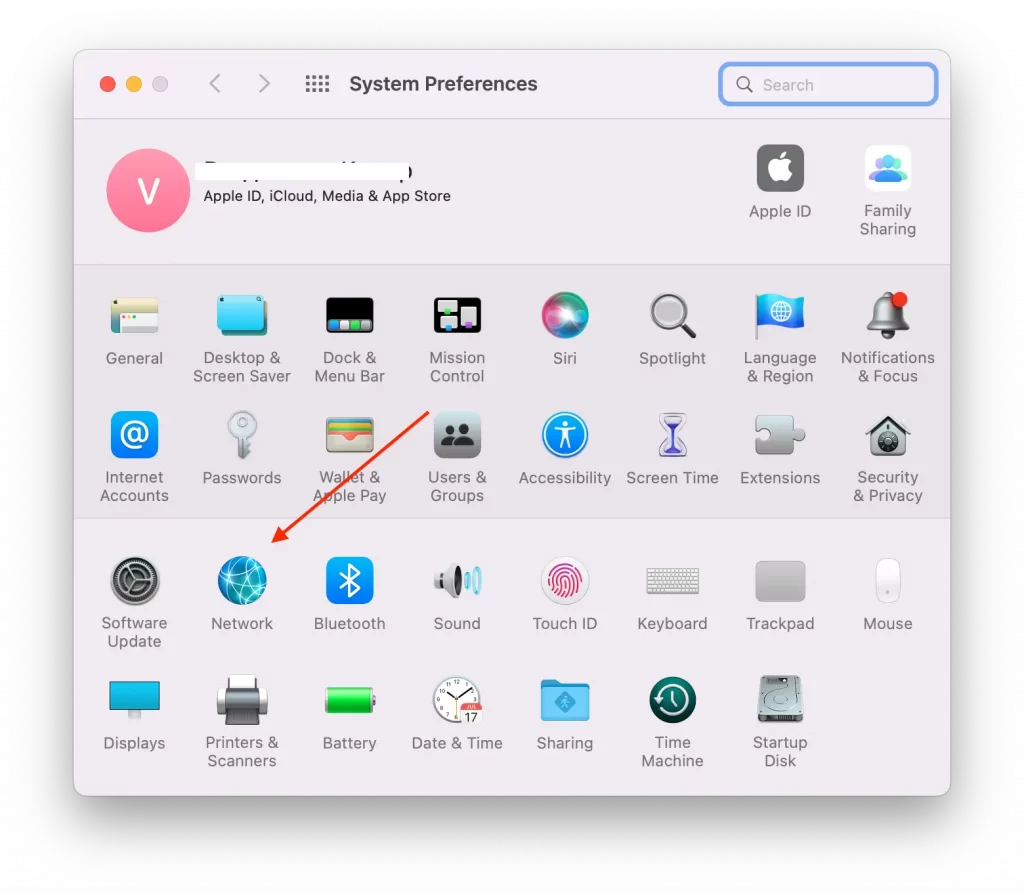
- In the next step, you need to select ‘Network’.
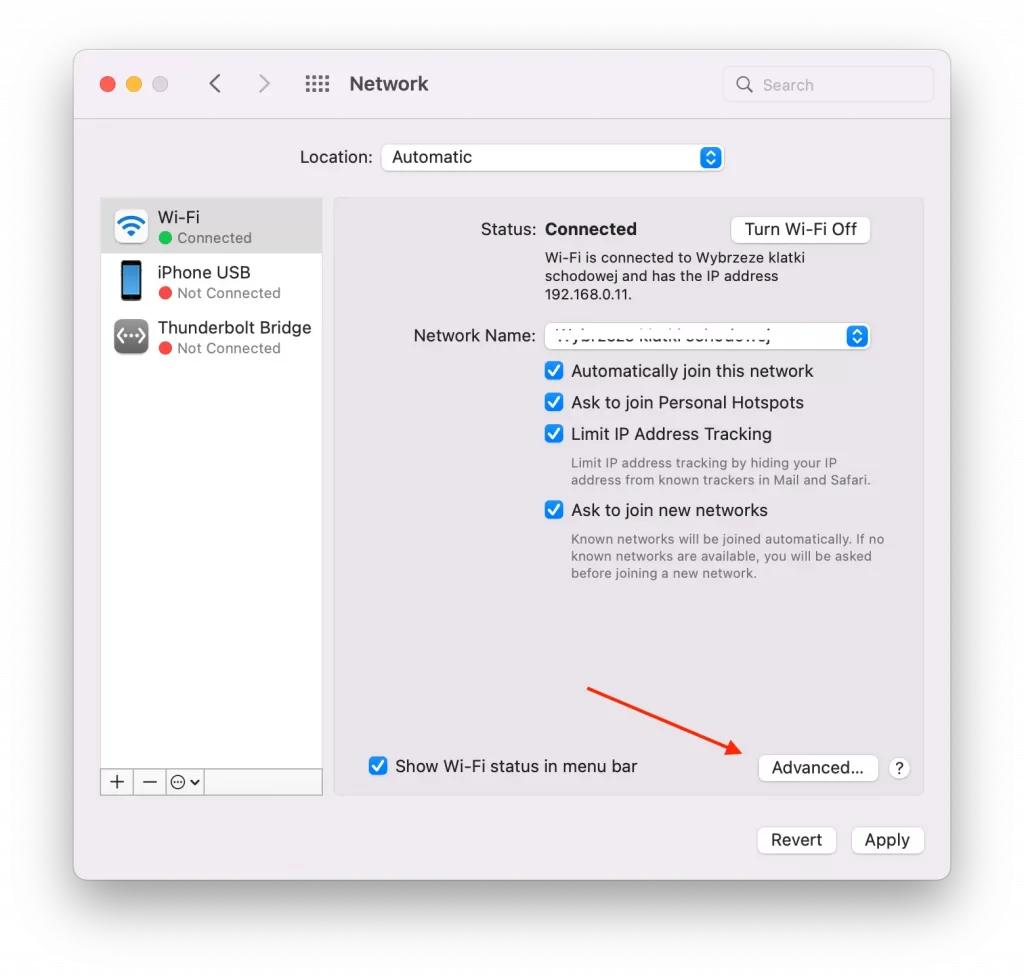
- Next, select the Wi-Fi network in the left side menu that opens and click the ‘Advanced’ button in the bottom right corner.
- After that, you need to click on the necessary network and select the ‘-‘ icon.
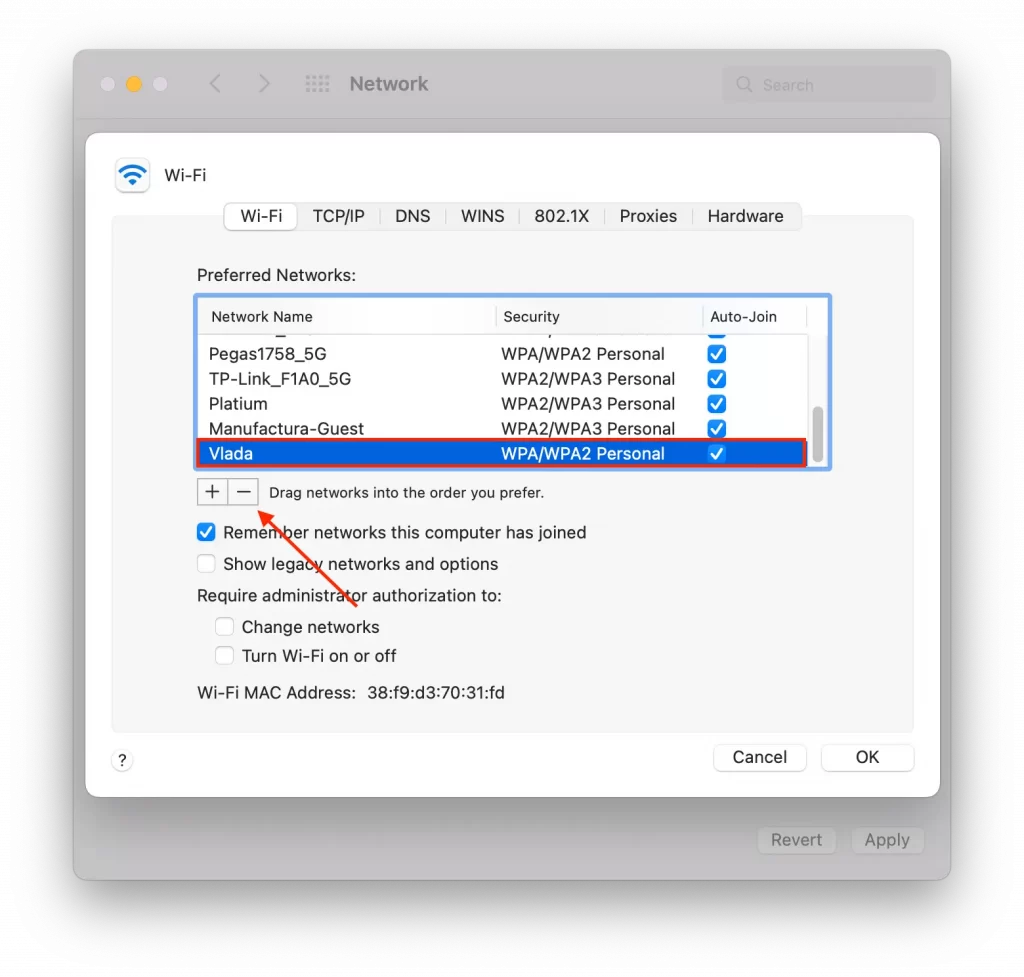
- Then confirm your actions and click on ‘Remove’.
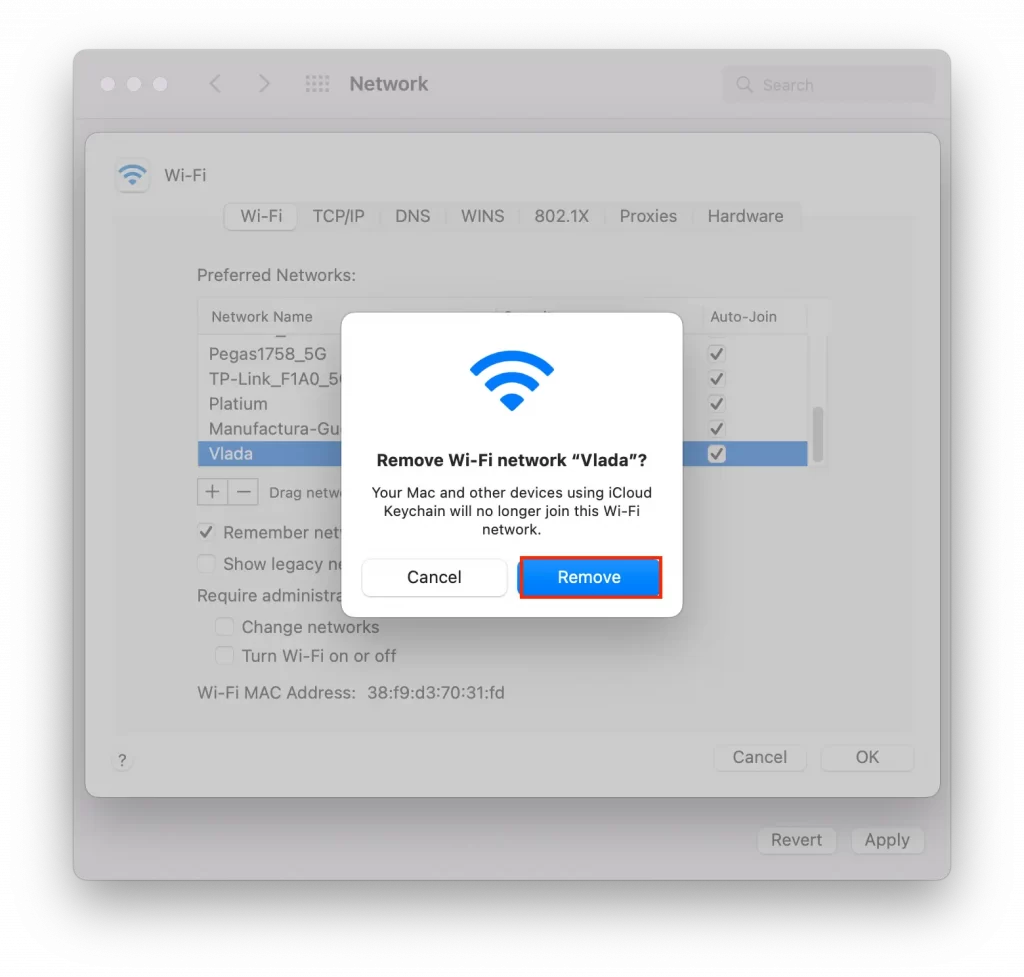
At the same time, you can uncheck the ‘Automatically join this network’ option. This is useful if you’re ever going to connect to a network, but you don’t have to enter a password to do so. All data will be saved and you only need to click on that network to connect.
What to do to forget the network on iPhone and iPad?
The same need may arise using an iPhone or iPad. This function is supported on all Apple devices for the convenience of the device owner. Whether you have an iPhone or iPad, the algorithm is almost identical. To get the network on iPhone and iPad follow these steps:
- The first step to getting the network on iPhone and iPad is to open the settings on your device.
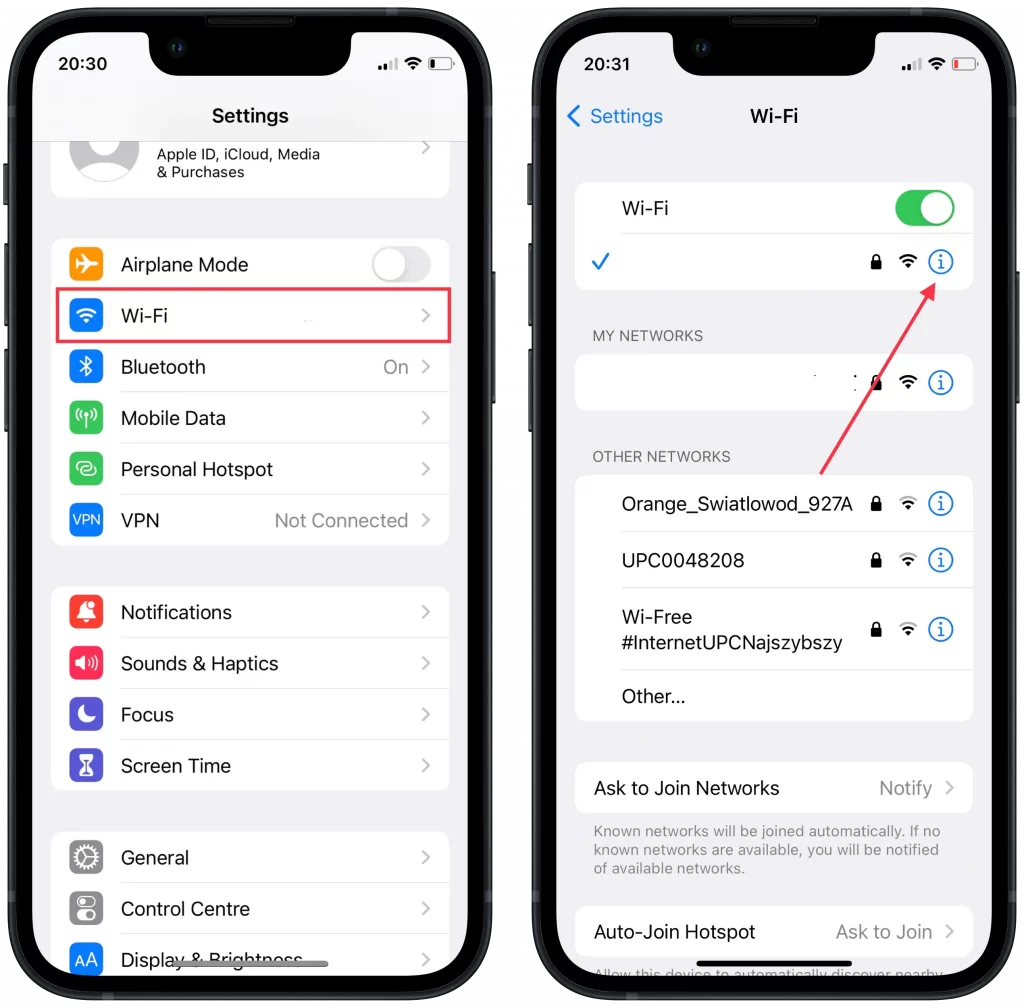
- Then select the section ‘Wi-Fi’.
- Next, you need to click on the ‘i’ icon of your network.

- In the last step, you need to click on ‘Forget this network’.
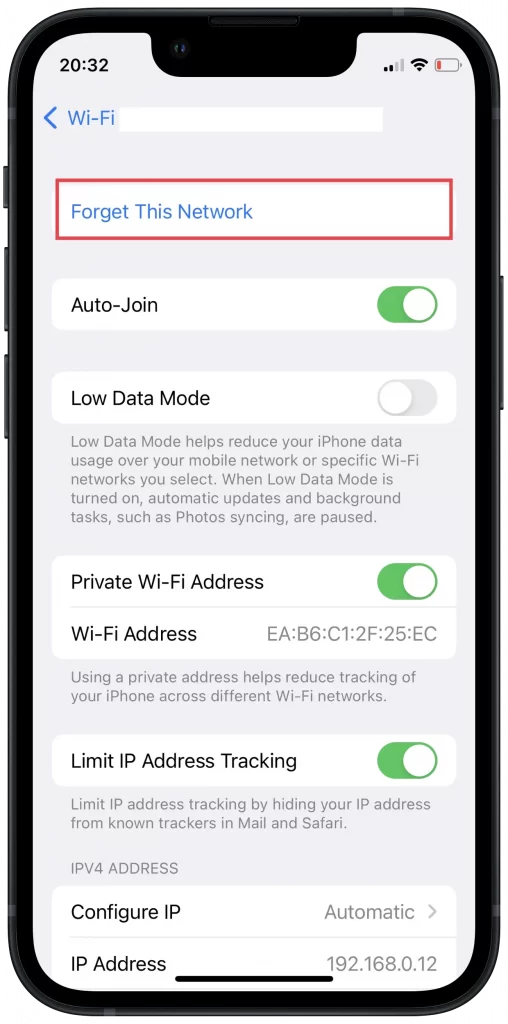
With these steps, you can make sure that your iPhone or iPad will not connect to this network. Since this network is deleted from the memory of the device.
Just keep in mind that if you have a controlled device that controls the connection to the Wi-Fi network, you may not be able to forget this network. As an alternative to forgetting the network on your device, you can disable auto-join for that network. Your device will still remember the network and its password, but will not try to connect to it automatically.
What to do to stop iPhone or iPad from automatically connecting to a network?
To do this, you need to follow similar steps as described above. So to stop your iPhone or iPad from automatically connecting to a network, you need to:
- The first step to stop automatically connecting to a network is to open the settings on your device.
- After that select the section ‘Wi-Fi’.
- Next, you need to click on the ‘i’ icon of your network.
- The last step is to drag and drop the slider in the ‘Auto Join’ section so it shows in gray.
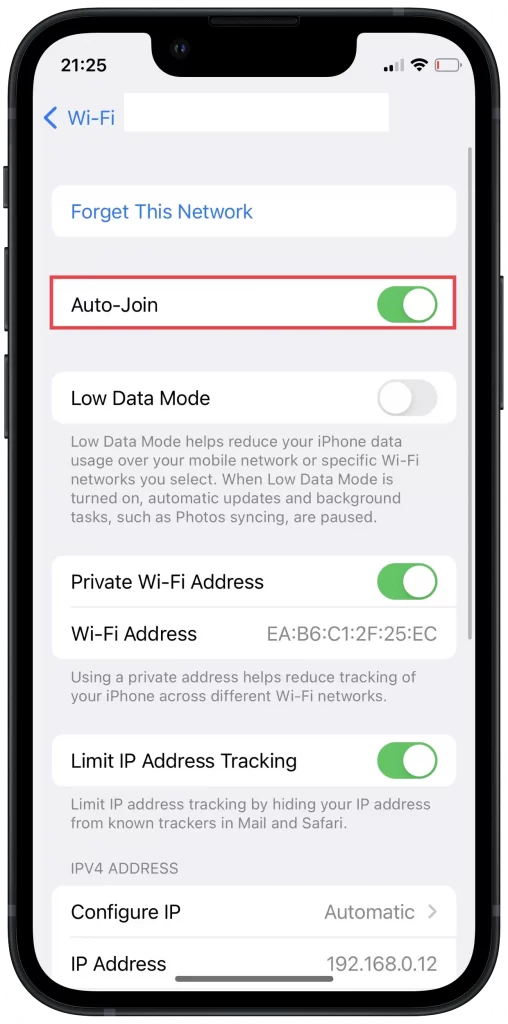
After these steps, you will need to select the network yourself and click ‘Join’. The network will no longer automatically connect to your device.


