
If your work or study involves creating and using spreadsheets, then you’ve probably heard of or maybe even tried a special service from Google called Google Sheets.
Google Sheets is a powerful spreadsheet application that offers many tools to facilitate data analysis. If you need to print out any spreadsheet document, but so that it contains only the data you want, one of the features of Google Sheets can help you.
One of the most important features for printing your work is the printable area, which determines how much of your sheet is printed. After all, choosing the right printable area is really important.
By default, Google Sheets prints the entire sheet when you press the print button. However, you shouldn’t do that, as you may end up leaving out some cells or columns. You may even end up with blank pages with only headers and footers.
Setting up your print area is a skill you need to master if you want your printer to produce high-quality, well-organized pages that are easy to present or analyze data on.
So, here’s how to set the print area in Google Sheets.
How to set the print area in Google Sheets on a PC
When you work with Google Spreadsheets on your computer, there are more printing options when you set up the printable area. You can choose to print the entire workbook, the current sheet, or just a few cells of the current sheet.
How to set the print area in the workbook or in the current sheet
If you want to set the print area in the workbook or in the current sheet in Google Sheets on your PC, you have to follow these steps:
- First of all, open the Google Sheets in your web browser.
- Then, go to the file you want to print.
- Click on the “Print” button in the upper left corner of the menu bar. The print settings window opens. By default, the window displays a preview of your sheet.
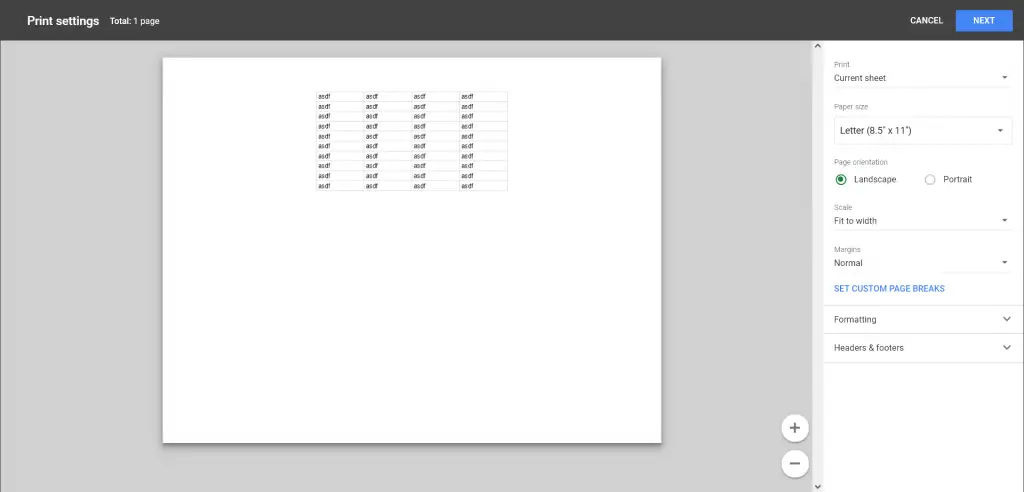
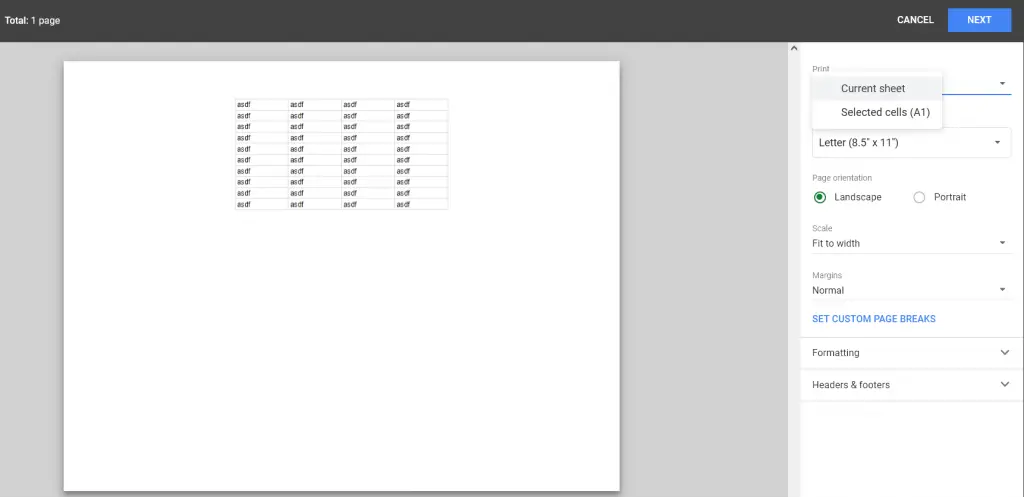
- After that, you should see a grayish print button with a down arrow next to it in the upper-right corner of the print settings window. Click the down arrow and select “Current Sheet”.
- Now, click on the blue “Next” button.
- A new window will appear at this moment, where you can adjust the print area and specify the number of copies you want to print. You can also change the print color.
- After you have adjusted the printable area to your liking, click “Print”.
Once you have completed these steps, you will print your current sheet or workbook.
How to set the print area in the selected cells
Sometimes you may want to print only a certain part of a worksheet. This can happen when you want to present only part of your work or even share certain sections with colleagues for discussion before printing the entire worksheet.
If you want to set the print area in the selected cells in Google Sheets, you have to follow these steps:
- Open the Google Sheets in your web browser.
- Then, go to the file you want to print.
- Choose the cells you are interested in. A continuous range of cells should be selected.

- Click on the “Print” button in the upper left corner of the menu bar. The print settings window opens. By default, the window displays a preview of your sheet.
- After that, you should see a grayish print button with a down arrow next to it in the upper-right corner of the print settings window. Click the down arrow and select “Selected cells”.
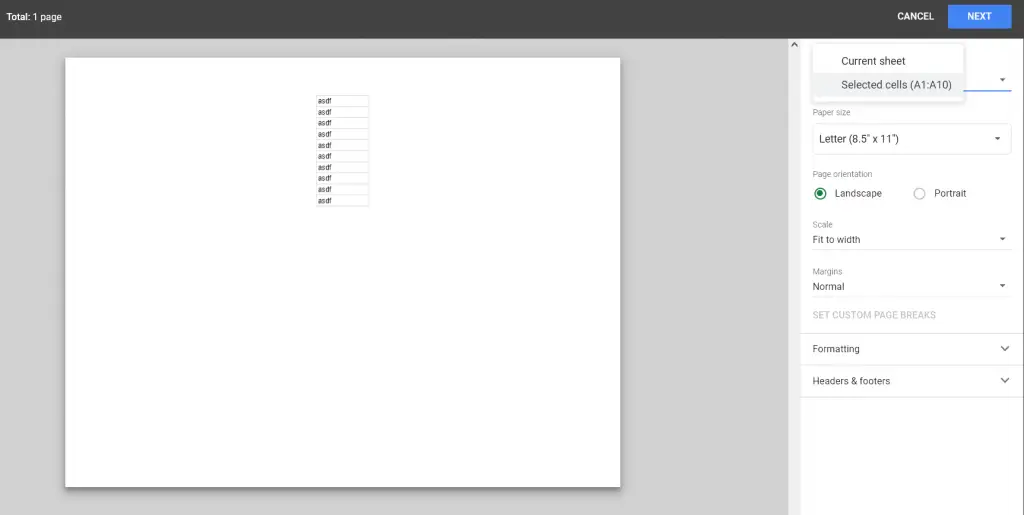
- Finally, click “Next” to open the last window, where you can configure the print area before sending the file to the printer.
Once you have completed these steps, you will print your selected cells in Google Sheets.
What is shared access in Google Sheets
One of the undeniable advantages of Google Sheets over Excel is the ability to share files with colleagues. To open your file to your colleagues, click the green “Share” button in the upper right corner and set the settings.
You can give access to the file to individual users, to those who have a link, or to the whole Internet. There are also different levels: “Edit”, “Comment”, “View”.
If you link to other sites in the sheets, and you don’t want others to see the contents of the file, don’t provide access via a link. The owners of the sites you are linking to can get a link to the file from the clickstream reports and open it.


