
If you’ve ever wondered about a device that may increase the productivity of your work, you should definitely hear about the Mac. This Apple device is filled with great features that can simplify your work and let you make your job more efficient. People who write articles especially admire Macs.
Articles sometimes require screenshots to show the users how to make this or that action. However, to make the article with screenshots look better, Mac gives an opportunity to create a screenshot of a window with a drop shadow. Fortunately, the process doesn’t require much effort.
How to make a screenshot on Mac
As was mentioned before, developers have created a device that is filled with features. There are plenty of Accessibility options, keyboard shortcuts, etc, that have been created to simplify the usage of the Mac. The person who knows the keyboard shortcuts – knows how to efficiently manage the Mac. In addition to this, for each action, there are several ways to complete it. The same is with screenshots, there are 3 ways to make screenshots on Mac:
- The first method is to press and hold the Command+Shift+3 button. In this way, the entire screen would be captured. The preview of the screenshot would be displayed in the bottom-right corner.
- For the second method, you should press and hold Command+Shift+4. In this way, you’ll get your cursor turned into the crosshair which can be pulled to select the area of your screen.
- The third method’s based on the keyboard shortcut Command+Shift+5. This would give you an opportunity to open the toolbar and select the area.
So, as you can see, there are several ways even to take a simple screenshot. So, the Mac developers have cared about the ability of their users to complete different actions for achieving the desired result.
How to take a screenshot with a drop shadow on Mac
Screenshots can be used for different purposes. Maybe you need to show your friend how to connect your AirPods to your iPhone or send your teacher the screenshot of your homework, maybe you’re a writer and you need to add a screenshot to your article. It doesn’t depend on the purpose, but you can make your screenshot look better with a drop shadow. So, if you want to do that, you should follow the steps which would be mentioned in the section below:
- First of all, you should open the window in which you want to take a screenshot.
- After that, you should press and hold “Command+Shift+4” on your keyboard.
- Then, you should press on space on the keyboard.
- To complete the process, you should click on the window you want to take a screenshot of.
Since then, your screenshot would be saved as a PNG file. The screenshot would be created with a drop shadow that would be displayed “under” the picture of the window. In this way, the appearance of your articles would be greatly influenced by this good feature as the screenshot would be highlighted and there would be no unnecessary windows displayed on your screenshot.
How to crop the screenshot on Mac
Sometimes there may be cases when you need to get rid of some needed parts of the screenshot as they don’t suit the article or this information can’t be used for a particular purpose. For those cases, you can crop the screenshot on your Mac. If you want to do that, you should follow the prompts which would be mentioned in the section below:
- First of all, you should use one of the 3 methods that have been mentioned before to capture your screen.
- After that, you should see the preview of the screenshot in the bottom-right corner. You should click on it.
- Then, there would be a new window displayed with tools.
- You should tap on the “Crop” icon and choose the section that you want to leave.
- After that, you should tap on the “Crop” option.
- To complete the process, you should tap on the “Done” option.
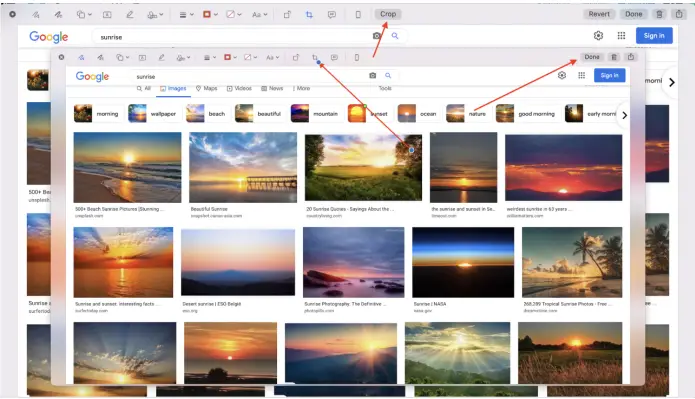
Since then, all unnecessary info would be removed from your screenshot. As you may see, you can also add some text on the screenshot, place some arrows and drawings, etc, using the toolbar that would be opened after the process above.
How to edit your screenshot using your iPhone
Sometimes, there may be cases when you need to edit your screenshot, but it’s more convenient for you to do some things using your phone. You may wonder about this feature, however, fortunately, Mac developers have provided their users with this great opportunity. So, if you need to edit your screenshot using your iPhone, you should follow the prompts which would be mentioned in the section below:
- First of all, you should use one of the 3 methods that have been mentioned before to capture your screen.
- After that, you should see the preview of the screenshot in the bottom-right corner. You should click on it.
- Then, there would be a new window displayed with tools.
- Next, you should click on the icon of the iPhone at the top of the toolbar.
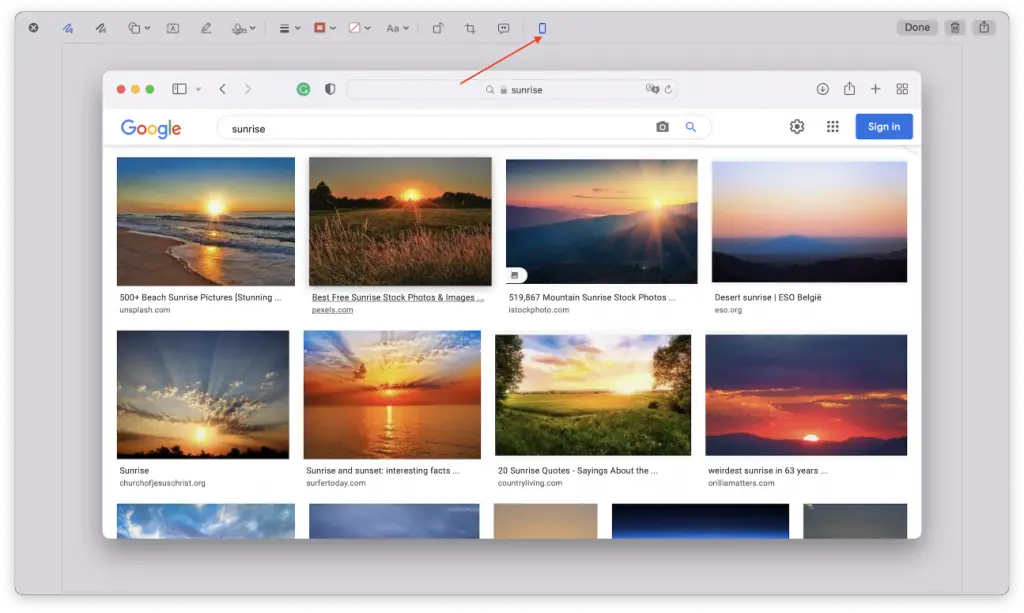
- After that, you should finish all the edits on your phone, and in case you still need to do something, you can finish on your Mac.
- To complete the process, you should click on the “Done” option.
Since then, all the edits that have been done with your screenshot using your iPhone and Mac would be saved. As for me, using my iPhone is much more convenient to edit some parts of the screenshot. In addition to this, it’s great news that you won’t need to send your screenshot to your iPhone, and after all the edits send it back to the Mac to save it, as it significantly saves your time and nerves.


