
If you regularly work with sensitive documents in Excel, you need to know how to use the spreadsheet protection feature. With it, no one can change anything in your sheet or workbook without knowing the unique password.
Although Excel protection secures data from editing, it still doesn’t prevent people from viewing the documents. However, this is enough if you don’t want someone to accidentally or deliberately delete important information.
But what if, for example, you forget your password? Fortunately, Excel allows users to unprotect a spreadsheet or workbook even without a password. In short, you will need to use a specific code to do this.
So here’s how it works in more detail.
How to unprotect Excel sheet without a password
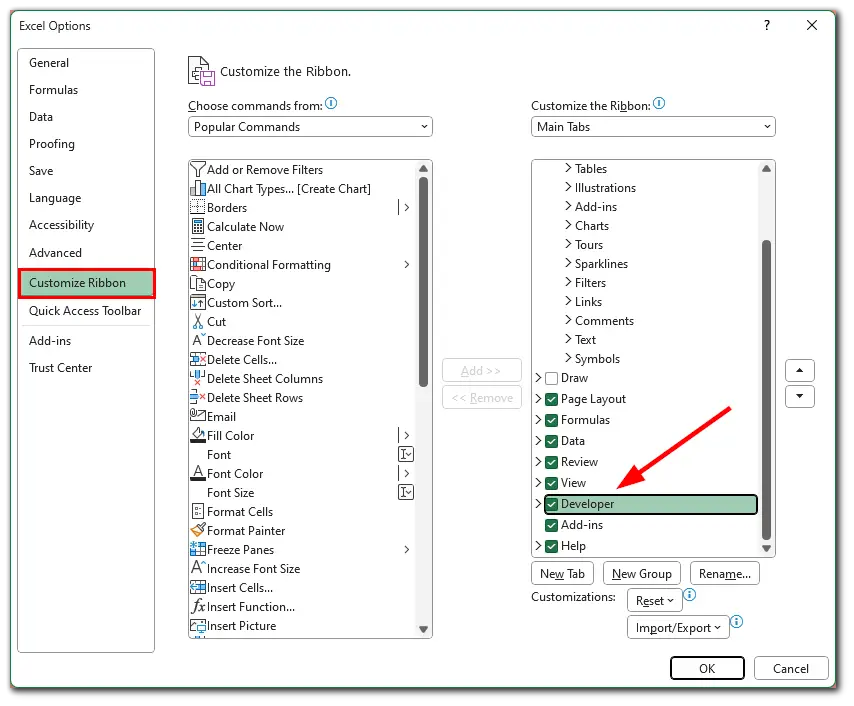
If you don’t know the password from the Excel sheet, you can still unprotect it. But first, you need to enable Developer options. So follow these steps:
- Open Microsoft Excel, click File and go to Options.
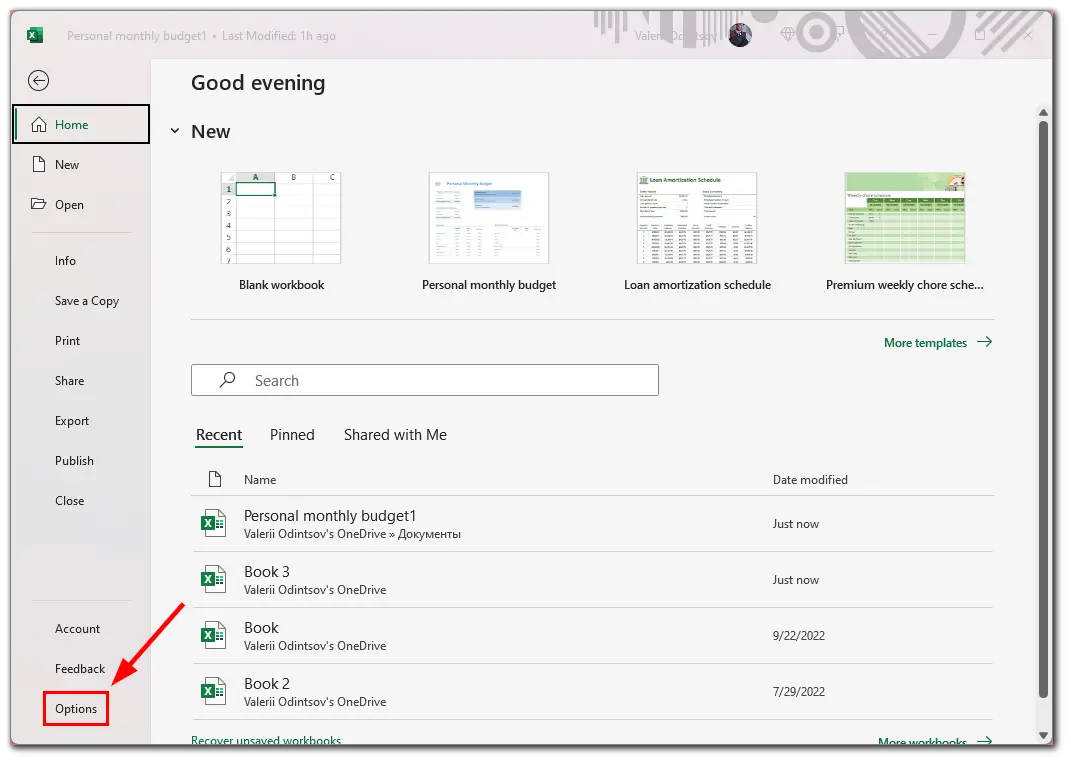
- Then select Customize Ribbon and check the Developer tab under Main Tabs.
Now, you can start unprotecting your Excel sheet without a password. So do the following:
- Open your protected Excel sheet.
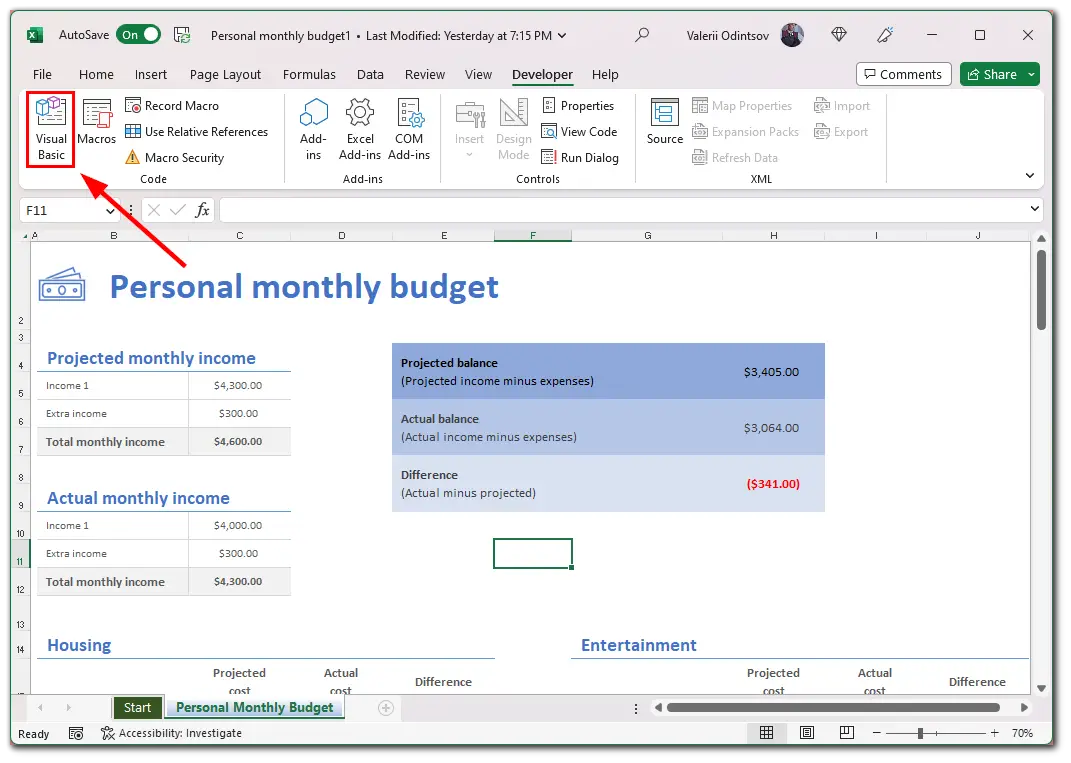
- Go to the Developer tab and click View Code.
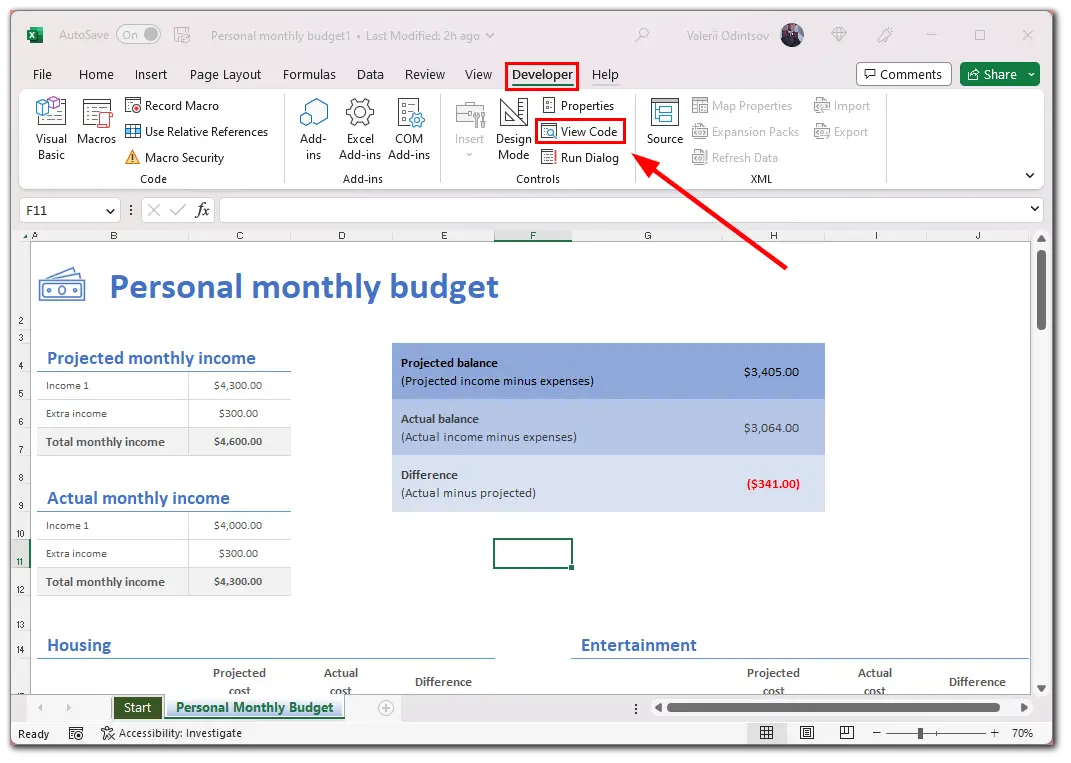
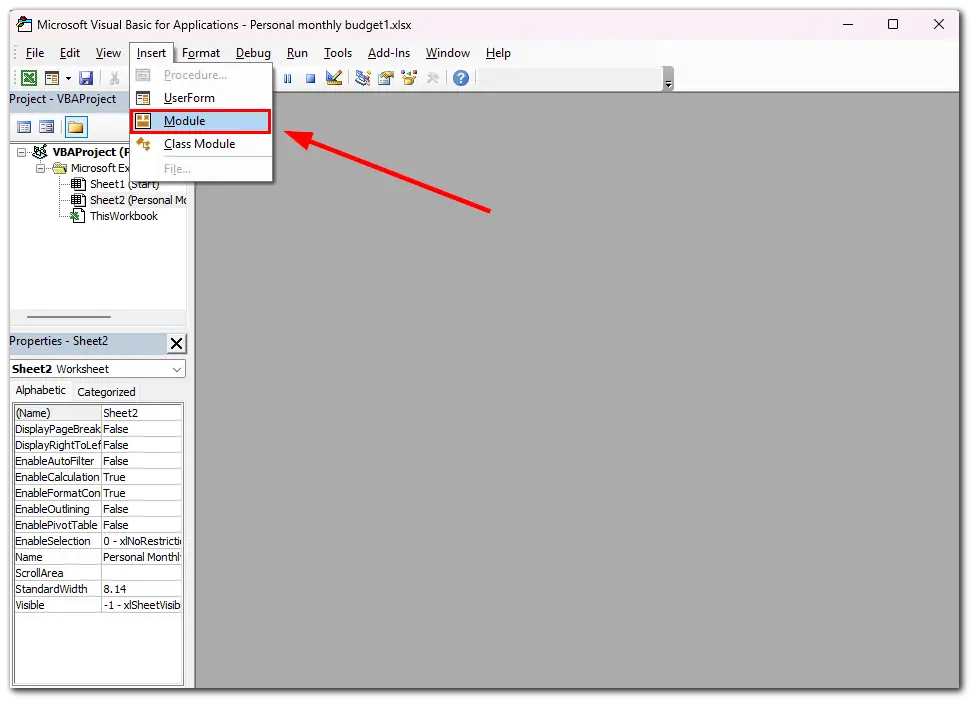
- After that, right-click the workbook name on the left pane (VBAProject).
- Click Insert and select Module.
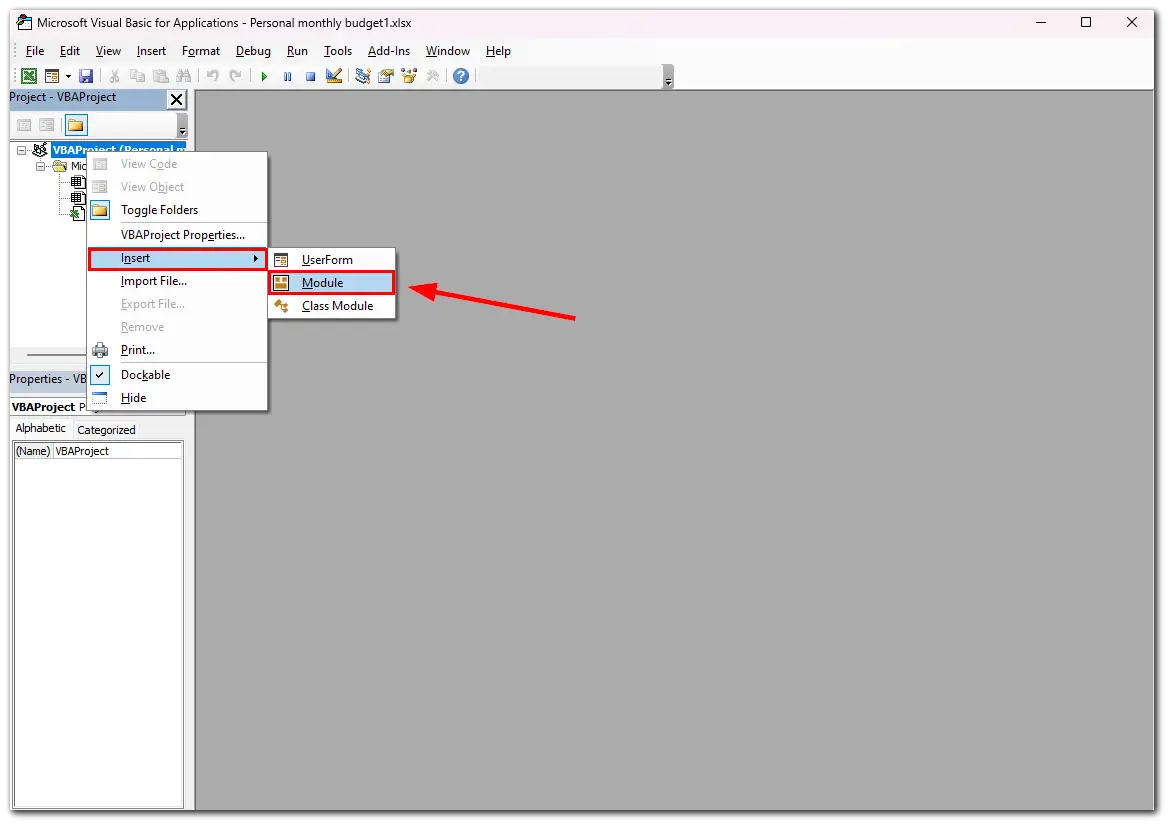
- In the appearing window, paste this code:
Sub PasswordBreaker()
Dim i As Integer, j As Integer, k As Integer
Dim l As Integer, m As Integer, n As Integer
Dim i1 As Integer, i2 As Integer, i3 As Integer
Dim i4 As Integer, i5 As Integer, i6 As Integer
On Error Resume Next
For i = 65 To 66: For j = 65 To 66: For k = 65 To 66
For l = 65 To 66: For m = 65 To 66: For i1 = 65 To 66
For i2 = 65 To 66: For i3 = 65 To 66: For i4 = 65 To 66
For i5 = 65 To 66: For i6 = 65 To 66: For n = 32 To 126
ActiveSheet.Unprotect Chr(i) & Chr(j) & Chr(k) & _
Chr(l) & Chr(m) & Chr(i1) & Chr(i2) & Chr(i3) & _
Chr(i4) & Chr(i5) & Chr(i6) & Chr(n)
If ActiveSheet.ProtectContents = False Then
MsgBox "One usable password is " & Chr(i) & Chr(j) & _
Chr(k) & Chr(l) & Chr(m) & Chr(i1) & Chr(i2) & _
Chr(i3) & Chr(i4) & Chr(i5) & Chr(i6) & Chr(n)
Exit Sub
End If
Next: Next: Next: Next: Next: Next
Next: Next: Next: Next: Next: Next
End Sub- Press F5 to run this code.
Now you should wait. This macro should report a cracked password. You don’t need to remember this fake password or enter it anywhere. Just press OK, and the sheet will be unprotected.
If you are using Excel 365 – 2013, you will need to save the document as an Excel 97-2003 workbook (*.xls). Then close Excel and reopen the workbook. It will be opened in compatibility mode. Run the macro to unprotect the worksheet and then save the workbook again as a .xlsx file.
If this method doesn’t work for you, there’s another one.
How to copy the protected Excel sheet
Many people will like this method, as all you have to do is copy all the content from the sheet and paste it into the new one. Here’s what you should do:
- Open the protected Excel sheet.
- Then click on the A1 cell and press Shift + Ctrl + End to select all used cells in the sheet.
- Press Ctrl + C to copy the content.
- Create a new sheet in the current or another workbook.
- In the new empty sheet, place the cursor in cell A1 and press Ctrl + V to paste the data.
However, you should also know that this method works only if the Select locked cells and Select unlocked cells actions are allowed in the protected Excel sheet.
How to unprotect the Excel workbook without a password
If you want to unlock your protected Excel workbook without a password, you can follow these steps:
- Open the document and go to the Developer tab.
- Then click on the Visual Basic button.
- After that, click Insert and select Module.
- In the appearing window, paste this code:
Sub Shareus()
ActiveWorkbook.Sheets.Copy
For Each sh In ActiveWorkbook.Sheets
sh.Visible = True
Next
End Sub- Finally, press F5 to run the code.
Once you have completed these steps, a new workbook with a different name will open. It will have all the same data but without the workbook structure protection.
In this case, you cannot simply copy data from a table and transfer it to another table, as I described above. The point is that the Structure box prohibits moving and copying sheets to another workbook.
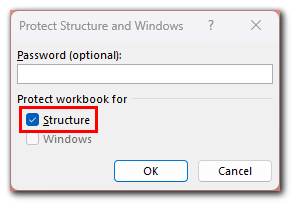
In addition, this function also prevents users from viewing hidden worksheets, renaming, moving, hiding, or deleting worksheets, and inserting new worksheets and worksheets with diagrams.
How to unprotect Excel sheet and workbook with password
If you find the password, you can easily unlock protected sheets or workbooks in Excel. So here’s what you should do:
For Excel sheet
- Open the document and go to the Review tab.
- Then click Unprotect Sheet.
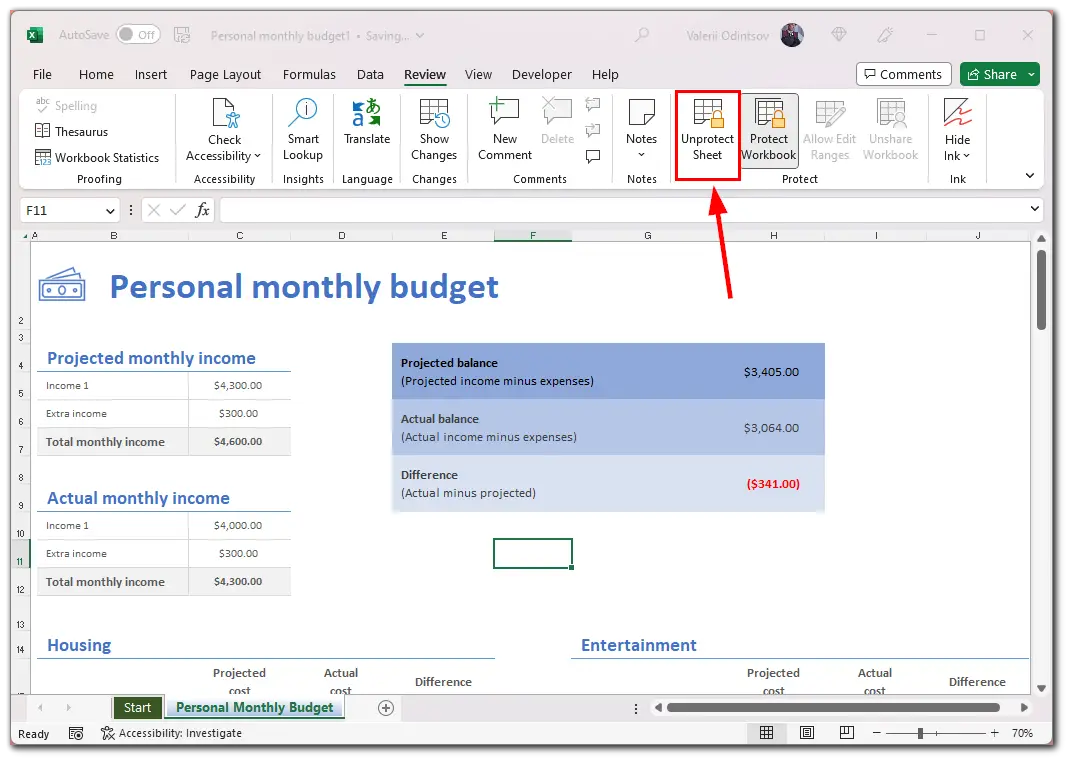
- Enter the password and click OK.
For Excel workbook
- Open the document and go to the Review tab.
- After that, click Protect Workbook.
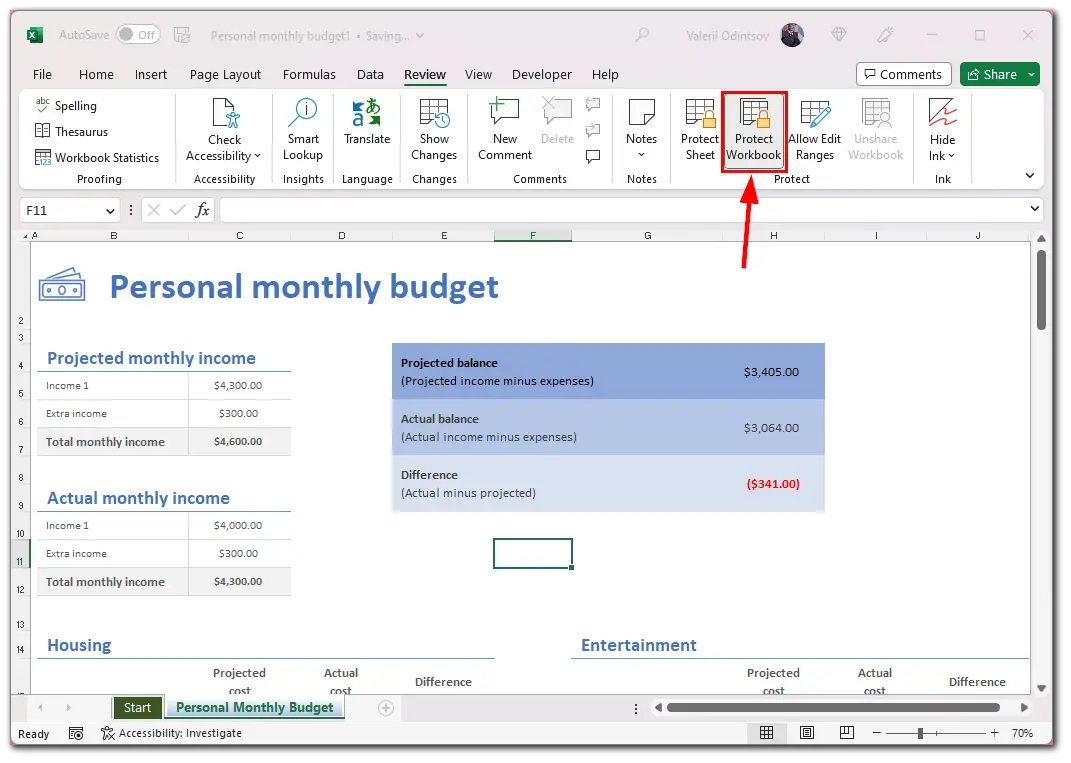
- Finally, enter the password and click OK.
Now your Excel sheet and workbook are unprotected.
How to set a password for Excel workbook
If you want to put a password on your Excel document, here is how:
- Open your Excel workbook and go to the File tab.
- Then click Info and select Protect Workbook.
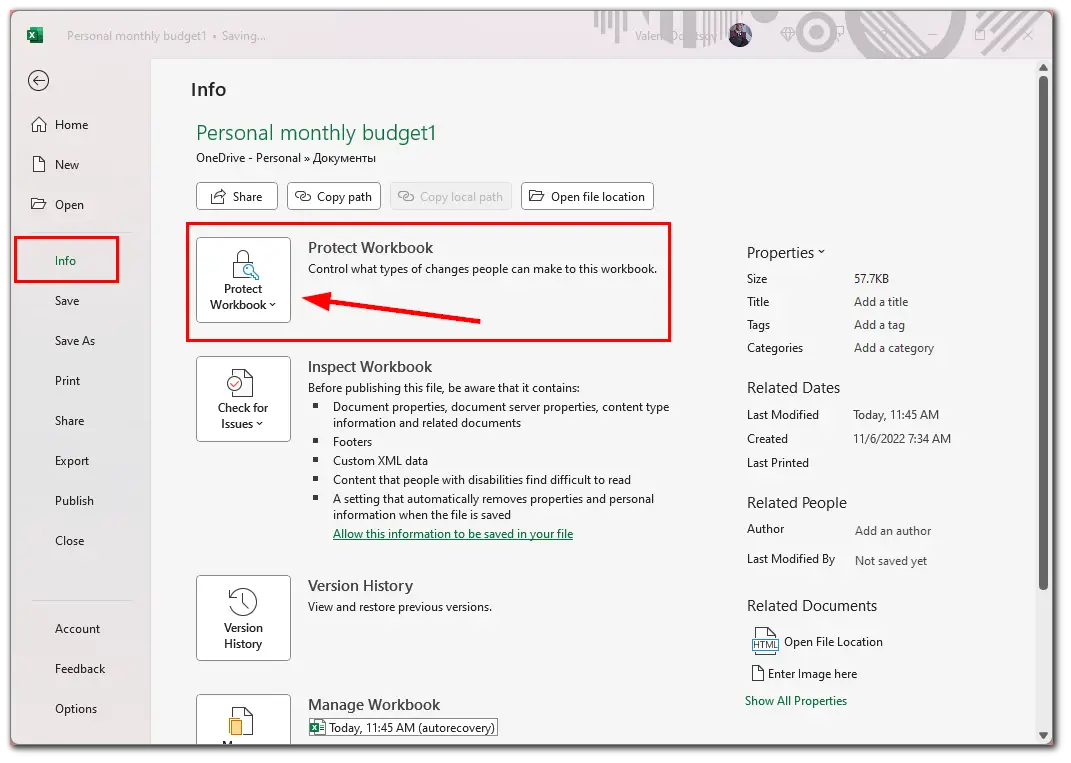
- After that, select Encrypt with Password from the drop-down list.
- Finally, enter and confirm the password.
Now, nobody can access your Excel document without a password.


