
If you need to work with different archives, you should pay attention to 7-Zip. It’s a featureless archiver that you can install on your Windows 11. You can also set it as the default archive management app.
It’s a pretty old application and already a bit outdated, but it has an amiable design. It will take you a few minutes to get used to it.
What is 7-Zip, and why do you need it
7-Zip is the archiver you need if your PC is too overloaded with different files. You can add your files to an archive and compress them to take up much less storage space. It is also convenient if you need to send several files to another user simultaneously.
So why should you use 7-Zip? 7-Zip has several advantages, including a completely free distribution model. You can use it free of charge for personal or commercial purposes. It has 87 different language versions and supports 256-bit AES encryption for 7z and ZIP formats. You can also integrate it with Windows Shell. Among supported formats, you will find:
- Packaging/unpacking – 7z, XZ, BZIP2, GZIP, TAR, ZIP, and WIM formats.
- Unpack only – AR, ARJ, CAB, CHM, CPIO, CramFS, DMG, EXT, FAT, GPT, HFS, IHEX, ISO, LZH, LZMA, MBR, MSI, NSIS, NTFS, QCOW2, RAR, RPM, SquashFS, UDF, UEFI, VDI, VHD, VMDK, WIM, XAR, and Z.
So if you want a more powerful archiving tool and are ready to play with an outdated design from the Windows XP days, this archiver will be perfect for you. You can download it directly from the developer’s page.
How to get 7-Zip on Windows 11
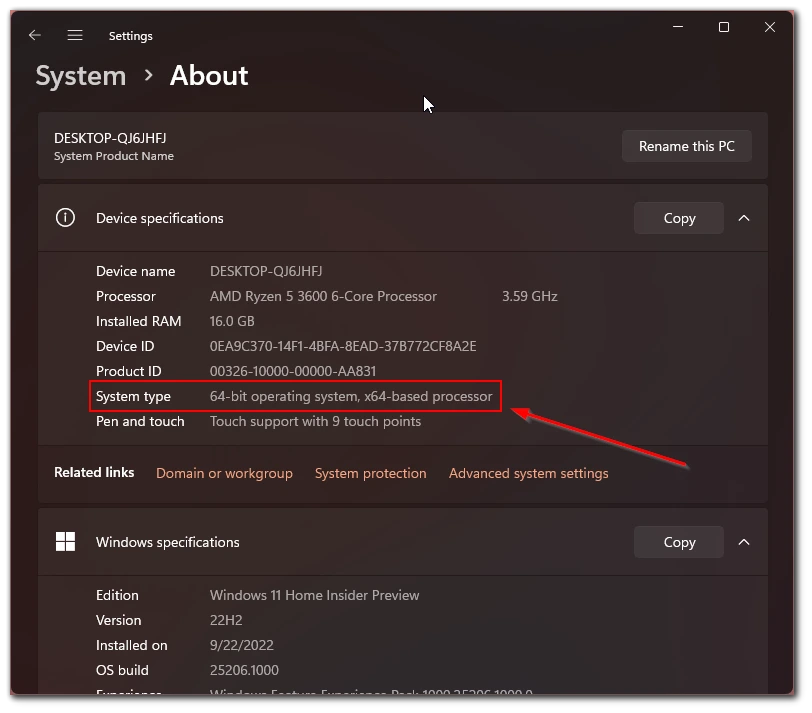
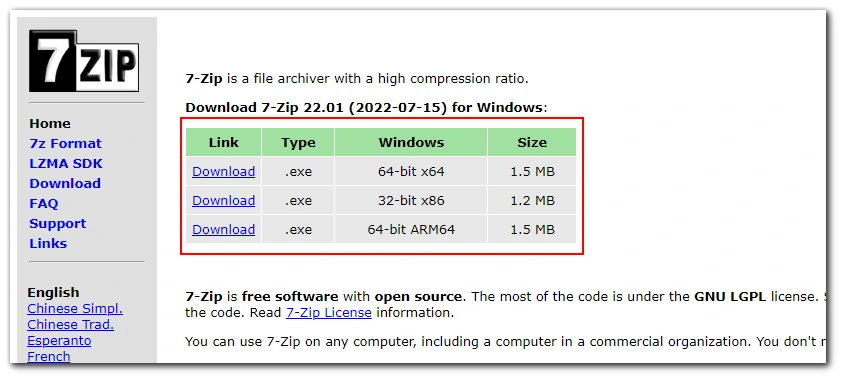
As I described above, you can download the exe installer from the developers’ official website. First, you will need to check whether you have a 32-bit or 64-bit Windows operating system. You can do this through the settings in the About System. You can also see the version of Windows installed on your PC and see if you need to update it.
After that, download the file you need on the developer’s site and install it on your PC. This program will work on any Windows version. Including the latest Windows 11.
I would also recommend running it as an administrator so you do not have problems accessing specific files. Nothing is complicated about the installation. You only need to specify the location on the disk where to install the program.
How to archive or unarchive files using 7-Zip
Using 7-zip is relatively easy. If you need to unzip an existing archive, you can right-click on it, select Open with, and then specify 7-Zip as the program to open the file.
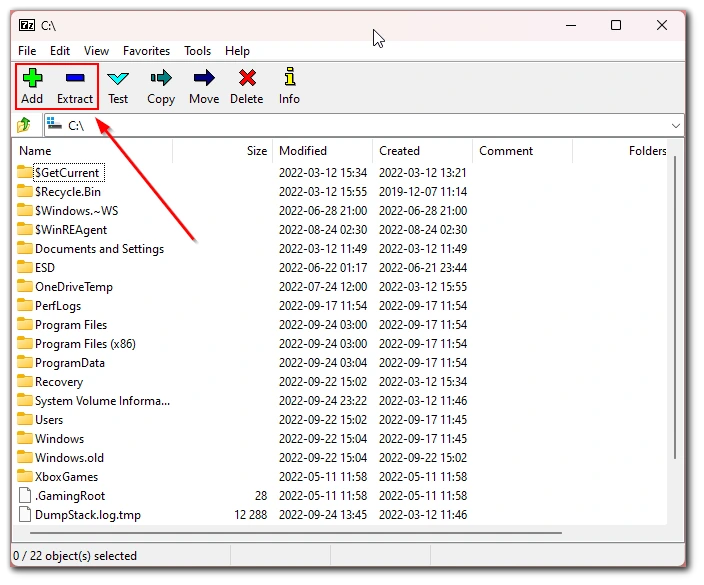
If you need to unarchive, go to the folder where 7-Zip is saved and open it. After that, click on the Add button with a green plus sign. This is where you will need to select the files you want and set the parameters for the compression. You will also be able to set a password.
You can also use 7-zip to move files around your storage, open archives directly from it, or even copy files you want. All in all, it can serve you as an alternative to Explorer. You can also set it as your default archiver right there.
Read also:
- How to fix blank icons in Windows 11
- Microsoft can make the names of Windows 11 updates easier to read
- How to check and update BIOS on your Windows PC
How to make 7-Zip a default archiver
If, after using 7-zip, you are satisfied and want to make it the default archiver, the developers have added this feature to the app. You can choose the formats to which this program will be applied. To do this, you need to:
- In the toolbar, select Tools.
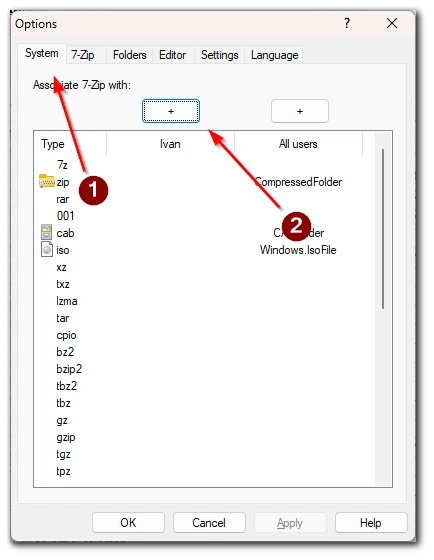
- From the pop-up menu, choose Options.
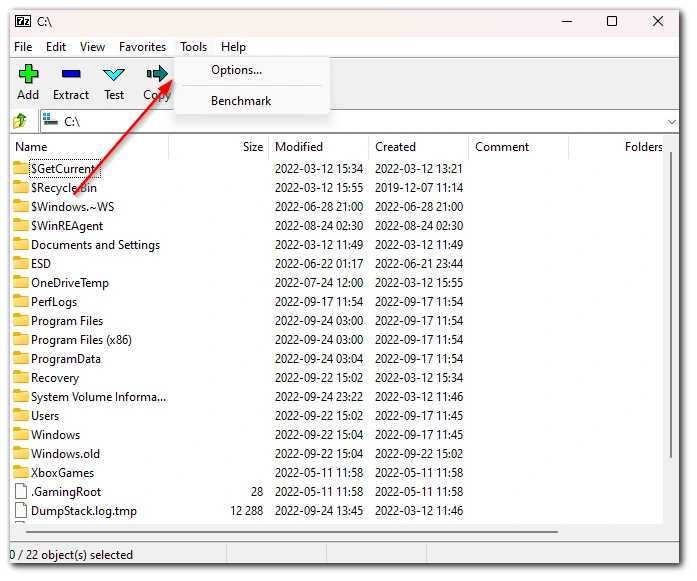
- Here you need to select the System tab. Click on + and choose the formats for which you want to leave 7-zip as the default archiver.
After that, the System will automatically open files in this program. If you do not find a format you need, you can always manually order the System to open files with this application by clicking on Open with.


