
In recent years, communication on the Internet has reached a new level. Nowadays messengers and video chats have become especially popular. However, emails are still relevant for business communication, especially Google has excelled in this area. Today their service Gmail is the most popular service for correspondence in the world. Tens of millions of emails are sent per day.
Of course, with so many emails many users often have the problem that at some point their mailboxes turn into a chaotic pile of emails. Folders of emails help a lot to solve this problem, but sometimes there are too many folders, or some of them become irrelevant. If this is the case, you can easily delete a folder you don’t need by using the app for phones or the Gmail service in your browser.
What are labels in Gmail
Not so long ago Gmail changed its design significantly and changed some of its features. In particular, what used to be called Folders is now called Labels. In essence, the functionality remains the same. You can add different emails to the different labels to have quick access to them. This is quite handy, for example, if you have several dozen emails a day, maybe to different accounts, and you quickly get lost in this amount of correspondence. That’s what labels are for. You just put the email you need in them and you can quickly find it among the others.
Besides, you can set up an email so that emails from certain people or companies go immediately to the right label. It’s pretty handy if you have a lot of email contacts, but only a few specific emails are really important to you.
However, if you don’t need a particular label anymore, or if you just decide you have too many, you can always delete it. This may seem like a simple task at first glance, but there are a few non-obvious steps in removing labels from your Gmail.
Read also:
- How to reset your Gmail password
- How to send email to multiple recipients in Gmail
- How to add a table to an email in Gmail
How to remove labels in Gmail
If you do decide that you need to remove the shortcut from Gmail, it’s pretty easy to do. You can delete it at any time, but the emails will not be deleted from it. They will simply be moved to the general mail tab. You can find them in the general list of all your emails. You can delete labels directly from your smartphone or from a browser on any device. The instructions will vary slightly.
Using the mobile app
In order to delete a label using a mobile app, you’ll need to:
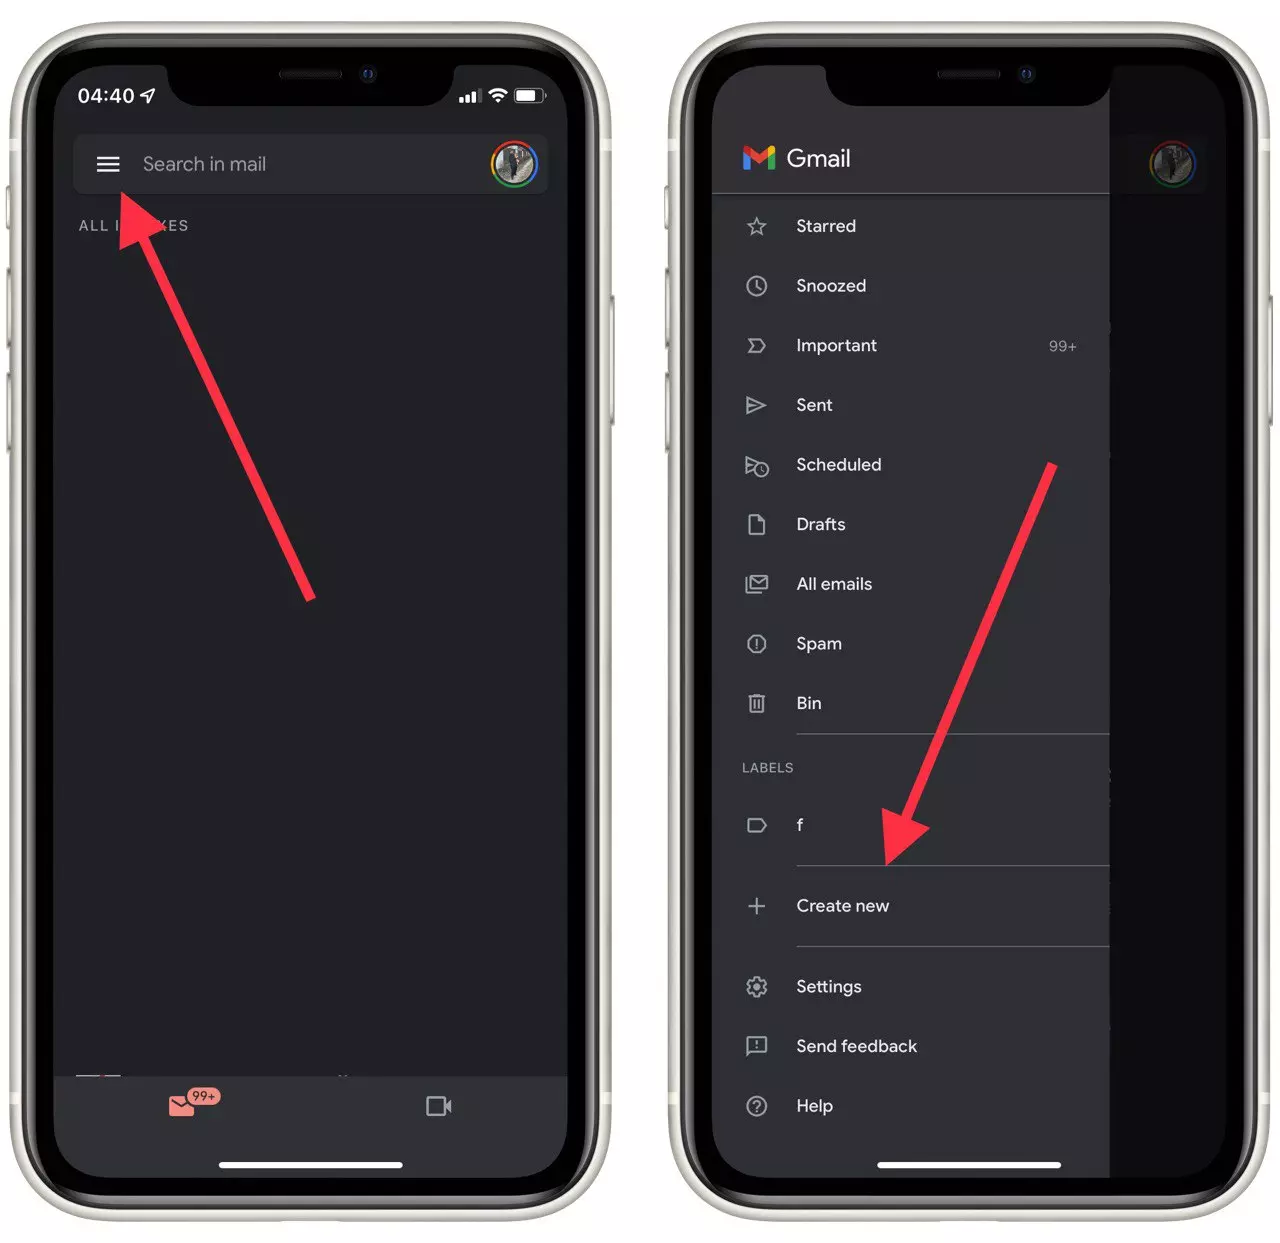
- Log in to the Gmail app and click on the three bars at the top left of the screen.
- In the pop-up menu, you need to select Settings.
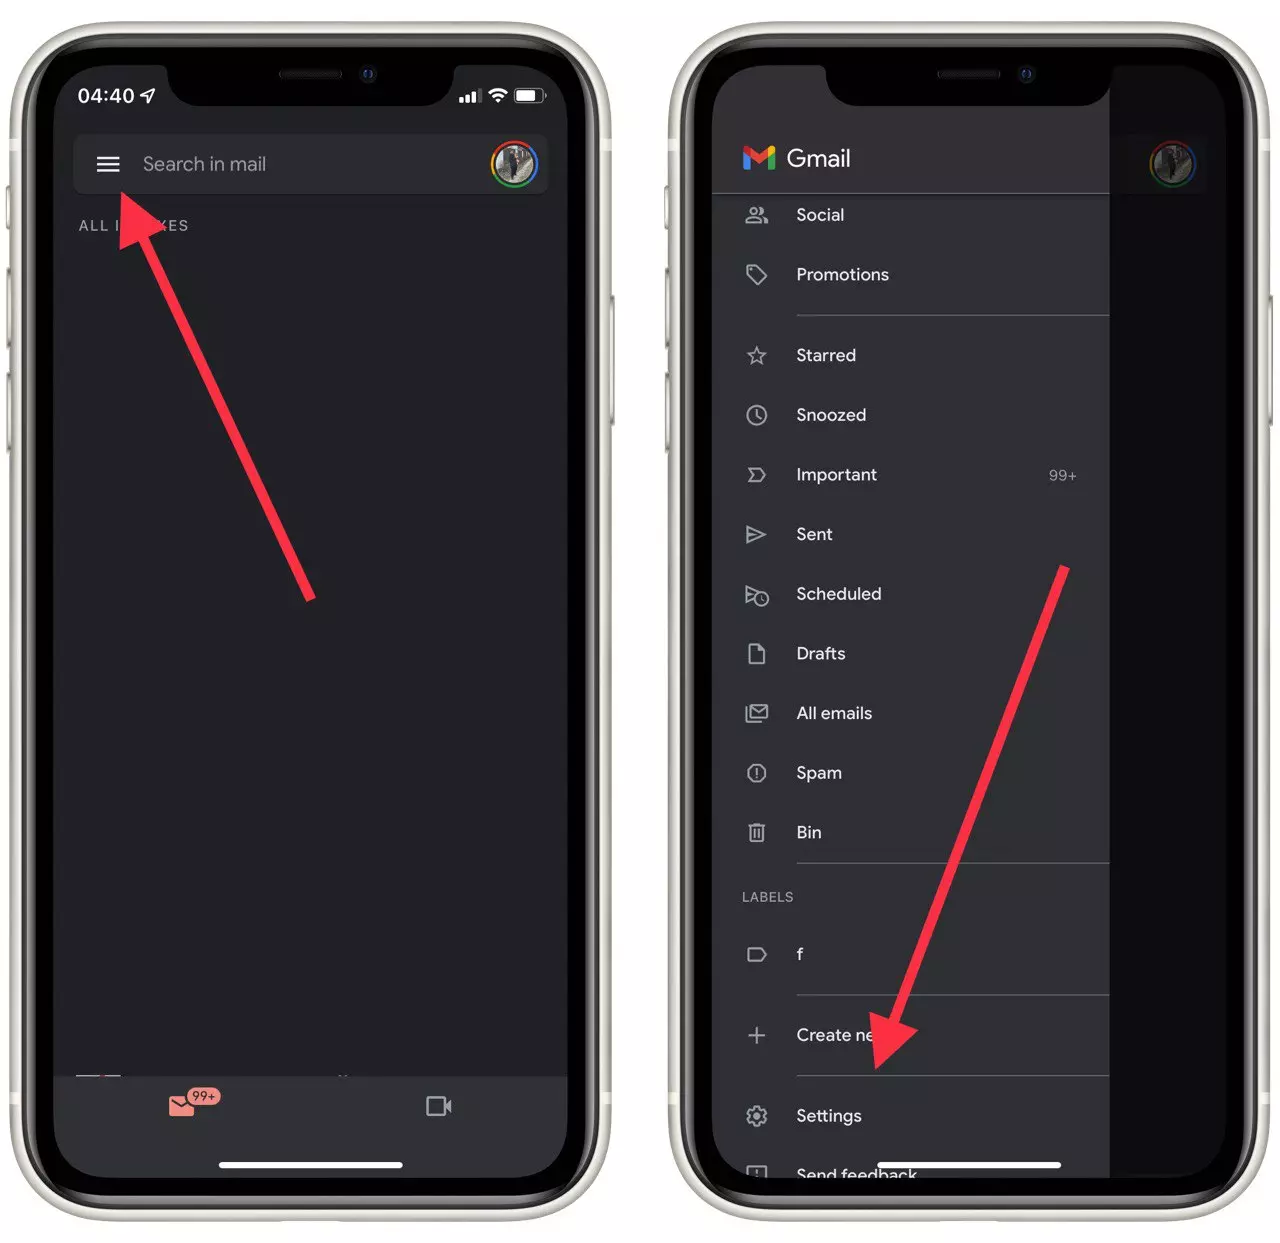
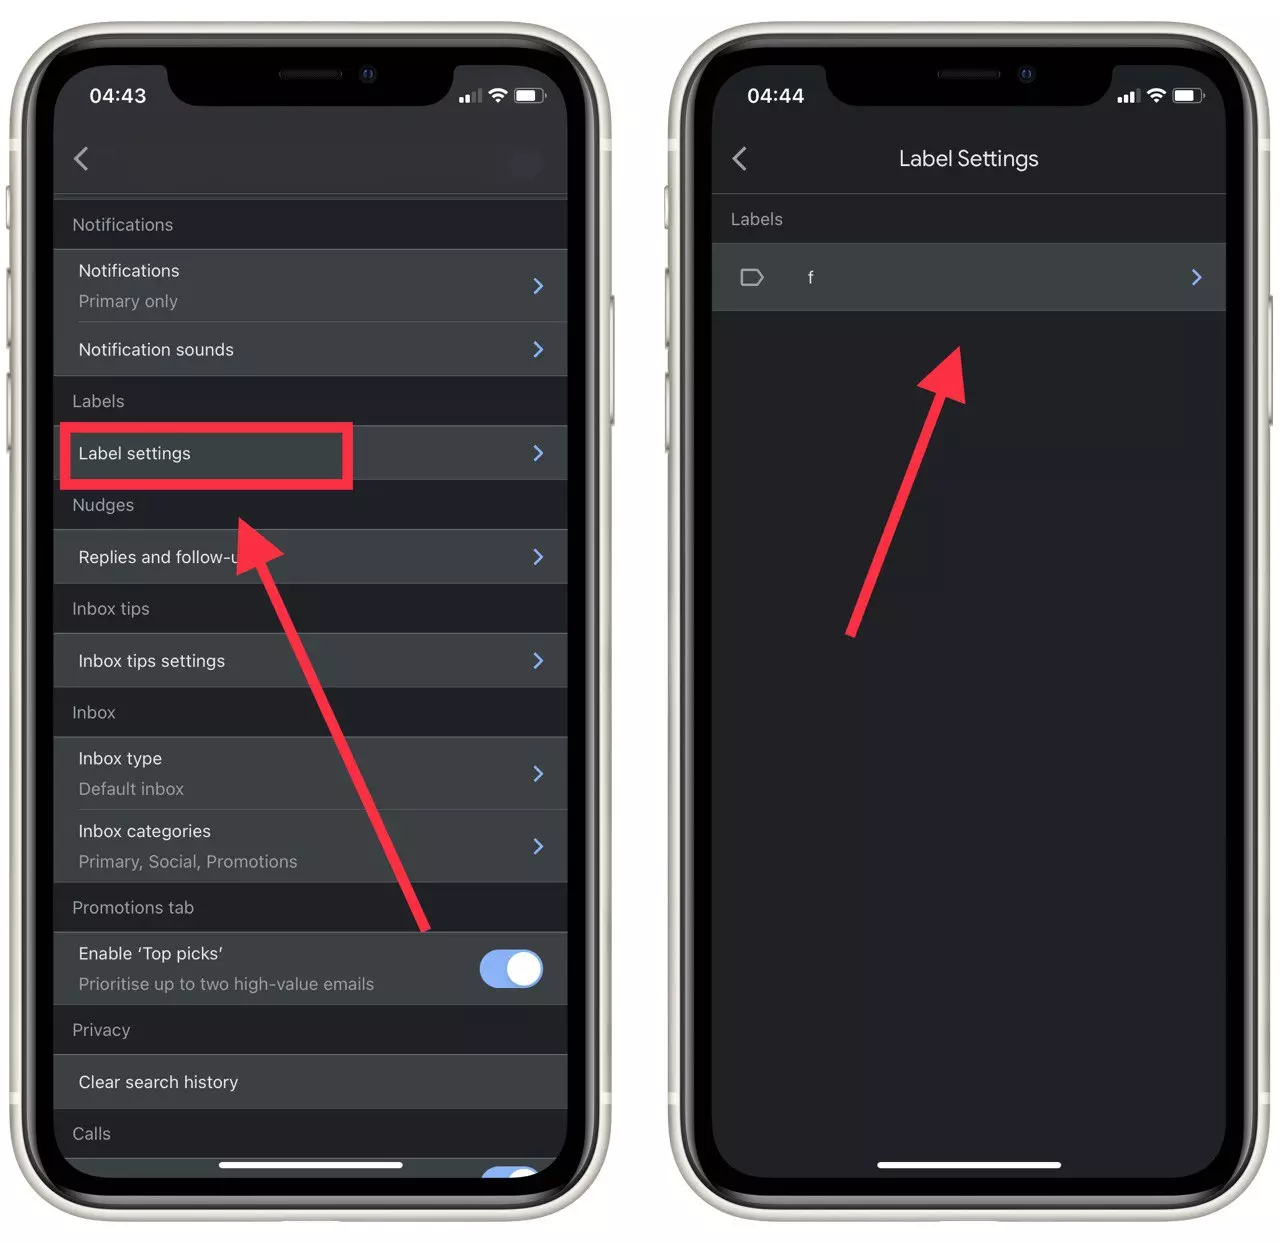
- Next, scroll to the very bottom to Label Settings.

- Select the Label you want.
- In the end, you just need to click delete Label and confirm.
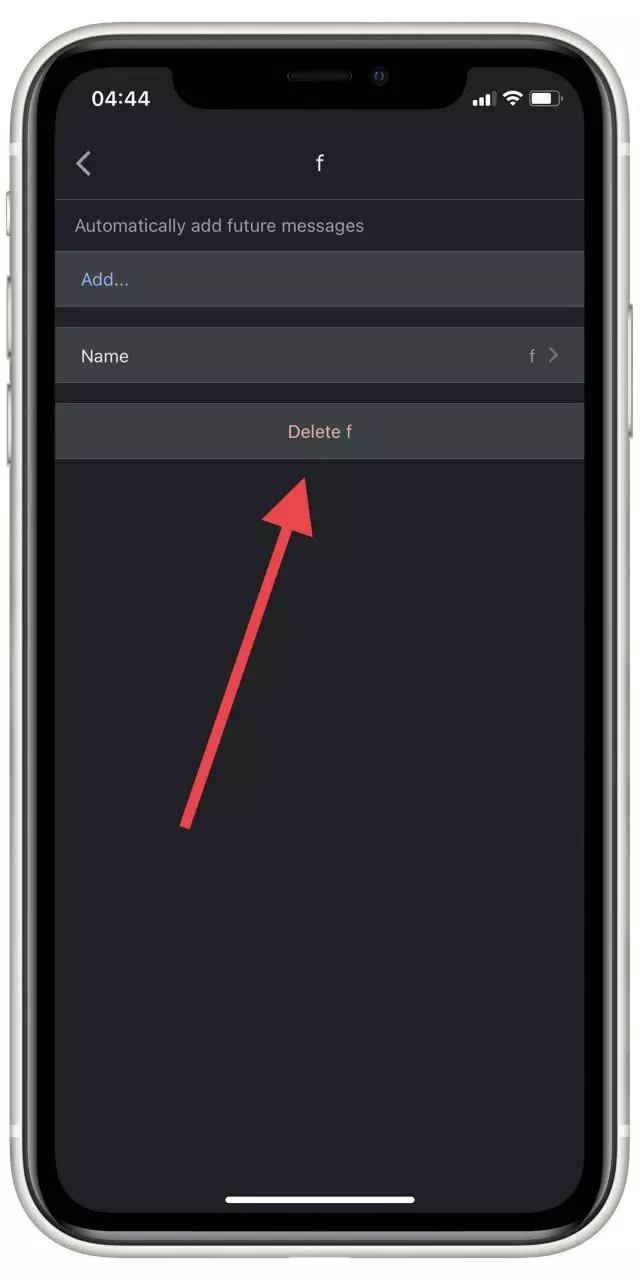
This way you can easily remove unnecessary labels using the mobile app. In the same menu, you can also rename the label.
With the browser desktop version
If you need to remove Label using your computer or any other browser-enabled device, it’s pretty easy to do. To do so, you will need.
- On the main Gmail page, click on the gear icon at the top right of the screen.
- Next, click on See all settings.
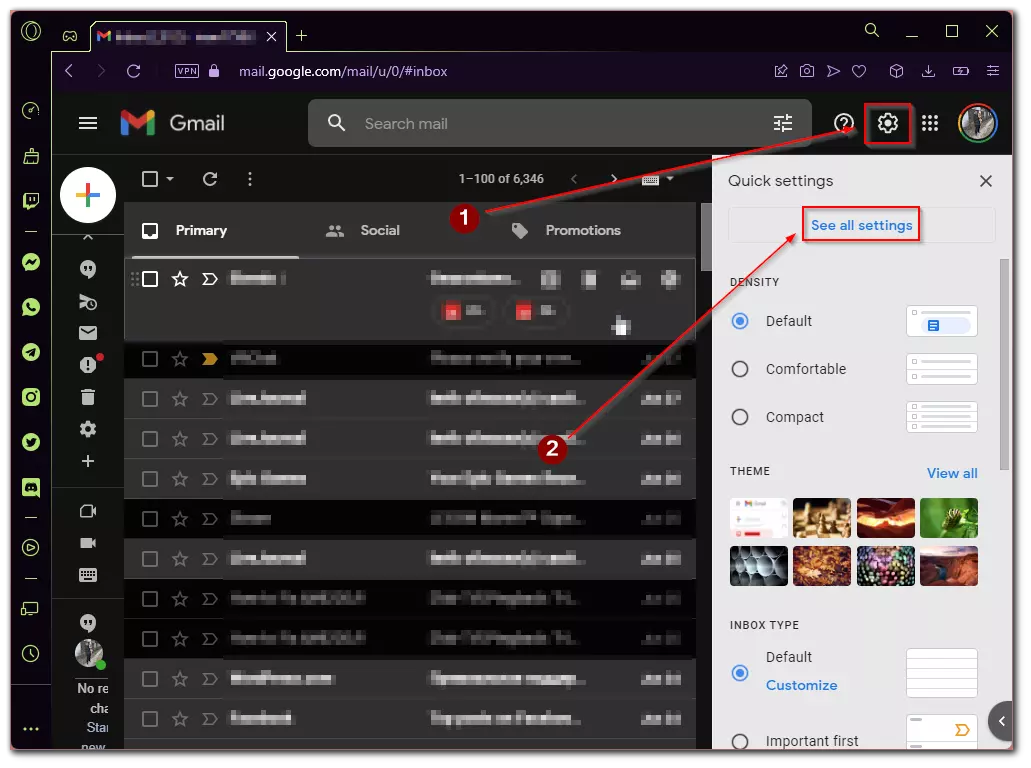
- Then you need to go to the Labels tab.
- Here, find the label you want and just click Remove next to it.
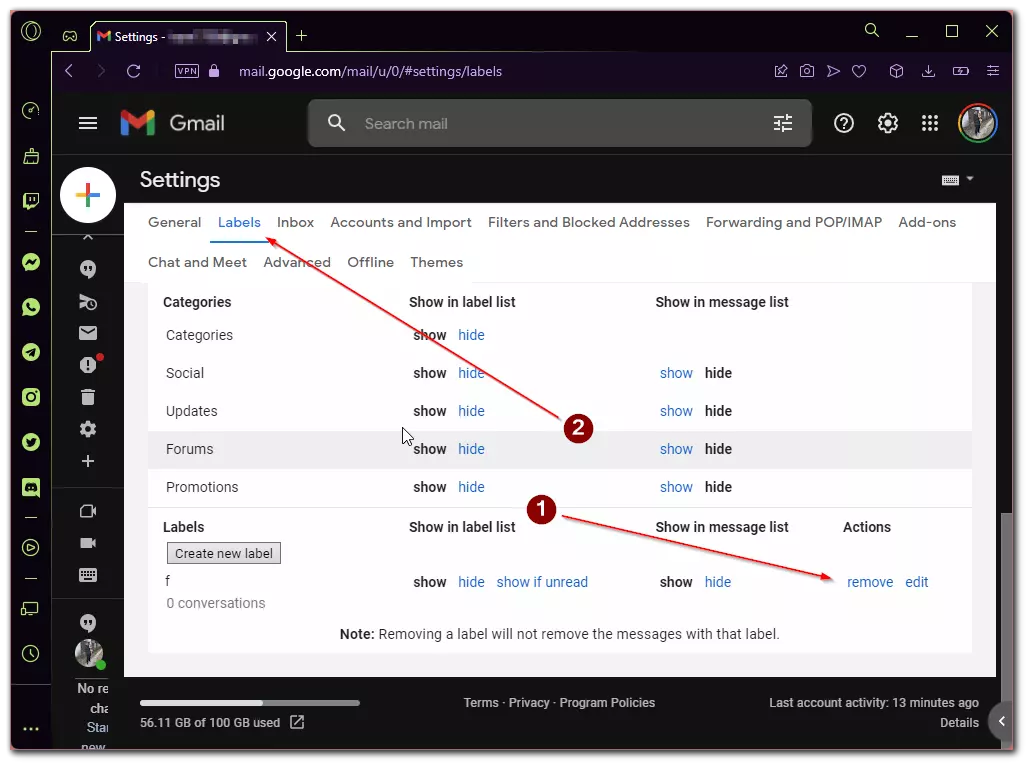
This way you can remove or rename a label in the desktop version of Gmail. As you can see, it’s pretty easy to do.
How to add a new label in Gmail
When you have already deleted all your old labels, you will most likely need to create new ones in their place. This is actually quite easy to do. Adding new labels is much easier than deleting them. The instructions for the desktop version of the app and the mobile version will be different again.
For the mobile version of the app
To add a Label to your Gmail inbox on your smartphone you need:
- On the home page, click on the 3 bars to open the side menu.
- In the side menu, you need to select “+ Create new“.

- After that, you need to add a label name and click on Done.

With this easy way, you can add a label to your Gmail account from your mobile device.
For the desktop version of Gmail
If you use the Desktop version of your Gmail email account then the instructions are actually quite similar:
- Open the side menu with the three lines on the right side of the screen
- Here at the very bottom, you will have the button Create a new label.
- After you click on it you get a popup menu, you enter the name and choose a subdirectory where your label will be located.

Done, you have created a label where you can put different e-mails.
How to set auto-sort emails to your label in Gmail
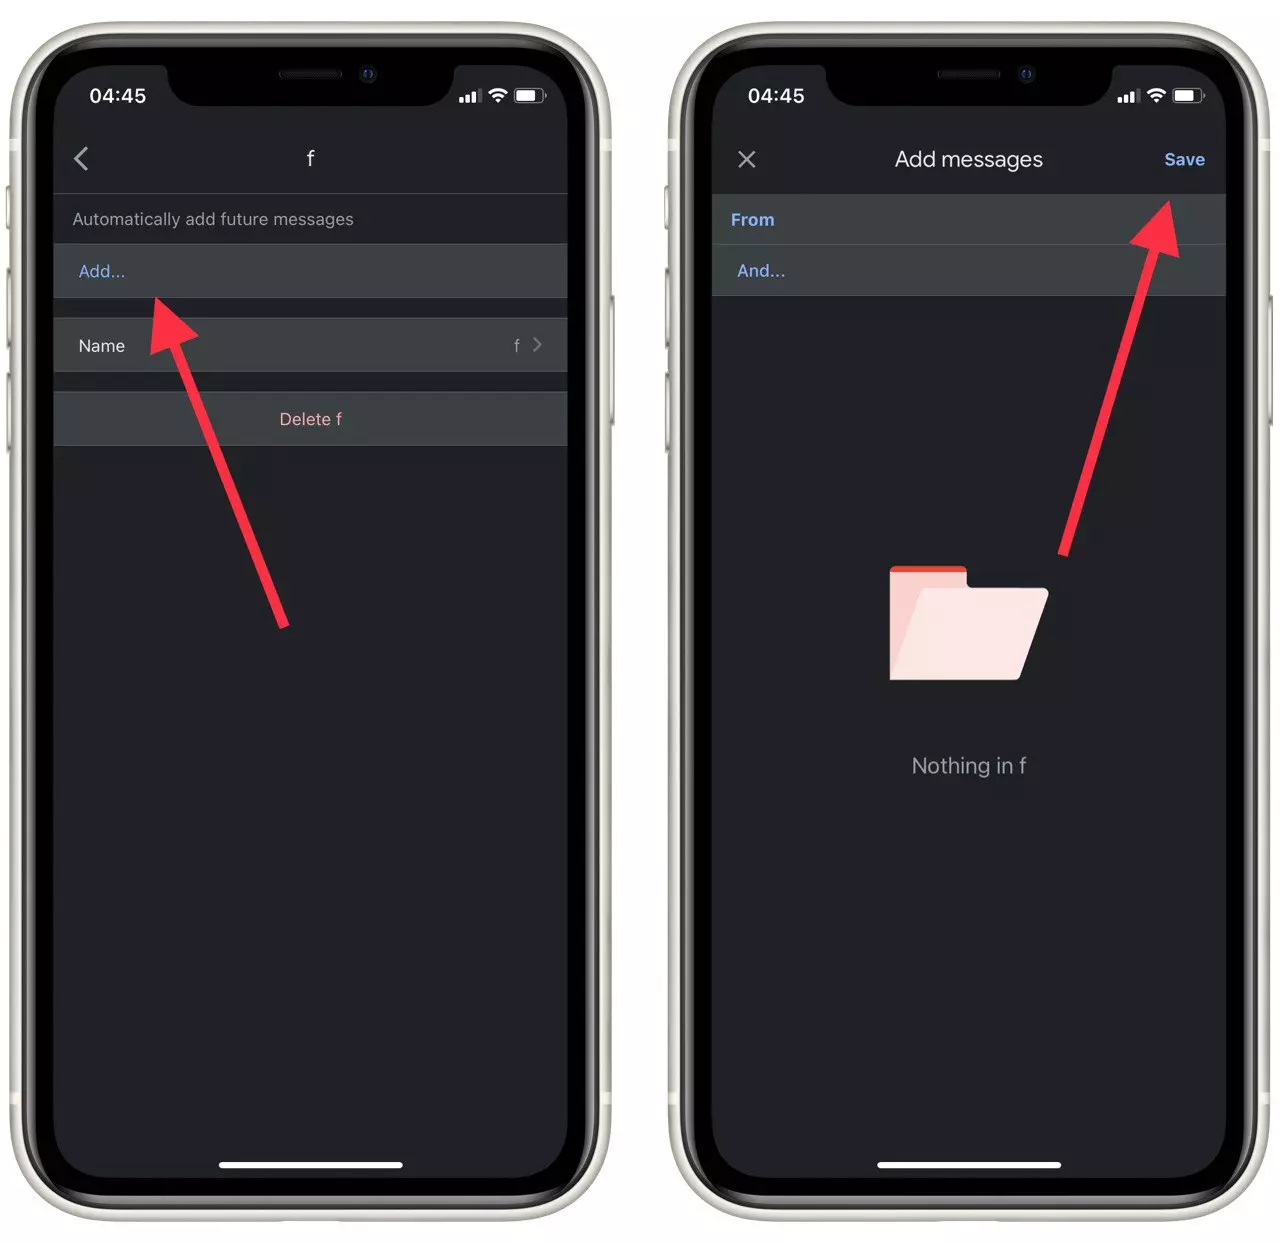
If you get quite a lot of emails then it’s not a bad idea to manage them. For example, you can set up automatic sending from some users to your folder. This means that every new email from a certain user will go straight to your label. That’s pretty handy. For this, you will have to use the mobile application Gmail. All you need to do is:
- On the main page of Gmail, click on the three bars on the left part of the screen and then click on Settings from the side menu.

- Then go to Label Settings.
- Here you need to select the label you’re interested in.
- Then click Add and enter the email of the user from whom you want to automatically receive emails to this box.
- At the end just click Done at the top of the screen.
As you can see this is pretty easy. However, it can make it a lot easier for you to use your mailbox. You might also find it interesting to create rules in Gmail for effective message management.
Read also:
- How to schedule an email in Gmail
- How to delete all emails in Gmail
- How to fix Gmail app crashing on Android
How to turn on auto-reply in Gmail
Another very useful feature that you will probably need is sending automatic messages in Gmail. This is generally quite easy to do. The easiest way to do it’s to use the Desktop version of your Gmail. That means you have to log into your account in your browser on any device. Follow these simple instructions:
- On the home page, you need to click on the gear icon in the upper right corner of your screen. After that, click on the See all settings button.

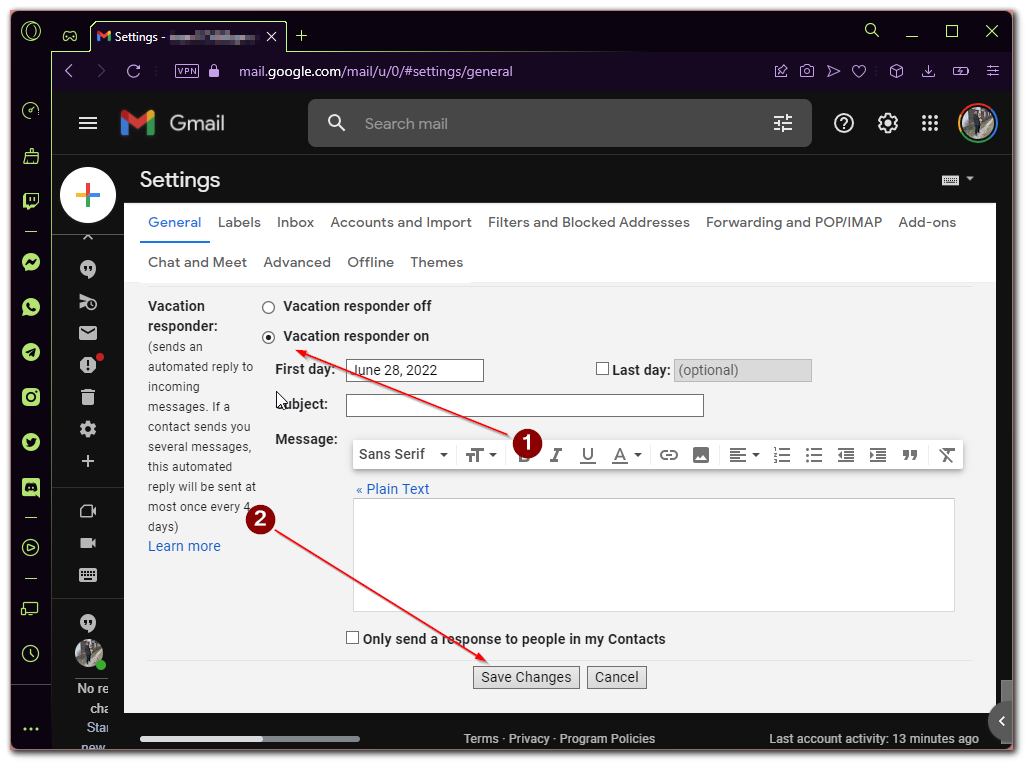
- Next, in the General tab, you need to scroll down to the Vacation responder.
- Here you need to enter the subject and content of the autoresponder, as well as set the start time of the autoresponder.
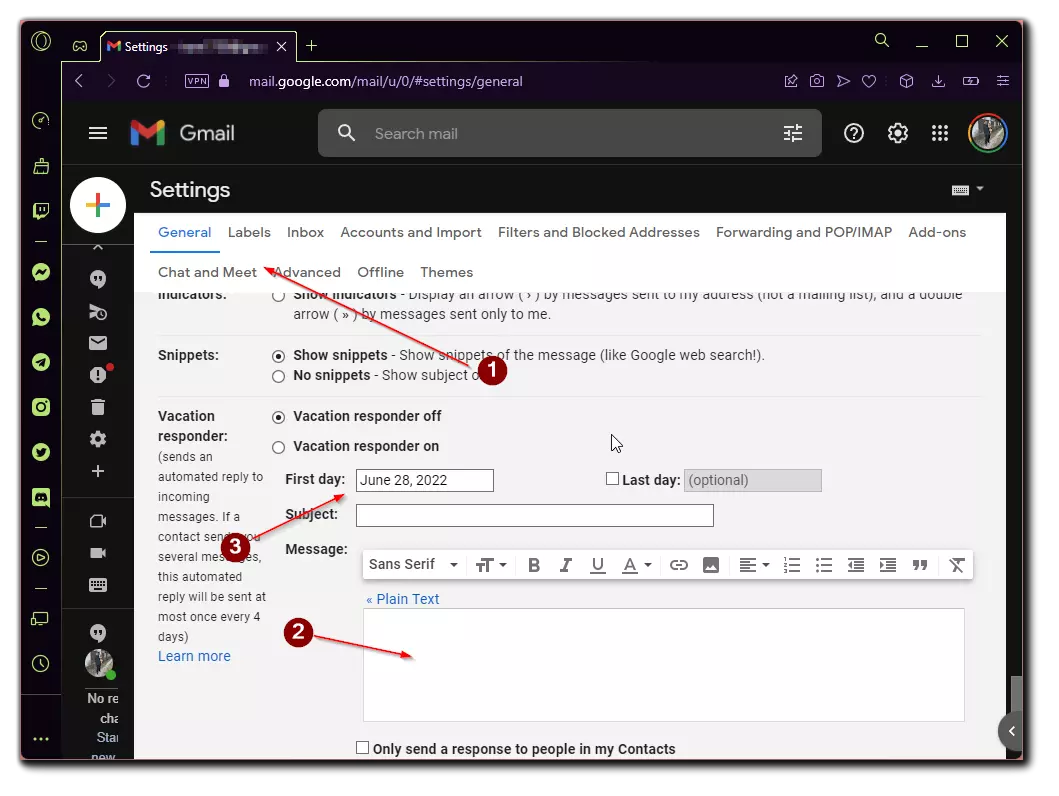
- After that, just check the Vacation responder on the box.
- In the end, make sure to click the Save changes button.
Thus, users will automatically receive an answer to all your incoming emails, which you have pre-recorded. This is quite handy if you go on vacation or simply can not respond to emails for a long time. To disable this function, you just need to check the Vacation responder off.


