
Windows 11 has a flexible notification system that allows you to customize all settings to suit your needs and tastes. However, if an app has annoying notification sounds, or you want to be less distracted without turning off notifications, you can turn off the sound effects.
This is quite easy to do through the sound settings menu. There you can turn off absolutely all sound effects at once, as well as the sound that plays when Windows starts up. You can also mute individual sound effects. Let’s take a closer look at how you can do this.
How to turn off all sounds on Windows 11
If you want to disable all sound effects on your Windows 11 PC, you can follow these steps:
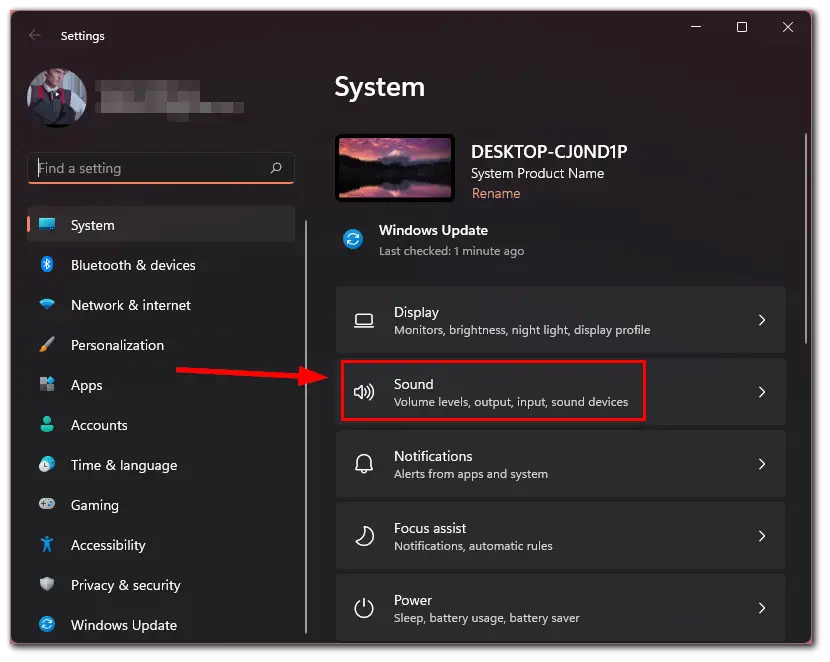
- First of all, go to the “Settings” menu and select “Sound”.
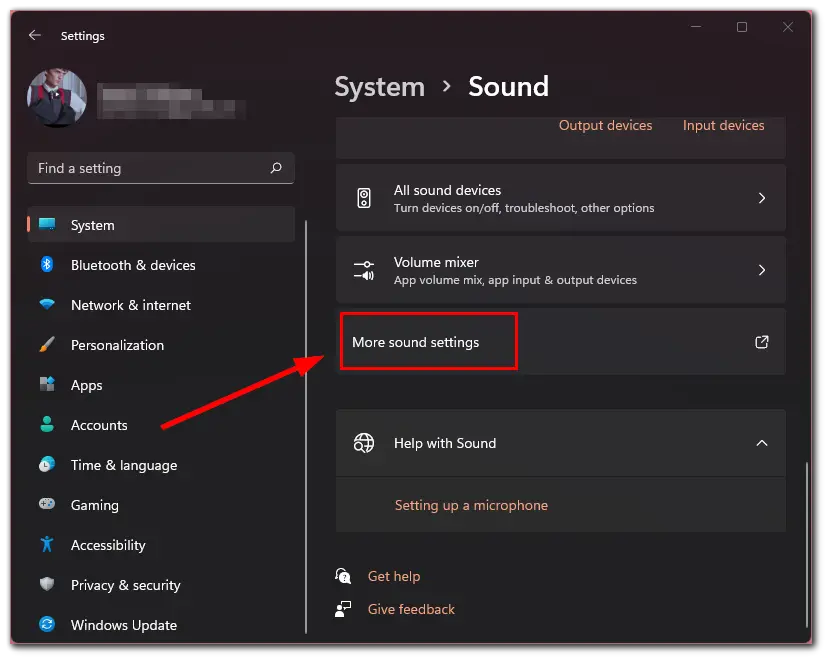
- Then scroll down and click “More sound settings”.
- After that, go to the “Sounds” tab.
- Open the “Sound Scheme” list of options and select “No Sounds”.
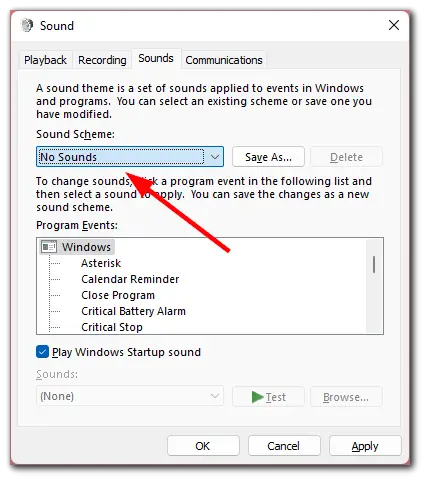
- Finally, click “Apply” and “OK”.
Once you have completed these steps, you will disable all sound effects on your Windows 11 PC. Moreover, you can also disable the sound that appears when you sign into Windows. Just uncheck the “Play Windows Startup sound” checkbox.
Remember that you can always set the sound scheme back to “Windows Default” to restore the default sound effects.
How to add custom sound effects on Windows 11
If you don’t like the standard Windows sounds, you can customize your own. Here’s what you need to do to do this:
- Go to the “Settings” menu and select “Sound”.
- Then scroll down and click “More sound settings”.
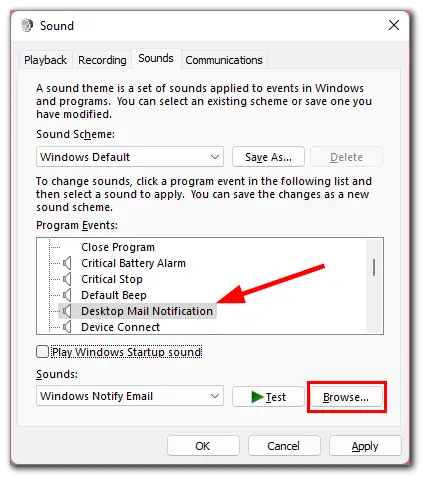
- After that, go to the “Sounds” tab.
- In the “Program Events” list, select the type of notification.
- Now, click “Browse..” and select the sound file you want to replace the standard sound of the event with.
- You can click “Test” to check your unique sound.
- Finally, just click “Apply” and “OK”.
Keep in mind that your custom sound effect file must be in .wav format. So by adding this sound, you will hear it after you receive a notification.
How to disable animation in Windows 11
Among other tips to improve OS performance, you can find the recommendation to disable animated effects in the Windows 11 interface. And indeed on some systems, this may have a positive effect.
You can disable animation in two Windows 11 locations, let’s look at them in order. First of all, disabling using “Settings”:
- Open “Settings”, you can do this from the “Start” menu or using the “Win + I” shortcut on your keyboard.
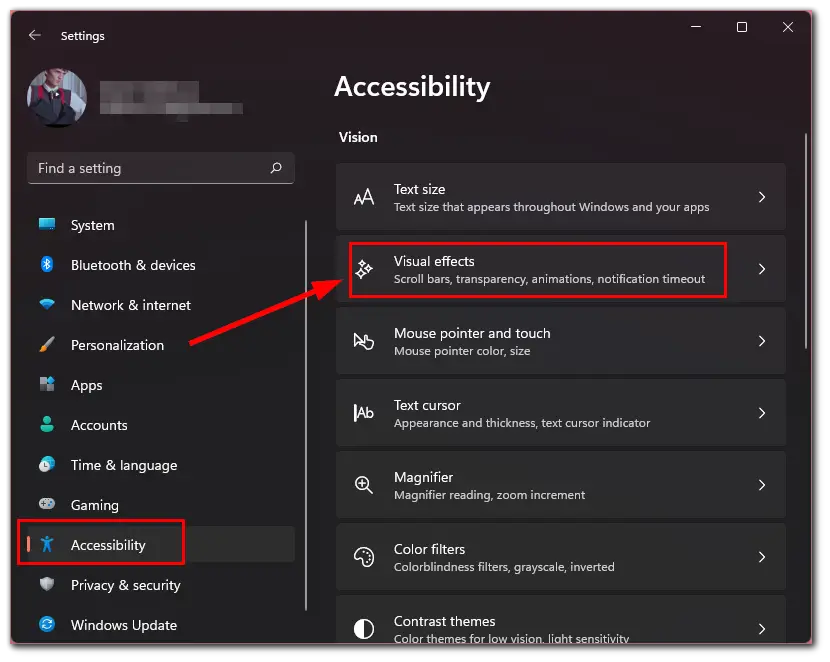
- After that, open the “Accessibility” section, and in it, the “Visual effects” section.
- Then disable the “Animation effects” item.
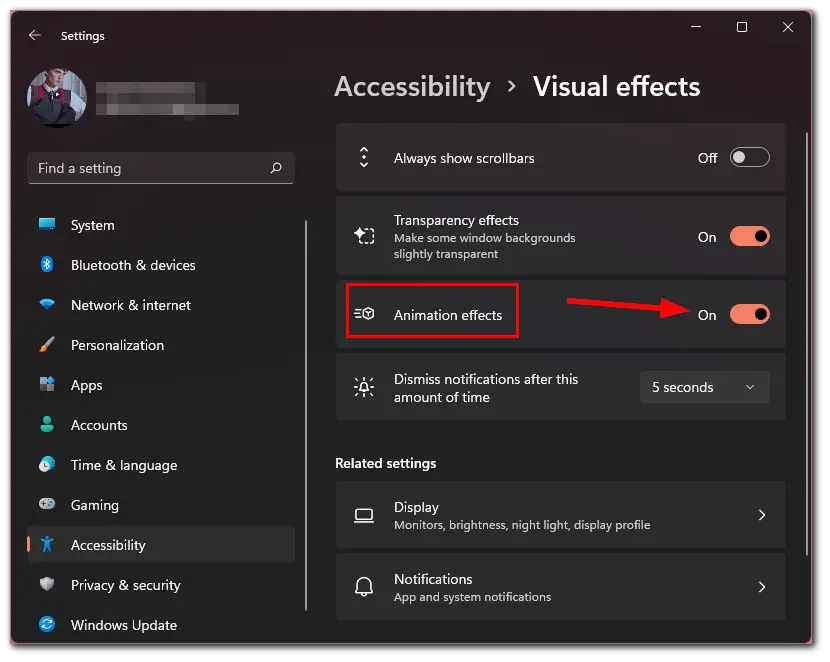
At this point, all Windows 11 animation effects will be disabled.
If for some reason you can’t use the “Settings” menu, there is another method. You can use the “System Properties” window:
- Press “Win + R” on your keyboard, type “sysdm.cpl” in the Run window, and press Enter.
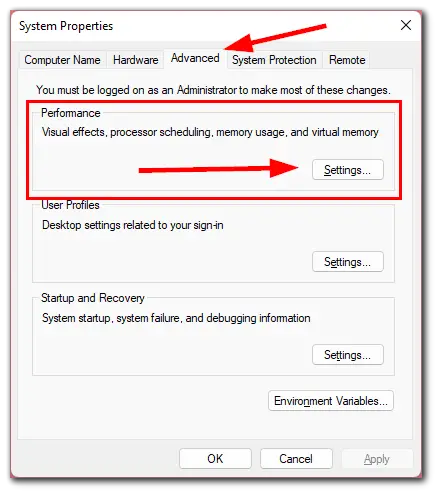
- After that, go to the “Advanced” tab and click on the “Settings…” button in the “Performance” section.
- Select “Custom” and disable the top three items.
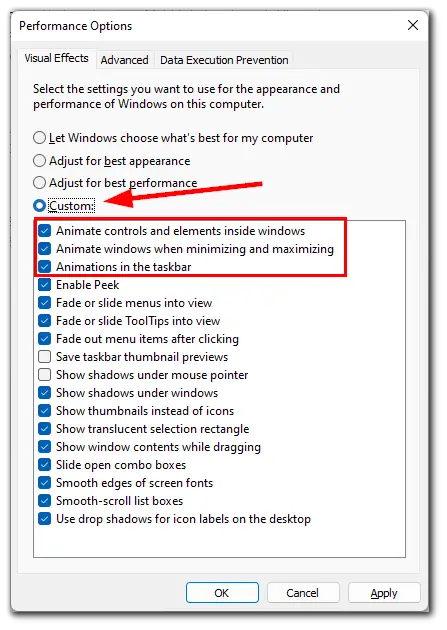
- Finally, apply the settings.
Note that even when animation effects are disabled in Windows 11 itself, some third-party programs may continue to display animated menus, lists, or other objects if they’re not implemented using the system controls, but using their own solutions.
Read Also:
- How to fix blank icons in Windows 11
- How to mount a drive in a folder in Windows 11
- 10 best Windows 11 features worth using
How to disable transparency in Windows 11
Windows 11 has default transparency effects for the taskbar, Start menu, windows, and other items that work right after installation, provided that the PC has a suitable GPU with drivers installed.
In some cases, the user may want to disable these effects: to improve performance. To do this, follow these simple steps:
- Open “Settings” and go to the “Accessibility” sections.
- Then select “Visual effects”.
- Next, disable the “Transparency effects” item.
Immediately after applying the above settings, all elements of the system that were displayed semi-transparent will become completely opaque. The task is completed.
Usually, the changes take effect immediately after you apply the settings, but if not, restart explorer or reboot your PC.


