
If you are creating any document, you may need to not only insert an image but in some cases change its orientation. Rotating an image can help make your document easier to read and look more professional. You can do all of this in your Google Docs document.
A common reason to rotate an image in Google Docs is to fix a formatting error. For example, if an image is upside down, you can rotate it so that it is oriented the right way. You can also rotate images so that they exactly match the size of the document. Here’s what you can do to help images look visually appealing in Google Docs.
How to add an image to Google Docs
There is nothing complicated about adding images to your Google Docs document. You can do it using keyboard shortcuts or in-app features. So, follow these steps:
- First of all, open your document and click on the place where you want to add an image.
- Then click “Insert” and select “Image”.
- Finally, just select one of the ways to insert it.
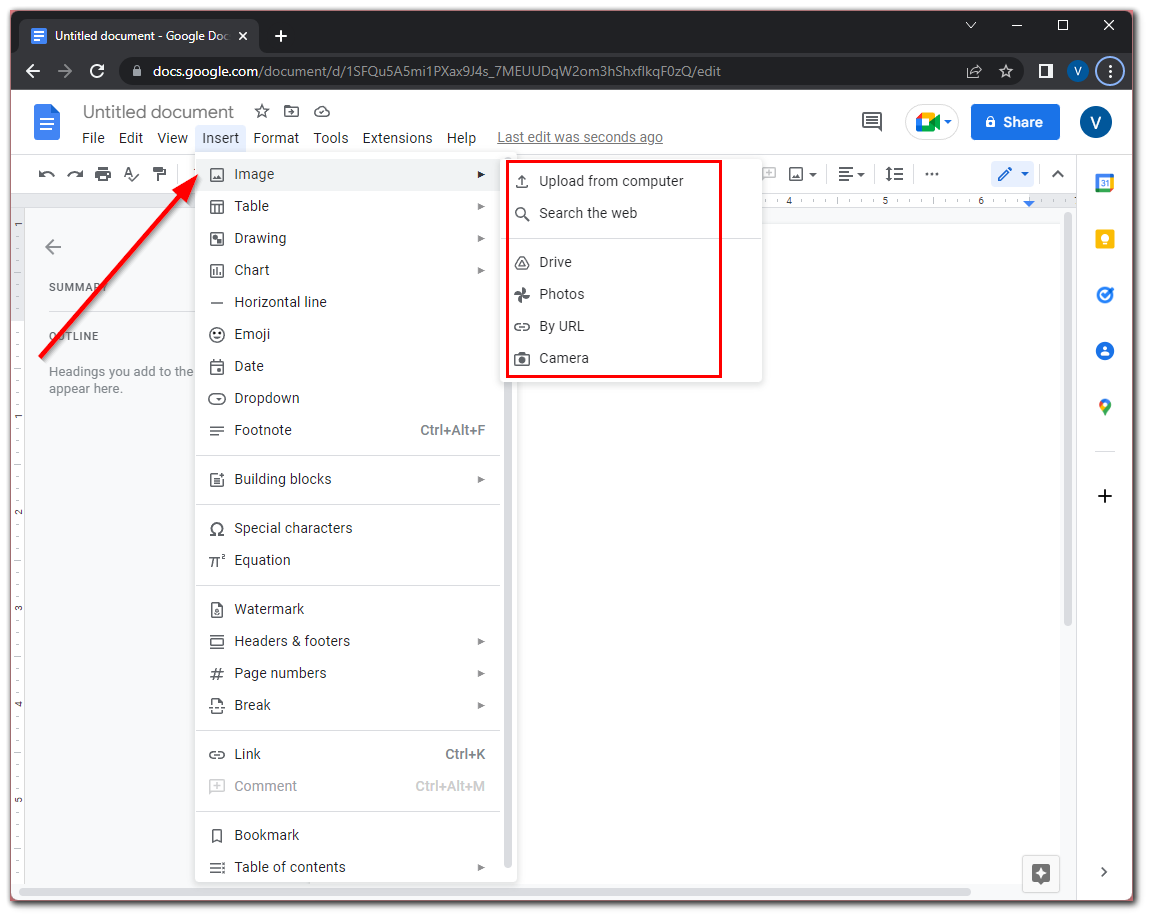
You can upload pictures from your computer or search for them on the web. Moreover, you can add them from your Google Drive, Google Photos, by URL, or make your own photo using a Camera.
How to rotate images in Google Docs
If you added an image to your document and it’s not oriented as you want, you can rotate it. To do so, you can use two methods.
How to rotate images in Google Docs using the Image options
To rotate an image in your document using the Images options, you can follow these instructions:
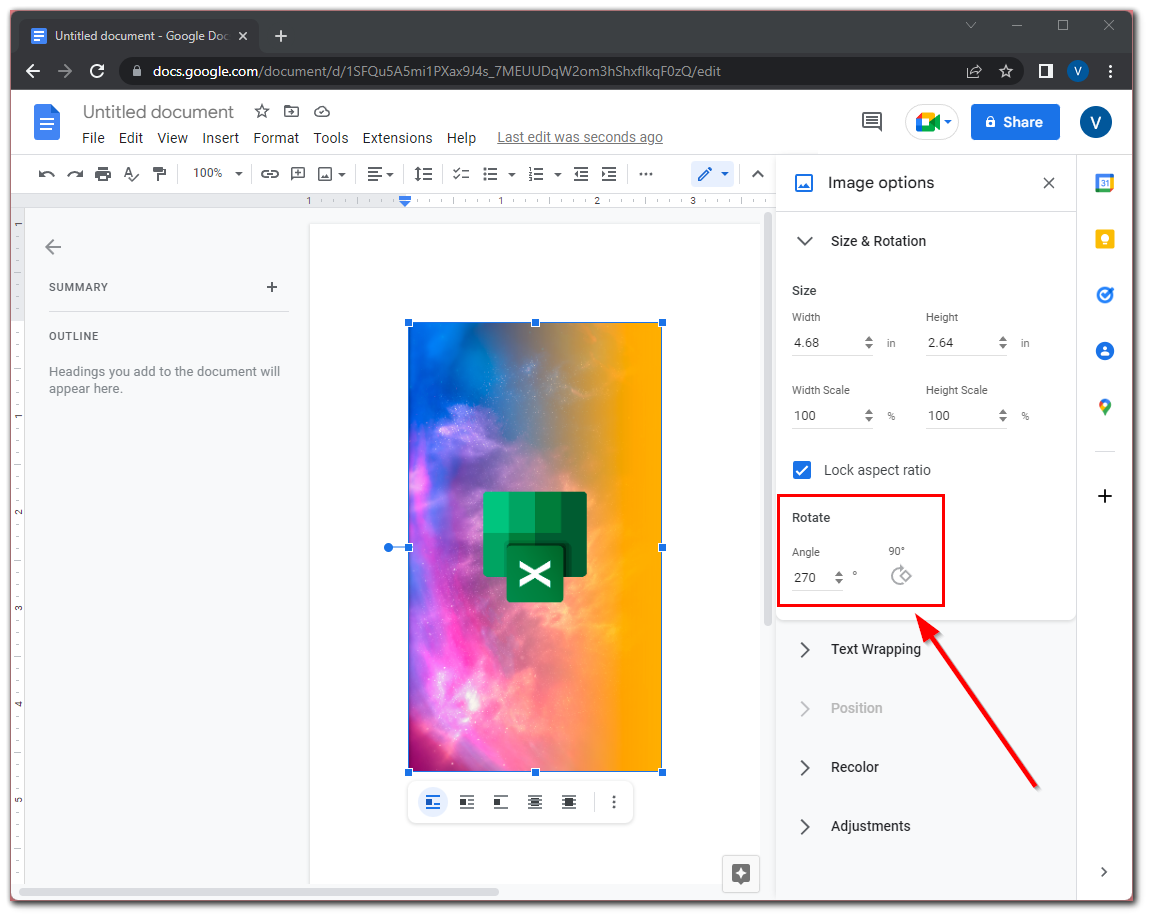
- Select the image and right-click on it.
- After that, select “Image options”.
- Then use the options under Rotate to change the Angle of the image (in degrees) or rotate the image by 90°.
Once you’re done, you can close the Image options panel and click outside the image in the document to close the controls and remove the bounding box.
How to rotate images in Google Docs using the rotation control
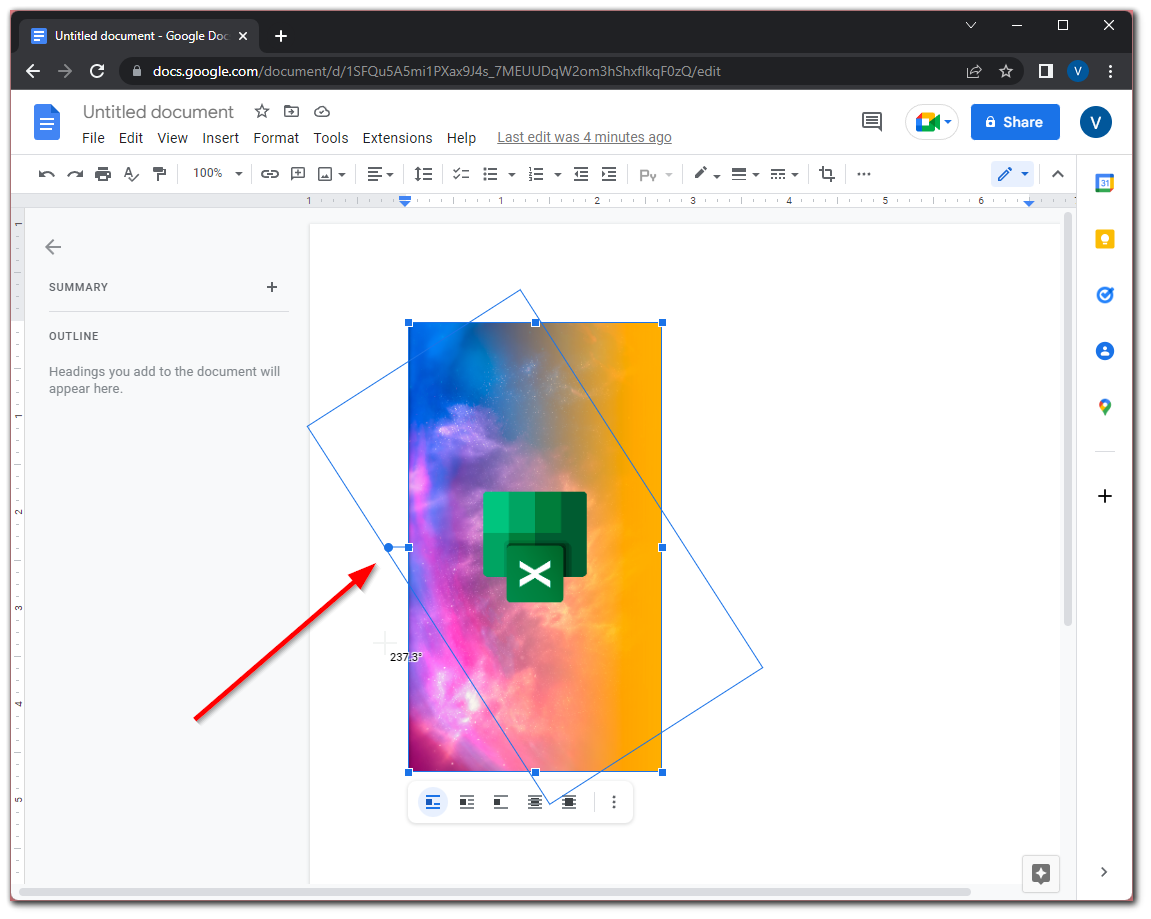
By selecting an image, you may notice that the blue bounding box has square dots in each corner and the center of each side. These dots are used to resize the image.
In addition, there is a round blue circle in the center of the top edge of the image. This is the rotation control. Once you have selected an image, you can press and hold this blue circle to change the rotation of the image.
Sometimes an image can suddenly disappear from your field of sight in a document. However, don’t panic. Just scroll down through your document. The image may have increased in size and moved to another page with more free space.
Read Also:
- How to center the text on Google Docs
- How to add a page on Google Docs
- How to add handwritten signature to Google Docs
How to flip an image in Google Docs
Flipping an image is slightly different from rotating it. The point is that flipping an image creates a mirror image in which the text falls back and objects appear on opposite sides of the image. However, you have to insert the image into the document in a different way to flip it. You need to add it as a drawing. So, follow these steps:
- Click on the “Insert” tab and select “Drawing”.
- Then create a new one or download it from your Google Drive.
- After that, click on the “Image” icon in the Drawing dialog window.
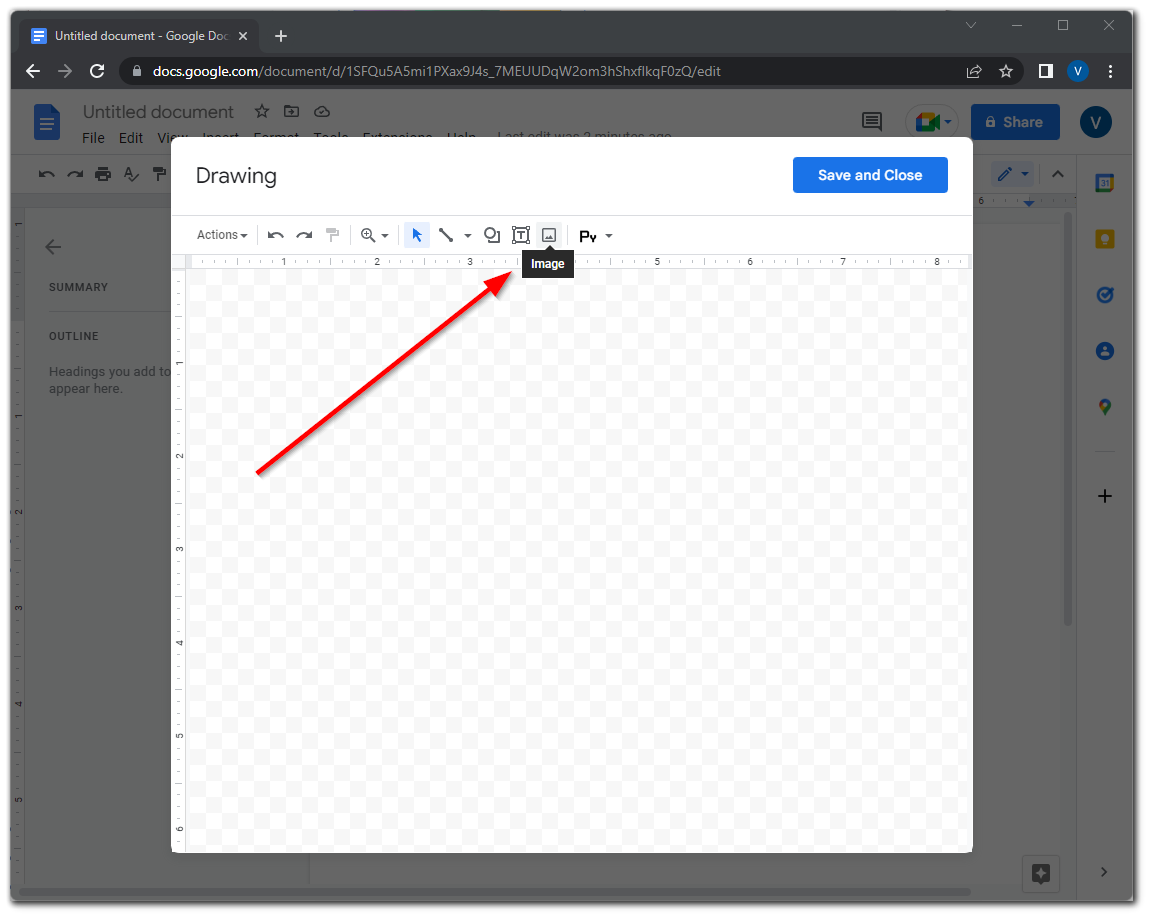
- Next, upload the image into your drawing.
- Now, go to the “Actions” menu and select “Rotate”.
- Finally, choose “Flip horizontally” or “Flip vertically” and click “Save and Close”.
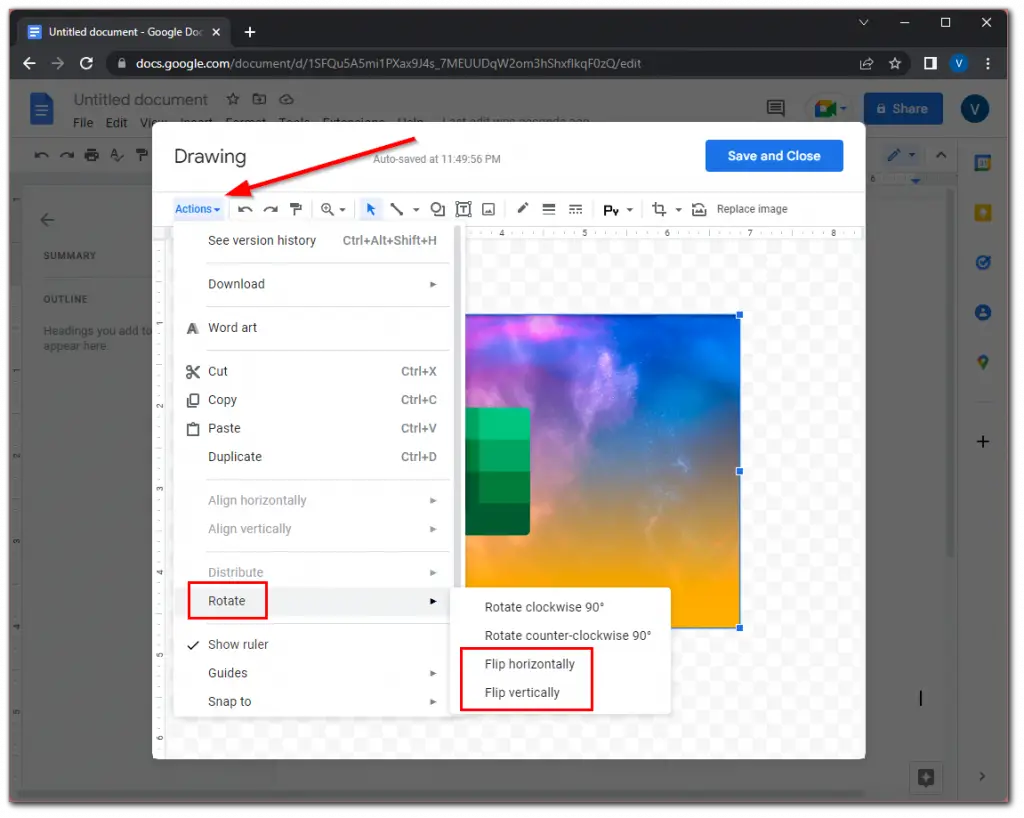
If you flip the image horizontally, the elements on the right side of the image move to the left side. If you flip the image vertically, the elements at the top of the image move to the bottom. You can also use this menu to rotate your image if you want.


